Selecting material
Material is the name of a chemical composition or alloy of which a part is made.
Material can be selected only for parts.
To display the details of the currently selected material
In the Manufacturing Process pane, click  to the right of the Material button. The Material Details dialog appears.
to the right of the Material button. The Material Details dialog appears.To edit material details
1 In the Production Scenario tab of the Cost Guide, click  to the right of the Material field. The Material Selection dialog appears.
to the right of the Material field. The Material Selection dialog appears.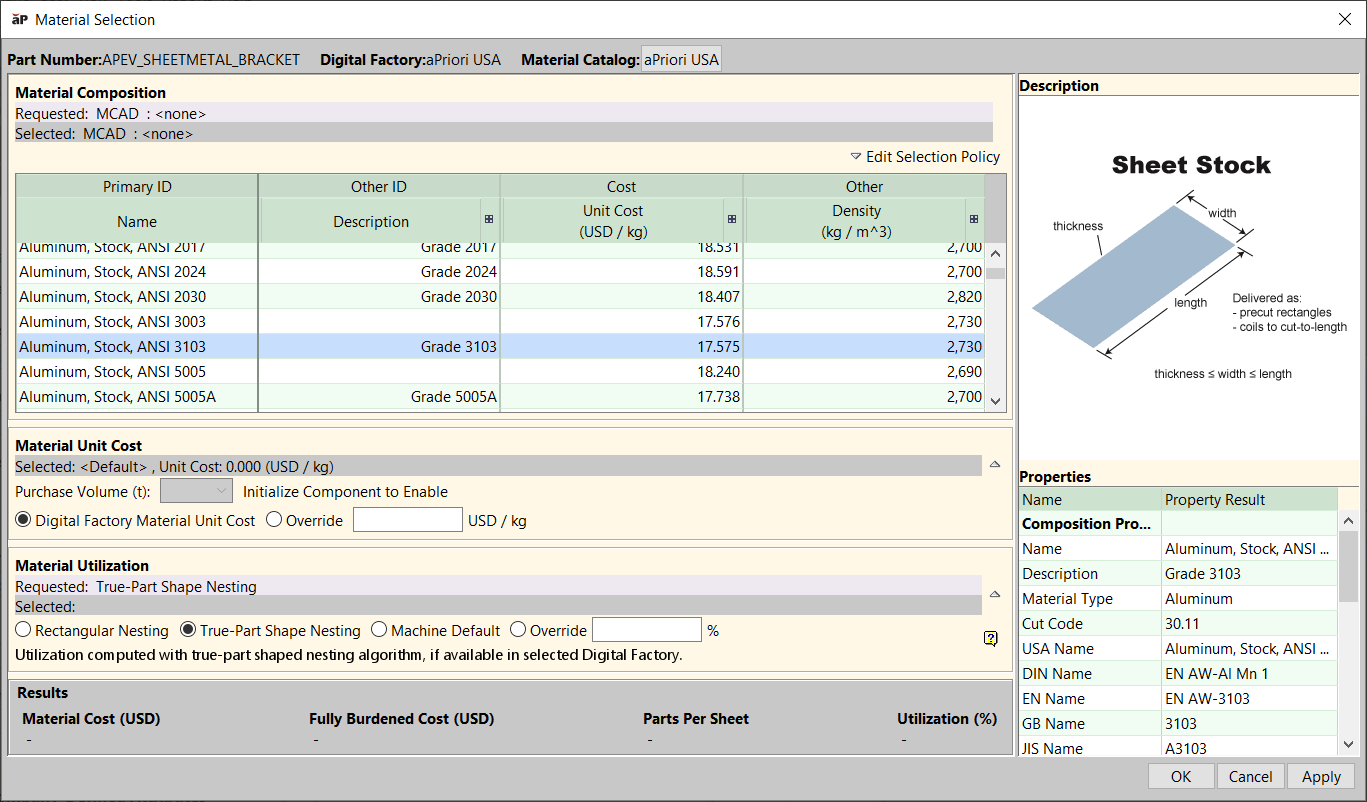
The Part Number and Digital Factory selected for this part are displayed in the window header. The list of materials shows all the materials available for the selected Digital Factory. Material automatically selected by aPriori is highlighted and the related properties are displayed in the Properties list. The Description panel shows material stock size and form.
2 In this window you can:
• Change material purchase volume (once the initial costing has been performed on the part). This affects default unit cost—see Working with Material Factors in the Digital Factory Administration Guide.
3 After making changes, click:
• Ok — to apply changes, recalculate the cost, and close the Material Selection window.
• Apply — to apply changes and recalculate the cost without leaving the Material Selection window.
• Cancel — to close the Material Selection window without applying the changes.
Status indicators appear separately for Material Composition and Material Stock. An overall results status indicator appears in the Results area.
A status indicator shows the costing status of the input:
• Green — Costing completed with the requested input.
• Yellow — Costing completed with warnings. Typically, indicates that the requested input was invalid and a different input, based on selection policy, was used for costing.
• Red — Costing failed.
You can see the warnings in the Status Messages pane.
Note If the costing results are outdated, the status indicator is not displayed.