Add or Modify a Material
Follow the steps below to add or modify a material using the Digital Factory Manager GUI. See also Add or Modify Materials Using a Spreadsheet.
-
Open the Digital Factory to which you want to add a material.
The Digital Factory is displayed in the Digital Factory Manager. For more information, see
-
Expand the process group to which you want to add a material.
-
Right-click the Materials folder and select Add material from the context menu to display the New Material dialog.
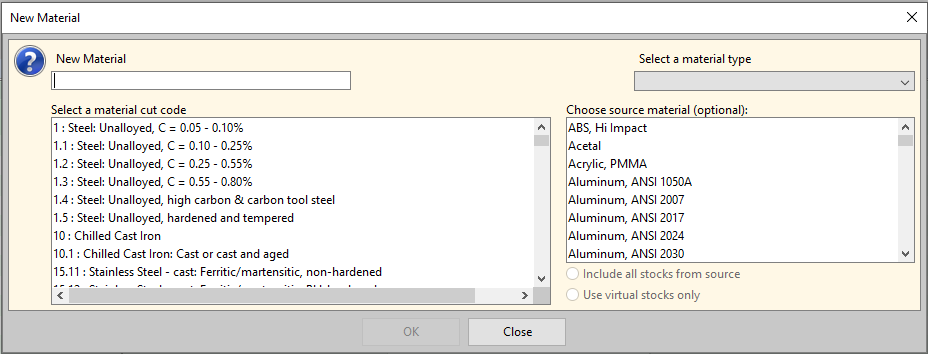
Figure: Adding new material
-
Enter a name for the custom material in the New Material field.
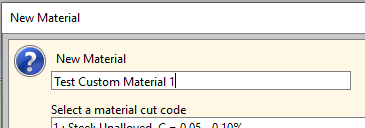
Figure: Naming a new material
-
Select a material type from the Select a material type drop-down list.
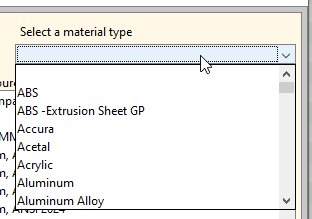
Figure: Selecting a material type
-
Optionally, select a source material.
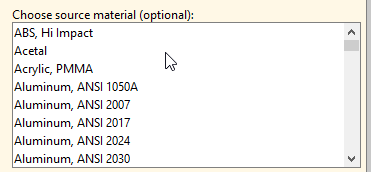
Figure: Select a source material
Selecting a source material pre-populates the new, custom material's fields by copying the source material's fields. It also creates a link to the source material so that an update to a field of the source material triggers the same update to the corresponding field in the custom material. For example, whenever you update your Regional Data Library, the updated unit costs for materials in the Library trigger automatic updates to the unit cost fields of any linked custom materials.
Note the following about linked custom materials:
-
Linking and Unlinking Materials: You can unlink the new material from the source material after you create it. You can also link an unlinked custom material to a source material at any time. See Linking and unlinking materials.
-
Unlinking Material Fields: you can unlink an individual field of a custom material from the corresponding field of the source material. See Unlinking material fields.
-
Deleting Source Materials: Deletion of a source material causes deletion of any materials linked to it. See Deleting source materials.
-
Source Materials and Generic Materials: The source materials list in the New Material dialog contains materials that are in the current process group in the current Digital Factory (including both baseline materials and custom materials). It also contains generic materials, which you can use if no material from the current process group is suitable. See Using generic source materials.
-
Adjusting Unit Cost: You can specify an adjustment factor for a custom material, so that aPriori maintains the Unit Cost field for the custom material as the product of the Adjustment Factor and the value of the source material's Unit Cost field. See Using adjustment factors for linked materials.
If you don't want to use a source material, skip this step and the next one, and go to step 8.
-
-
If you selected a source material that comes in a variety of stock sizes, aPriori will create the same stock sizes for your new material, by default. To override the default, click the Use Virtual Stocks radio button.
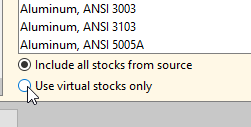
Figure: Overriding stock replication
-
If you didn't select a source material, select a material cut code.
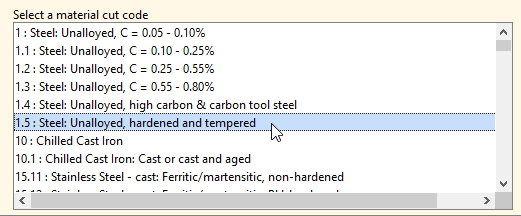
Figure: Selecting a material cut code
A material’s cut code characterizes the machinability of a material and is adapted from the Sandvik Cormorant cutability classification (CMC code) scheme for metals. Different materials that machine similarly are assigned the same cut code. For example, both Inconel and Hastelloy are assigned a cut code of 20.21 as they are both nickel-based, heat resistant super-alloys.
For more information on assigning material cut codes, see Managing Digital Factory cut code data.
-
Click OK in the New Material dialog to add the new material as a new item in the Navigation pane and as a new row in the Materials table in the Data pane.
-
Click the material in the Navigation pane to edit the material’s properties. (Note that when you edit a property of a linked material, you unlink that property from the source material.)
Material properties vary by process group. Review the cost model to understand the role that material properties play in calculating cost. Typically, once a material is added, the only value that changes over time is the Unit Cost.
Common material properties include:
-
Density: The density of the material
-
USA Name, DIN Name, and EN Name: These properties reflect the name or standard by which the material is known in the US, Germany, and Europe, respectively. These alternative names are optional fields that may be populated in addition to the primary Name field.
Note: An alternative name cannot be the same as any material's primary name and cannot be the same as any other alternative name of any material.
-
Cost Units: Material cost data can be entered in multiple unit systems. Select one of the following unit types from the drop-down list:
-
Cost per KG: Available for all process groups
-
Cost per LB: Available for all process groups
-
Cost per Square Foot: Available for the Sheet Metal process group
-
Cost per Square Meter: Available for the Sheet Metal process group
-
Cost per Linear Foot: Available for the Bar & Tube Fabrication and Forging groups
-
Cost per Linear Meter: Available for the Bar & Tube Fabrication and Forging groups
-
Cost per Item (Each): Cost for an individual stock item of the specified size. Available for some process groups
Regardless of the cost units chosen, costs are converted as appropriate and displayed in cost per mass units in the aPriori interface. That is, in the aPriori interface, material unit costs are displayed as Cost per Kg or Cost per Lb, depending on whether the user has chosen Metric or English units for display.
-
-
Cost per Unit – Material unit cost based on the selected Cost Units. See also Working with Material Factors.
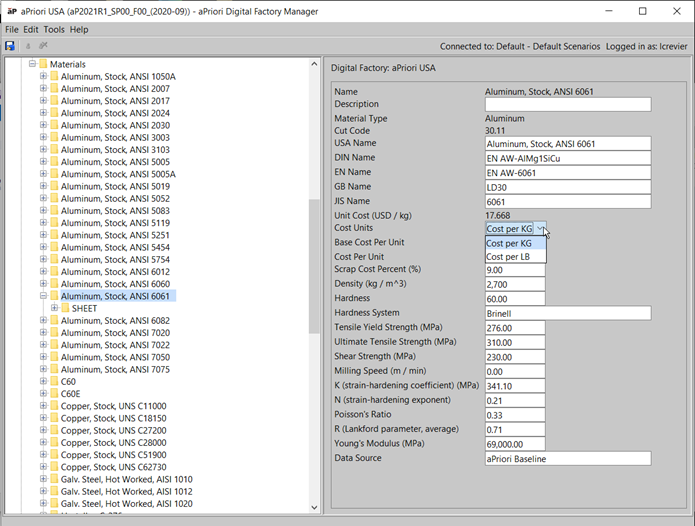
Figure: Editing material properties
When you add a material with cut code 4.0 or 4.1, please specify Rockwell C as the Hardness System field value. When you add a material with cut code 23.1, 23.21, or 23.22, please specify Tensile Strength as the Hardness System field value. See A note about material hardness for more information.
-
-
Add material stocks to the material type folder following the instructions in Adding a material stock.