Use the System Administrator Dialog Views window to specify:
-
Which searchable attributes appear on the Search window (also called the “Search tool”), and in what order.
-
Organization of the first tab of the Cost Guide.
For more information about the Search tool, see “Using the Search tool” in the aP Pro User Guide.
For more information about the Cost Guide, see “Initial Costing: The Cost Guide” in the aP Pro User Guide.
Display the Dialog Views window
-
Click Tools > System Admin Toolset to open the System Administrator window from the main aPriori client, then click System Administrator.
-
Click Dialog Views in the Navigation pane to display the Dialog Views tab. (The Available Fields column will be blank if you have not customized Displayed Fields.)

Controlling searchable fields in the Search tool
You can control which searchable attributes appear in the Search Criteria pane of the Search tool and where they are positioned. This allows you to show only the attributes that you want to make available and turning off the display of less useful attributes.
Display and position searchable fields in the Search window
-
Select Search from the drop-down list.
-
To hide a searchable field from the Search window, select it in the Displayed Fields column and click the left arrow (
 ) to move it to the Available Fields column.
 -
To display a hidden searchable field, select it in the Available Fields column and click the right arrow (
 ) to display it in the Displayed Fields list.
You must display all required user defined attributes, or users will not be able to cost components. -
Adjust the order of the displayed fields on the Search window by selecting a field in the Displayed Fields list and clicking
 or
or  to move it within the list.
 -
Select File > Publish Changes from the System Administrator menu bar or click
 in the tool bar to save your changes.
 -
Restart aPriori to display changes to the Search window.
Note: System Administrators that have implemented aPriori Access Control can further affect the behavior of the Search tool by restricting the display of search results to only those components to which the user has access permission. See Managing System Variables for Session Timeout for more information.
System Administrators can customize the organization of Production Scenario tab of the Cost Guide.
This enables you to design a more efficient and user-friendly panel. For example, if your company:
-
Has a User Defined Attribute that is directly related to the Process Group, then that UDA can be moved directly below the Process Group input.
-
Has many related inputs, then they can be put into their own group, with any name of your choosing.
-
Does not use target costs or target mass, then those inputs can be removed from the screen.
-
Always uses the material from the CAD model, then the material selection field could be removed.
Configuration capabilities include
-
Rename the Out-of-box group headers 1.1 Basic Options, 1.2 Company-Defined Attributes, and 1.3 Targets.
-
Remove group headers.
-
Define new group headers.
-
Remove any fields other than Process Group and Digital Factory.
-
Move fields to any location
Note: aPriori enforces that “Process Group” and “Digital Factory” appear above their dependent inputs (“Material”, “Process Routing”, “Volume”, and “Batch Size”). The order of other dependent fields is not enforced. You must consider these dependencies when configuring the view to make the behavior as clear as possible to users.
Changes made to the Cost Guide may cause changes to organization of the items on tabs in the Cost Object Info window. Fields will not change tabs in the Cost Object Info window: any attribute that exists by default in Cost Guide sections 1.1 (Basic Options) or 1.3 (Targets) out of the box will always appear on the Cost Object Info Production Info tab, and anything that appears by default in section Cost Guide 1.2 (Company-Defined Attributes) will continue to appear on the Cost Object Info Administrative Info tab. However, if you hide a field in the Cost Guide, it will also no longer display in the Cost Object Info window. And if you move a field up or down in the Cost Guide, its relative position to its neighbors will also change in the Cost Object Info window.
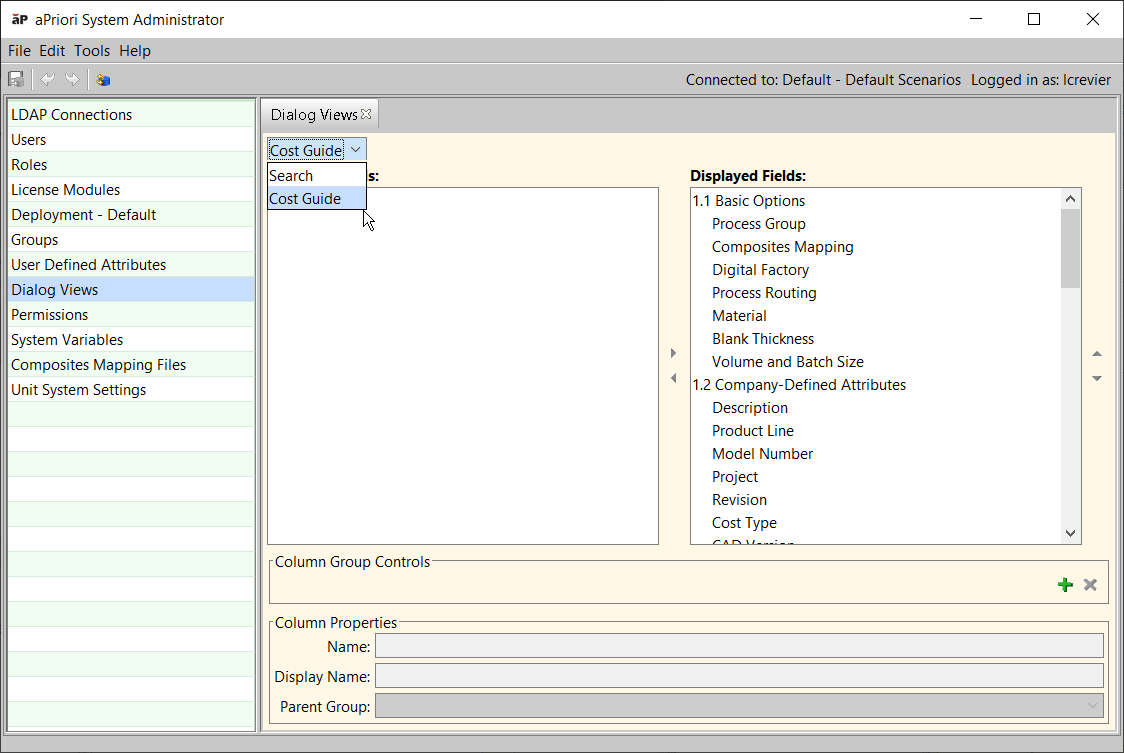
Customize fields on the first tab of the Cost Guide
-
On the Dialog Views window, select Cost Guide from the drop-down list.
-
To rename a field or group header, select it in the Displayed Fields column and edit the Display Name field in the Column Properties section at the bottom of the window.
Note: Do not change the display name of UDAs here, since the change will not be reflected elsewhere (such as in the BOM Loader, Bulk Costing, Part Details, and so on.) You should only change UDA display names in the UDA definition. See Managing user defined attributes for details.
-
To delete a group header, select it in the Displayed Fields column and click the red
 on the Column Group Controls section near the bottom of the window.
 Note: The deleted group’s members remain. You should manually move them to other groups.
-
To hide fields or groups of fields, select one or more fields and/or group headers in the Displayed Fields column (use the Shift and Ctrl keys to expand your selection).
Note: You cannot select “Process Group: or “Digital Factory”. Click the left arrow (
 ) in the center of the window to move the item(s) out of the Displayed Fields column. Note that if you hide a group header, all of its members also are hidden.
 -
To define a new group header, click the green “+” icon (
 ) in the Column Group Controls section near the bottom of the window. Enter a name in the resulting Add Group dialog box, then click OK.
 -
To move fields or groups within the Cost Guide, select one or more fields and/or group headers in the Displayed Fields column (use the Shift and Ctrl keys to expand your selection). Click the up and down arrows (
 ,
, ) at the right of the column to move the item(s). Group headers (and their members) will move above or below the adjacent group. Individual fields will move up or down within their current group. To move a field to a different group, select the target group from the Parent Group drop-down menu at the bottom of the window.
 -
When you finish, click File > Publish Changes from the System Administrator menu bar or click
in the tool bar to save your changes. You do not need to restart aPriori to see your changes.