You can create a new component (a virtual component) from aP Pro without a CAD model. A virtual component may represent; a component sourced from a supplier, a non-mechanical component such as lubricant, or an early conceptual part or assembly, for which a CAD model does not yet exist.
A virtual part component uses the User Guided process group, and a virtual assembly component uses the Assembly process group, using those groups' default Digital Factories, but with no default no material or process routing.
Analyze a Virtual Component
Without a CAD model, aP Pro cannot automatically derive GCDs such as length or volume. However, you can analyze a virtual component:
-
Using the separate aP Pro User-Guided Costing module. See the Cost Model Guide.
-
Manually entering data in the Cost Summary tab. See Cost Summary Overrides.
Virtual Assembly Components
Tip: See Add Virtual Components to an Assembly for more details.
The assembly process routing is fully accessible from virtual assemblies, and all components contained within the assembly, virtual or CAD-based, contribute to the aggregate cost of the assembly. Assembly processes also reflect the costs of subcomponent assembly if you provide a mass for each subcomponent.
Assembly component GCDs may be specified in the Geometric Cost Drivers window. Volume, Surface Area, Length, Width, and Height may be entered to describe assemblies that are not CAD-based.
Assembly components that are not CAD-based generate cost information just like CAD-based assembly components.
-
Subcomponent costs are aggregated, and assembly costs are calculated for the active assembly.
-
You can enter cost information for manually costed assemblies, disengaging the aPriori cost engine
-
Use cost overrides to enter values for the aPriori cost engine. For more information about manual costing, see Override Computed Values.
Create a Virtual Component
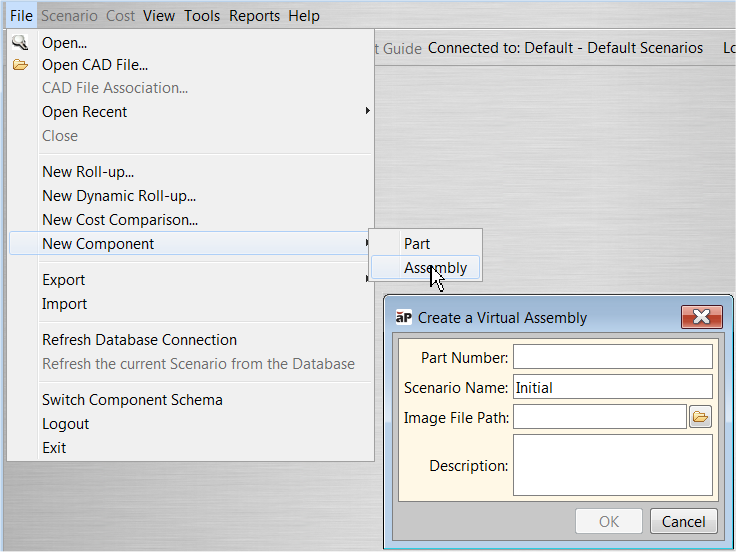
- Select File > New Component > Part or Assembly from the aPriori menu bar, to display the Create a Virtual Part or Create a Virtual Assembly window.
-
Enter a part number in the Part Number field.
-
Use the default scenario name for the new part or assembly or enter a new scenario name.
Note: The Scenario name field cannot be blank. For more information about scenarios, see Work with Scenarios.
-
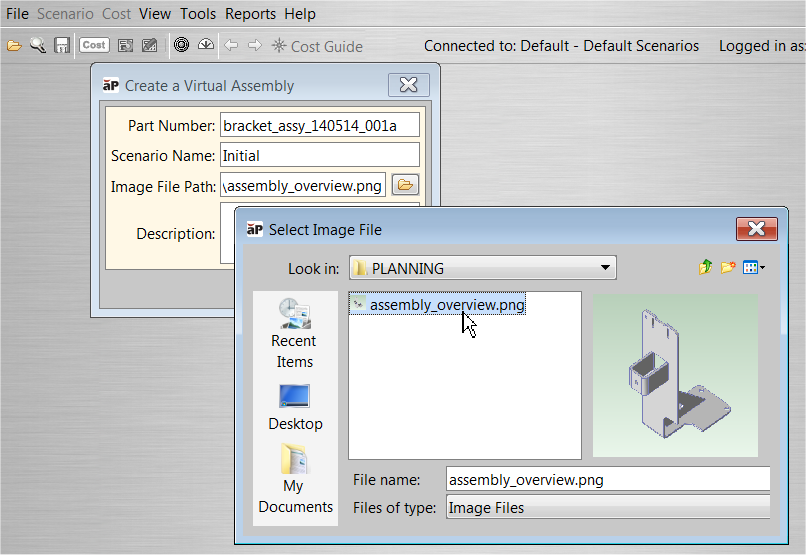
In Image File Path click the folder icon to browse to an image that you want associated with the component.
-
Supported image formats are BMP, WBMP, JPG, JPEG, PNG, and GIF.
-
-
(Optional) Enter a description in the Description field.
-
Click OK to display the Production Info tab of the Cost Object Info window.
-
Select the Costing Method:
- Manual to manually enter cost data for the part
-
aPriori if you have licensed the aP Pro User Guided Costing module and want to enter inputs to drive a user-guided cost model.
-
Select the Batch Size.
- Auto to have aPriori calculate the monthly production size from your Annual Volume value/12.
- Manual to provide a specific value.
-
(Optional) Check the Target Cost and /or the Target Finish Mass box and enter a value in their fields to associate target values with the component.
-
Click OK.