The Auto Select Parent Process command is available only for punched holes in Bar & Tube Primary Process Group. You can use this command to revert to the aPriori selected punching process from a manually selected punching process.
The following sequence of steps illustrates how you can use the Auto Select Parent Process command:
-
Open a Bar & Tube part with punched holes. You can see holes listed under Punching\SimpleHoles or Punching\ComplexHoles in the Routing Tree.
-
Select Edit > Routing Selection to open the Routing Selection window, see Edit a Process Routing.
-
Select All Processes from the View menu.
-
Expand the Routing Tree until you see an uncosted Punching process.
-
Right-click the uncosted Punching process and select Include from the Inclusion menu.
-
Click OK.
-
The Routing Selection window closes, and you can see two punching processes in the Routing Tree in the Manufacturing Process pane Punching and Punching 2.
-
Select one or more holes under Punching and drag them to Punching 2. The Cost Output information becomes stale.
-
Click the Cost button. The Cost outputs information is updated, and you can see the holes that you dragged under the Punching 2 process.
-
Right-click a hole under Punching 2.
-
The Auto Select Parent Process command is now available. Select this command to revert the hole to aPriori selected parent process. The Cost Outputs information becomes stale.
-
-
Click Cost. The cost outputs are updated, and you can see the hole back under the Punching process.
No Cost Feature
aPriori provides a "No Cost Feature" operation for handling GCDs that should not contribute to the cost of a component. For example, if an operation on one GCD also happens to apply to an adjacent GCD, applying "No Cost Feature" to that adjacent GCD prevents double costing. aPriori automatically applies "No Cost Feature" when possible, but you can also apply this manually as needed.
You can apply this feature both in the Routing Selection editor and in the GCD Operation Sequence Selection window
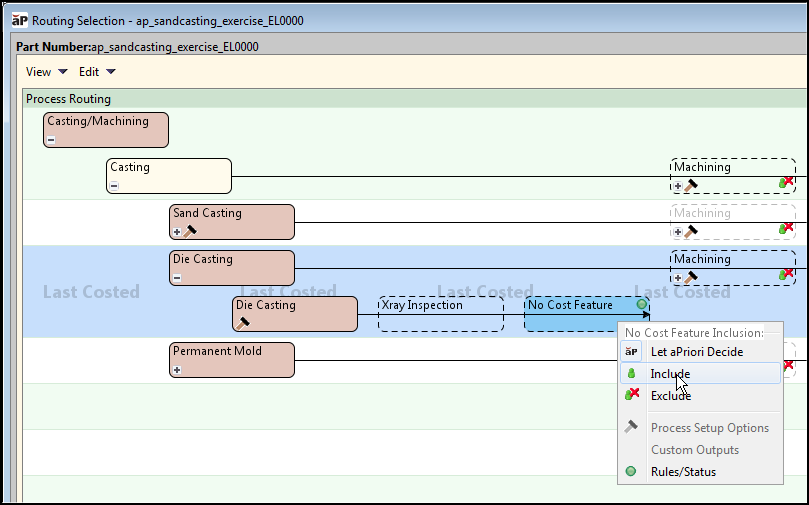
Apply a No Cost Feature in the Routing Selection editor
In the Routing Selection editor, right-click the optional No Cost Feature operation and select Include. A sandcasting part is shown in the following example.
To apply a No Cost Feature to a GCD
-
Assign this operation to a GCD in the Operation Sequence Selection window by selecting the No Cost Feature operation block - see see GCD operation sequence selection.
-
Click OK.
When set, this override is displayed in the Geometric Cost Drivers pane. After successful costing, the Selected field also reflects "No Cost Feature".
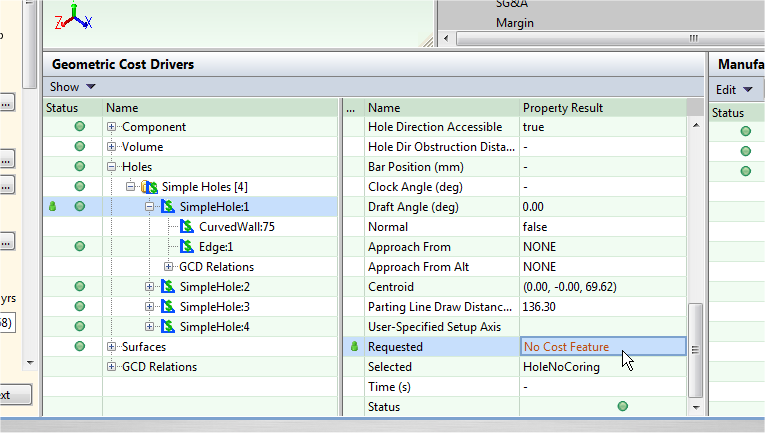
In general, applying "No Cost Feature" to a GCD with children applies to the children. There are some exceptions such as Edge, CurvedSurface, CurvedWall, and PlanarFace.
If you apply No Cost Feature to a child GCD, the parent's Selected field notes <child_gcd>/No Cost Feature after successful costing.