You can create additional views for Part Details and Assembly Details tabs, containing just the data fields of interest for a particular purpose organized in a desired order.
Tip: See also the Create a Custom Table View aP Academy training course.
To create a new view:
-
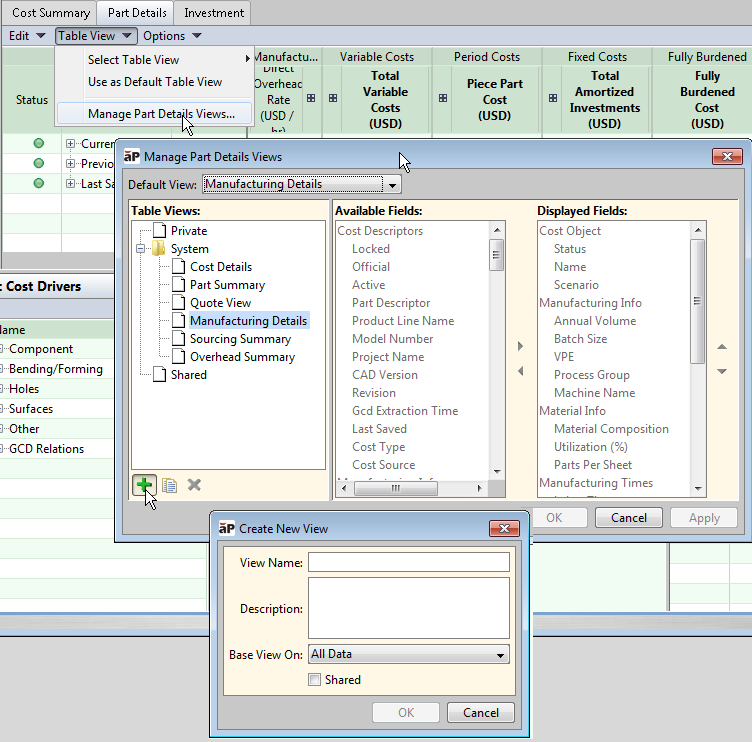
From the Part Details or Assembly Details tab, click Table View > Manage Part Details Views or Manage Details Views. From the resulting window, click the "plus sign" Add icon (
 ).
).
-
In the Create New View window, complete the View Name and Description fields, then use the Base View On drop-down menu to indicate which pre-configured view to use as a starting point. All Data is the default.
-
Check the Shared checkbox to make the new view available to other users.
Note: A shared view can be deleted by any user who views it, so you may want to create an unshared view first, then create copy of that view to share.
-
Click OK. The Customize Part/Assembly Details View window then updates with the name of the new view.
-
The right panel of the window shows a list of Available Fields and Displayed Fields.
-
Use the left and right arrows to move fields between the from the Displayed and Available lists. You can hold down the Ctrl key to move multiple fields.
-
Use the up and down arrows to order the Displayed Fields as desired.
-
-
Click OK when you are satisfied with the contents and order of the new view.
-
To display the new view you have just created, click Table View
-
If you want to edit the view, choose Manage Part/Assembly Details Views. In the left panel, click on the view you want to edit. The right-hand panel shows the configuration for the selected view, where you can change displayed fields.