Deep Costing Assemblies
Use Deep Costing to analyze an assembly and its sub-components in one operation, as follows:
Preparing to Deep Cost
-
(Optional) Select Tools > User Preferences > Default Production Inputs to match the default production inputs with the most commonly occurring inputs in your assembly, primarily Process Group, Digital Factory, and Material:
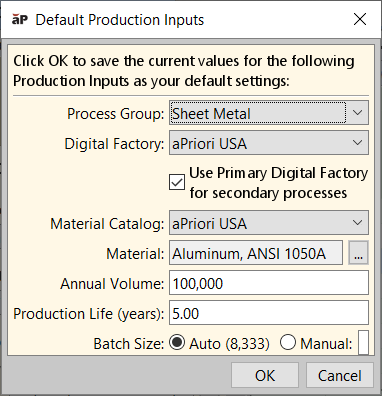
This saves time when populating the production inputs in the parts table later.
-
Click File > Open CAD File to open the assembly CAD file.
-
Click Cost to allow aPriori to parse the assembly model and extract the child parts and BOM structure.
Enter Production Inputs
-
Select Cost > Deep Cost Scenario...:
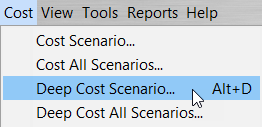
The Bulk Cost & Analysis window appears, with the Deep cost box checked for the top-level assembly and all sub-assemblies, to ensure that all assembly components will be analyzed.

-
(Optional) Align the order of display for both the Assembly UI and Bulk Costing & Analysis window – this makes it easier to enter production data:
-
Assembly UI: in the Assembly Details tab, select Options > List (instead of Tree), then click on the Name column header to sort the names in alphabetical order. See View Assembly Details.
-
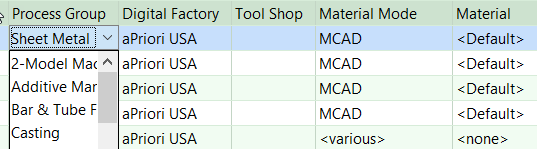
Bulk Costing & Analysis window: click on the File Name column header followed by the Component Type column header.
-
-
(Optional) Set options to easily see the part for allocating the appropriate Process Group. Use the Component Viewer to set the Render Mode to Transparent and select the Show GCD Labels function from the Analysis menu:

When you click on a part in the assembly list, aP Pro then highlights the part in the CAD assembly model in yellow and a leader line shows the component name in the Component Viewer.
-
For each child part, review and update the Process Group, Digital Factory, and Material production inputs, referencing your organization’s engineering management system:
Tip: You can multi-select components using either SHIFT+Click or CTRL+Click options.
Note: GCDs differ across process groups, to allow aP Pro to extract meaningful geometry for each manufacturing method. For example, a ‘hole’ in machining may be a ‘void’ in casting. So ensure that you allocate the correct process group to the part being analyzed.
The Annual Volume and Production Life (Years) fields can be inherited from the assembly.
Tip: Use the Bulk Loader to quickly upload this data from a spreadsheet. See Supply Bulk Costing Data from a Spreadsheet and Bulk Costing Using the UI.
Perform Analysis
-
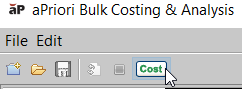
Click Cost in the Bulk Costing & Analysis window to run the deep cost analysis on your assembly:
A ticker starts in the lower-right corner of the UI:

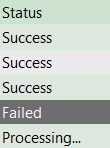
The Status field indicates if a part is processing and whether the costing status is Success or Failed:
-
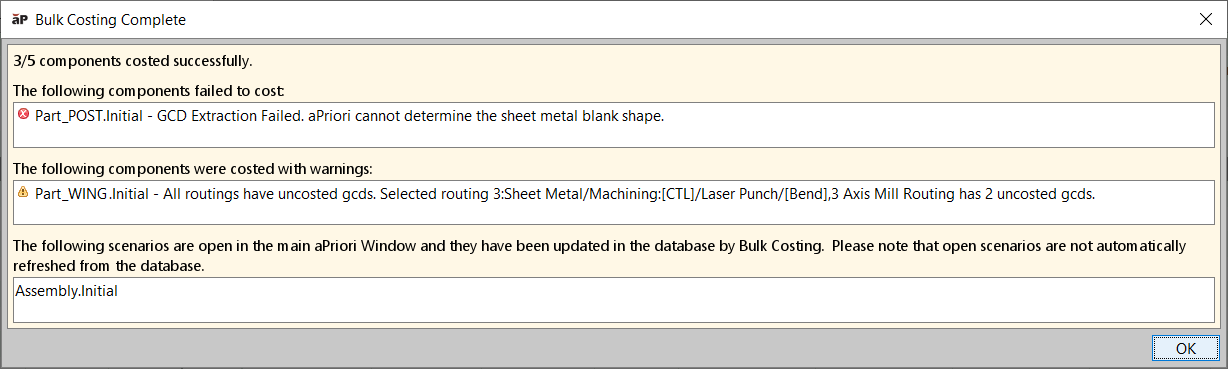
After the costing process completes, view the results in the pop-up Bulk Costing Complete window. This could indicate that some sub-components have failed to cost, or have costed with warnings:
-
Open the assembly, then copy the individual Annual Volume requirement from the assembly level to the sub-component; selectScenario > Copy Assembly Inputs to Children, then selecting the inputs to copy:
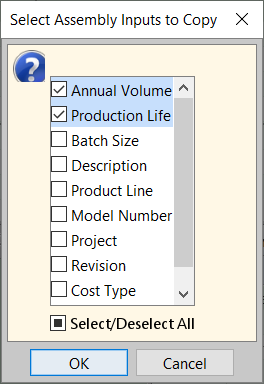
Tip: See Copy Assembly Inputs to Children for more details.
-
Re-cost the assembly by clicking Cost, to recalculate the cost with respect to the new annual volumes for the child parts.
Review results
You now have an initial calculated cost for all the parts in the assembly. From here, you could add additional depth to child parts, such as cleaning, coatings, and heat treatments. You could also add assembly processes, such as mechanical assembly, welding, and packaging.
Tip: See View Assembly Analysis Results for more details.
Notes
-
If a sub-component scenario with unsaved changes is open, aP Pro copies that scenario to the Bulk Cost Group. If not, it is read from the aPriori database.
-
If a sub-component does not exist in the database (and so cannot be opened), a new component scenario is created with default values. However, the component must be associated with a CAD file (unless the component is being costed in the User Guided process group). If an assembly has been initialized (see Analyze Sub-Components Using the Initialize Option), the immediate sub-components are automatically associated with CAD files even if they have not been initialized. For deeper level children, aPriori assumes that those sub-component CAD files are in the same directory as the root assembly. If not, associate these components with the relevant CAD files before you start Deep Costing.
-
if a component failed to cost because the wrong Process Group was assigned to it, open the component, assign the correct Process Group, and re-cost. To handle uncosted GCDs, open the part(s) individually and follow the error messages for the specific GCDs. For more details, see Cost failures during bulk costing.
-
When you deep cost an assembly and view it, the scenario of the top-level assembly is the one you select in aP Pro. The sub-components are set to whatever scenarios you have associated with this assembly