Define Stock Form and Alignment
Use the Stock Form and Alignment tool to display and edit the automatically-chosen stock shape and alignment.
Process Overview
-
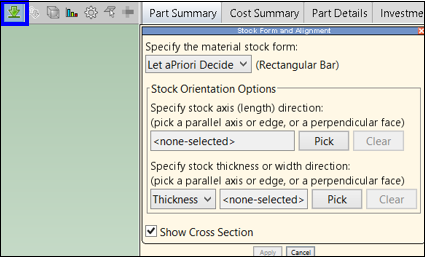
Click the Stock Form and Alignment button - the green down arrow in the Component Viewer tool bar:

Note: If the toolbar icon (the down arrow) is grayed out, ensure that your scenario is CAD connected; select CAD File Association... from the File menu. Also ensure that your current process group supports stock forms.
-
Select a stock from the dropdown list.
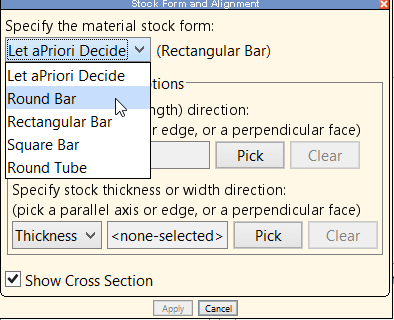
For Bar & Tube Fab, the selected stock form must be similar in shape and size to the finished part, as Bar & Tube Fab models the cost of fabricating parts from “as-supplied” stock forms, without any material removal around the part boundaries. For example, for a part that is rotationally symmetric, aPriori supports selection of only round bar or round tube; if you select a square bar, aPriori displays the error message.
-
You can also use the Stock Orientation Options section to display and override the alignment of the part relative to the stock axis. Typically, you will not need to use this field, as aP Pro analyzes the part from multiple directions and determines which alignments are viable. But in some cases, a part potentially could be made from more than one stock form, depending on what is assumed to be the stock-axis direction.
To change the assumed alignment:
-
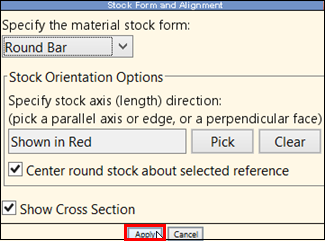
For Bar & Tube Fabrication, click Pick , then click an edge of the part this is parallel to the desired stock axis direction. As you move the mouse cursor over the part edges, the edges are highlighted. Highlight the edge along which you want to align the stock and click the left mouse button.
-
For Stock Machining, click Pick , then select either an edge of the part or an axis of the part parallel to the desired stock axis direction, or select a planar face on the part that is perpendicular to the desired stock axis direction. As you move the mouse cursor over the part edges or faces, they are highlighted in yellow; as you move them over available setup and turning axes, the axis arrow highlights and a dotted red line is displayed in the axis direction. Highlight the desired item, then click the left mouse button.
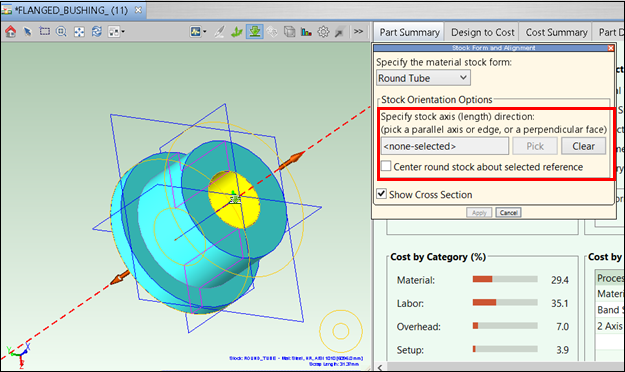

Use Clear to revert to the stock alignment direction automatically determined by aP Pro.
-
-
Click Apply to re-analyze and re-cost the part.
Example: Change Stock Form to Plate Type
-
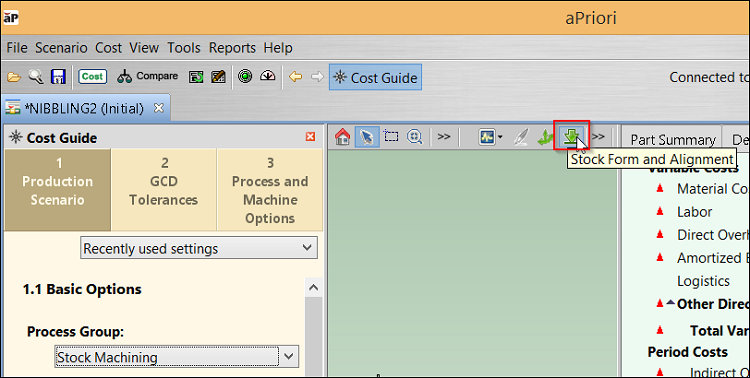
Set the Process Group to Stock Machining :
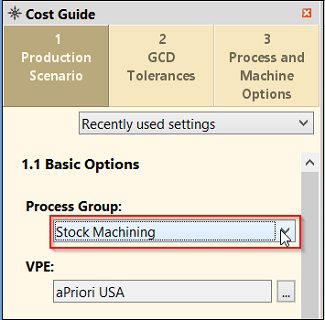
Tip: See Production Scenario: Tab Basic options for details of setting Process Groups.
-
Click the green arrow to open the Stock Form and Alignment window:
-
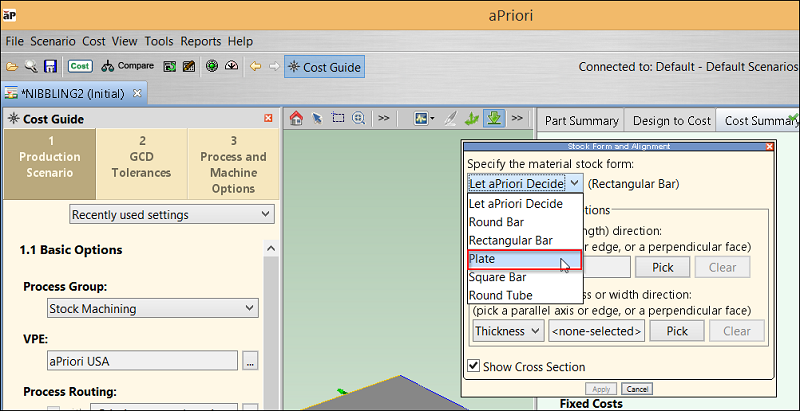
In the window that opened up, select Plate from the drop down menu, and apply changes:
-
Close the window and re-cost the part.
Other Methods
You can also override aPriori's automatic stock form choice by doing one of the following:
- Editing the Stock Form field of the Cost Guide's Production Scenario tab.
- Map a CAD attribute to the Stock Form production input in the CAD mapping file.
- Specify the Stock Form in Bulk Costing by using the input table or the inputs spreadsheet.