Collaborate Using Projects
Projects in aP Workspace allow you to collaborate on groups of parts and assemblies with team members. This helps to ensure that team members stay informed and aligned throughout the development process.
View the Projects Page
-
Click the Projects tab on the aP Workspace home page:
If there are any existing projects in aP Workspace, you can see high-level details of each one, including the project Status (Completed, In Progress, or Open), Owner, Organization, and the initials of project members:
-
Click the project name to view details of the project. See View or Edit Project Details.
Create a New Project
-
Click the Projects tab on the aP Workspace home page.
-
Click Create New Project at the top-right of the page:
-
In the pop-up window, provide the following information:
-
Name and Description: enter a unique name for the project (required). Optionally, enter a description.
Note: The remaining fields are optional, you can add this information now or after you create the project.
-
Parts and Assemblies: add parts or assemblies. Click Add New to locate parts using the Add Parts window, then click Add.
-
Invite Team Members: click the Make Selection button, begin typing a user's name, then select their name in the dropdown list.
Note: Initially, you can add up to ten users. You can add more if needed after you create the project.
-
Project Goals: add project goals, including Target Cost, Target Weight, Target Carbon and Target End Date.
-
-
Click Create Project. The project appears on the Projects page.
View or Edit Project Details
Click the project name on the Projects page then select from the Details, Parts & Assemblies or Users tabs to view or edit the following:
-
Details:
-
Details: view the project name, description and owner. Click Edit to make changes. Click Delete Project to delete this project. (Only the project owner can edit Details.)
-
Project Goals: view project goals including the target cost, weight, carbon and end date. Click Edit to make changes.
-
Status: view the current project status, along with the start and end dates. To update, select a status from the Project Status dropdown or enter/select a date for the Start Date or End Date.
-
-
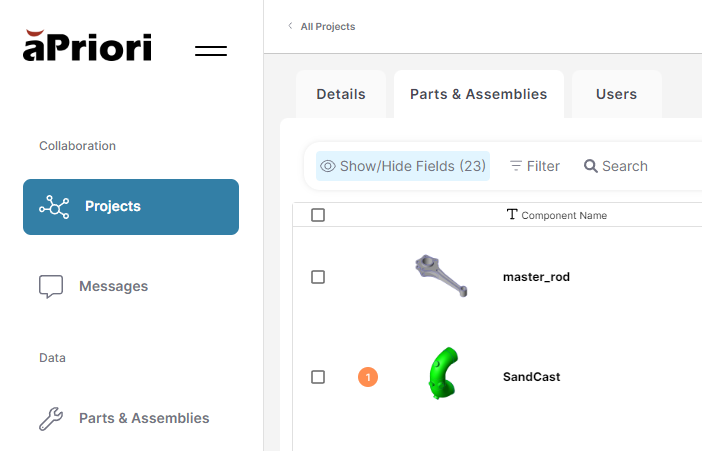
Parts and Assemblies: view and open all parts and assemblies within the project. Click Add Parts to add parts to the project. Select a part and click Remove Selected Part to remove it from this project. Each part can only be assigned to one project at a time. An orange 'unread messages' icon indicates which scenarios contain unread messages and how many:
-
Users: view users associated with the project. Select a user and click Remove Selected User to remove them. Click Invite Users to add new users.
-
Messages: view all messages related to parts and assemblies in the project. You can scroll through the pane to review feedback without opening individual parts.
-
DELETE PROJECT: Select to delete this Project and all data.


