Publish a Scenario
Public scenarios can be viewed by others in your team with relevant access. You can make a private scenario into a public scenario by publishing it.
You can publish a single scenario from the Explore tab, the Evaluate tab, or the Assembly Explorer on the Evaluate tab.
You can also group publish scenarios in the Explore tab or by using the Assembly Explorer on the Evaluate tab.
Caution: If you publish a scenario that has unanalyzed changes, these changes are lost. aP Design publishes the last successfully analyzed iteration of your scenario.
Example: Publish Using the Explore Tab
-
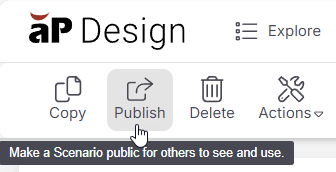
Select a private scenario and click Publish.
-
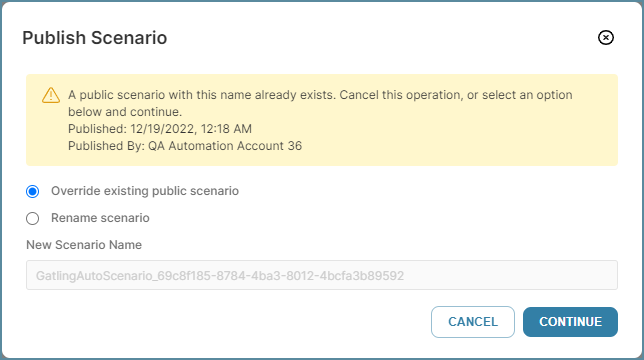
If a conflict is found (if a scenario with that name is already public), select to override the existing scenario or create a new name:
-
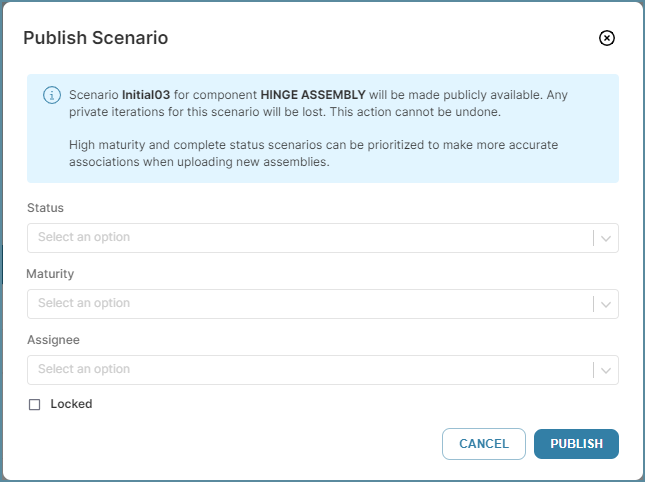
Select a Status, Maturity, and Assignee for the published scenario.
-
Status: select between New, Analysis, Waiting, Complete, and Closed.
-
Maturity: select between Initial, Low, Medium, and High.
-
Assignee: select the name of the team member that you are assigning the scenario to.
The selected values for Status and Maturity can determine whether the scenarios are used for subcomponents for new assembly scenarios. For more information, see Assembly Defaults and Assembly Association Strategy.
Optionally, select the Lock check box to lock the scenario against changes. See Edit a Scenario for details of locking scenarios.
-
-
Click Publish to publish this scenario.
Group Publish Scenarios
You can publish multiple scenarios (up to 10) in the same way, by selecting multiple private scenarios and then click Publish, following the same process as described previously.