A static roll-up is created by searching aP Pro for components (parts, assemblies or other roll-ups), and selecting which of these components to add to the roll-up. You can edit this roll-up, including creating components and adding them to the roll-up.
Tip: See also the Perform Static Roll-ups aP Academy training course.
Dynamic or Static Roll-up?
To choose when to use a Dynamic Roll-up or a Static Roll-up, typically:
-
Use Static Roll-ups to give you a greater level of manual control over the contents in a roll-up. Also, you can create a part from scratch using static roll-ups.
-
Use Dynamic Roll-ups when you are working as part of a larger team, all of whom may be working on the same project and updating the contents of the roll-up. This allows you to see the latest version of your roll-up on a dynamic basis.
See Dynamic Roll-ups for more details.
Create Roll-ups
Create a New Roll-up
-
Select File > New Roll-up:
-
Enter the roll-up name, scenario name and a description for the new roll-up.
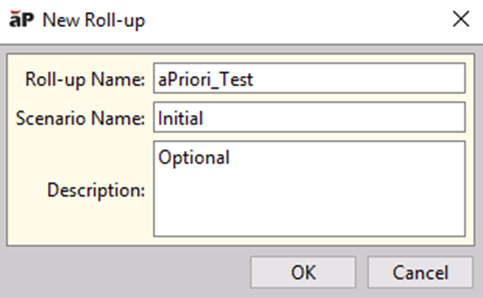
In the Scenario Name field, use the default scenario name, or enter a new name to create a scenario with a different name. For more information about scenarios, see Work with Scenarios
-
Click OK.
-
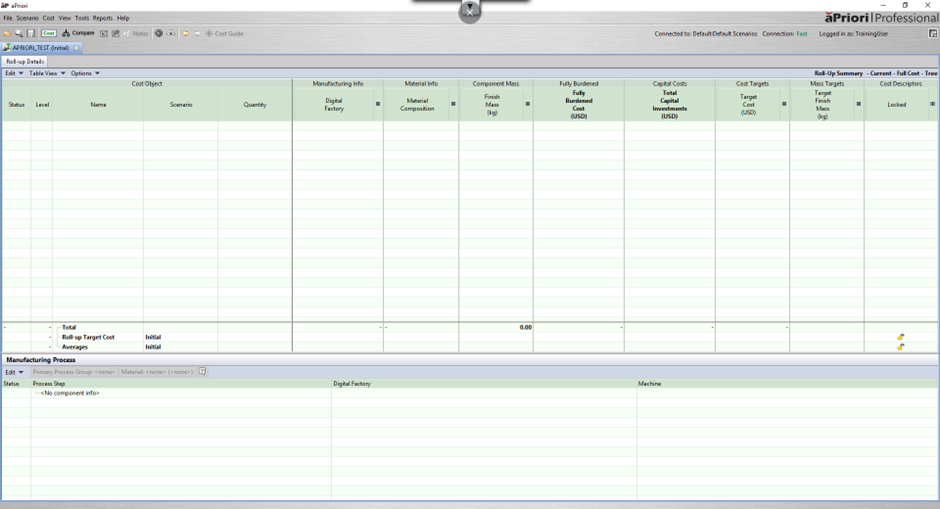
An empty roll-up is displayed.
-
The roll-up is also added to the Open Items tab in the navigation pane.
-
Add a component to a roll-up
To add components to the roll-up, you can:
- Drag a component from the navigation pane to the open roll-up.
- Select Edit > Add > Component(s)... to display the Search window, then.
- Enter search criteria in the filter fields and click Find. The list of components that match the filter criteria is displayed.
- Select the component(s) from the list and click OK.
By default, the official scenario for each component in an assembly is used for costing. To use a different scenario for, select that specific scenario, rather than the part itself, in the Search window.
- Select Edit > Add > New to create and add a new part, assembly, or roll-up to the active roll-up, including virtual components (see Add Virtual Components to an Assembly). The new component is added to the bottom of the list of roll-up components.
Tip: When you add a component to a roll-up, the roll-up is visible in the Roll-ups subfolder of the Where Used folder for this component.
Costing Components
Before you can analyze (cost) a roll-up, each component must be costed.
The Status column shows the status of a component’s costing:

- Green: costing completed successfully
- Yellow: costing succeeded with a warning
- Red: costing failed
- Grey: not initialized
- Asterisk (*): unsaved changes; to save the changes, right-click the component and select Save
To cost a virtual component, double-click on the entry in the list, to open it in a separate tab, then click the cost button and enter cost information manually in the Cost Summary tab:

Click Save to save this information, then close the tab. The roll-up includes the new cost information.
Edit Static Roll-up Properties
Edit Roll-ups
Edit a roll-up
-
Double-click a roll-up in the navigation pane.
-
In the roll-up table, select a component and edit the Manufacturing Process as desired. New cost reflecting the changes is calculated. Red up-arrows indicate values that went up, and green down-arrows indicate values that went down. An asterisk appears next to the component’s name to indicate that there are unsaved changes.
-
To save the changes, right-click the component and select Save.
Edit or Remove a Component
-
Double-click a roll-up in the navigation pane.
-
Right-click the component you want to edit and select Edit Quantity. The Edit Quantity window is displayed.
-
Enter new quantity. Enter 0 to remove the component.
-
Click OK. The costs are updated to reflect the new quantity. Red up arrows indicate values that went up, green down arrows indicate values that went down.
View Roll-up Values
-
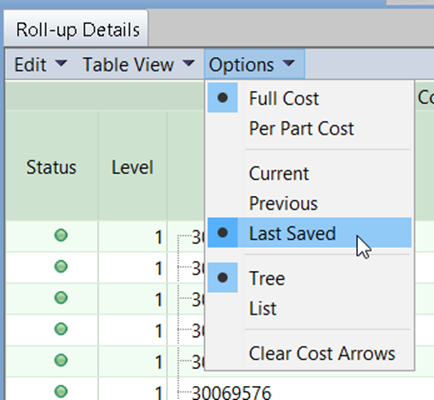
To view saved values: In the roll-up tab, select View > Saved Values. The last saved values for the components are displayed without losing any unsaved changes. You cannot edit the saved values.
-
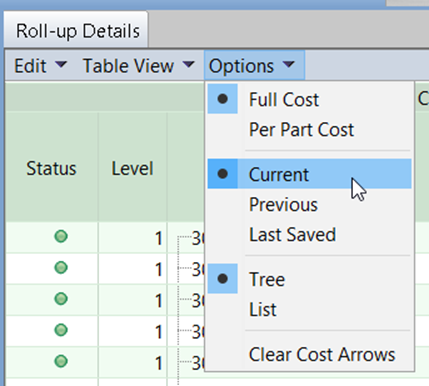
To view current values: in the roll-up tab, select View > Current Values. The changes that have been made since the values were saved are displayed. You can continue editing the current values.
-
To view roll-up components, double-click a roll-up component in the roll-up table or in the navigation pane to open it in a new tab.
Copy Roll-ups
Copy a Roll-up
To copy an entire roll-up table:
-
Double-click a roll-up in the navigation pane.
-
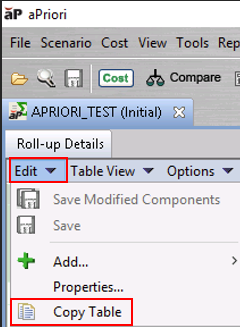
In the roll-up tab, select Edit > Copy Table.
-
The table is copied to the clipboard. You can paste the table into another application such as Microsoft Excel.
Tip: You can also copy a section of a roll-up table: select rows of interest, then copy-and-paste those rows.
Copy a Roll-up Component
You can cut, copy, and paste components from one rollup to a new or existing roll-up. This enables you to create alternative groupings of components for analysis purposes, or to dynamically organize product costs as the product structure evolves.
-
Open a rollup and select one or more components that you want to cut or copy. Use Ctrl + click to select multiple components.
-
Right-click and select Cut or Copy from the context menu.
-
Right-click the destination roll-up in the active roll-up tab or open the destination roll-up tab.
-
Right-click and select Paste from the context menu.
Save a Roll-up as a Scenario
-
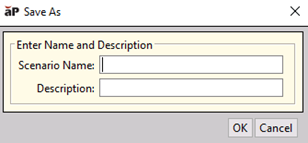
Right-click a roll-up in the navigation pane and select Save as Scenario to open the Save As window.
-
Enter the Name and Description (optional) for the new scenario.
-
Click OK.
-
The roll-up is saved as a locked (uneditable) scenario.
-
It captures a static version of the roll-up components and costs for later analysis.
-
When a scenario is created, it appears in the Scenarios folder in the navigation pane. For more information, see Work with Scenarios.
-