Quickstart
This shows a simple example of how you can use aP Pro to create and analyze a scenario from an imported CAD file:
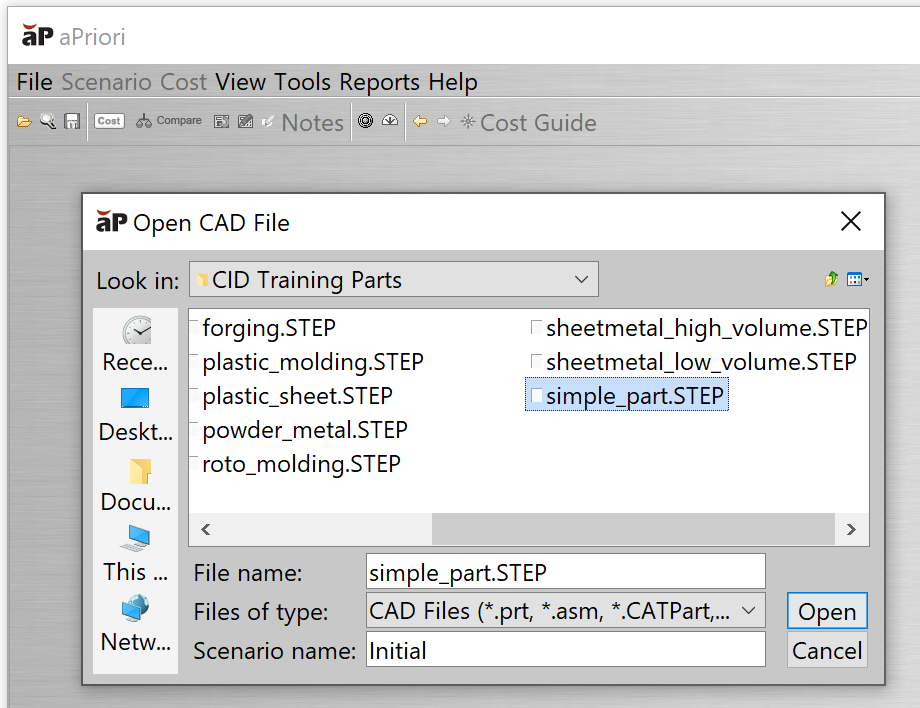
Step 1: Open a Component File
Select File > Open CAD File… to open a part in aP Pro, creating a component and an initial scenario for that part:
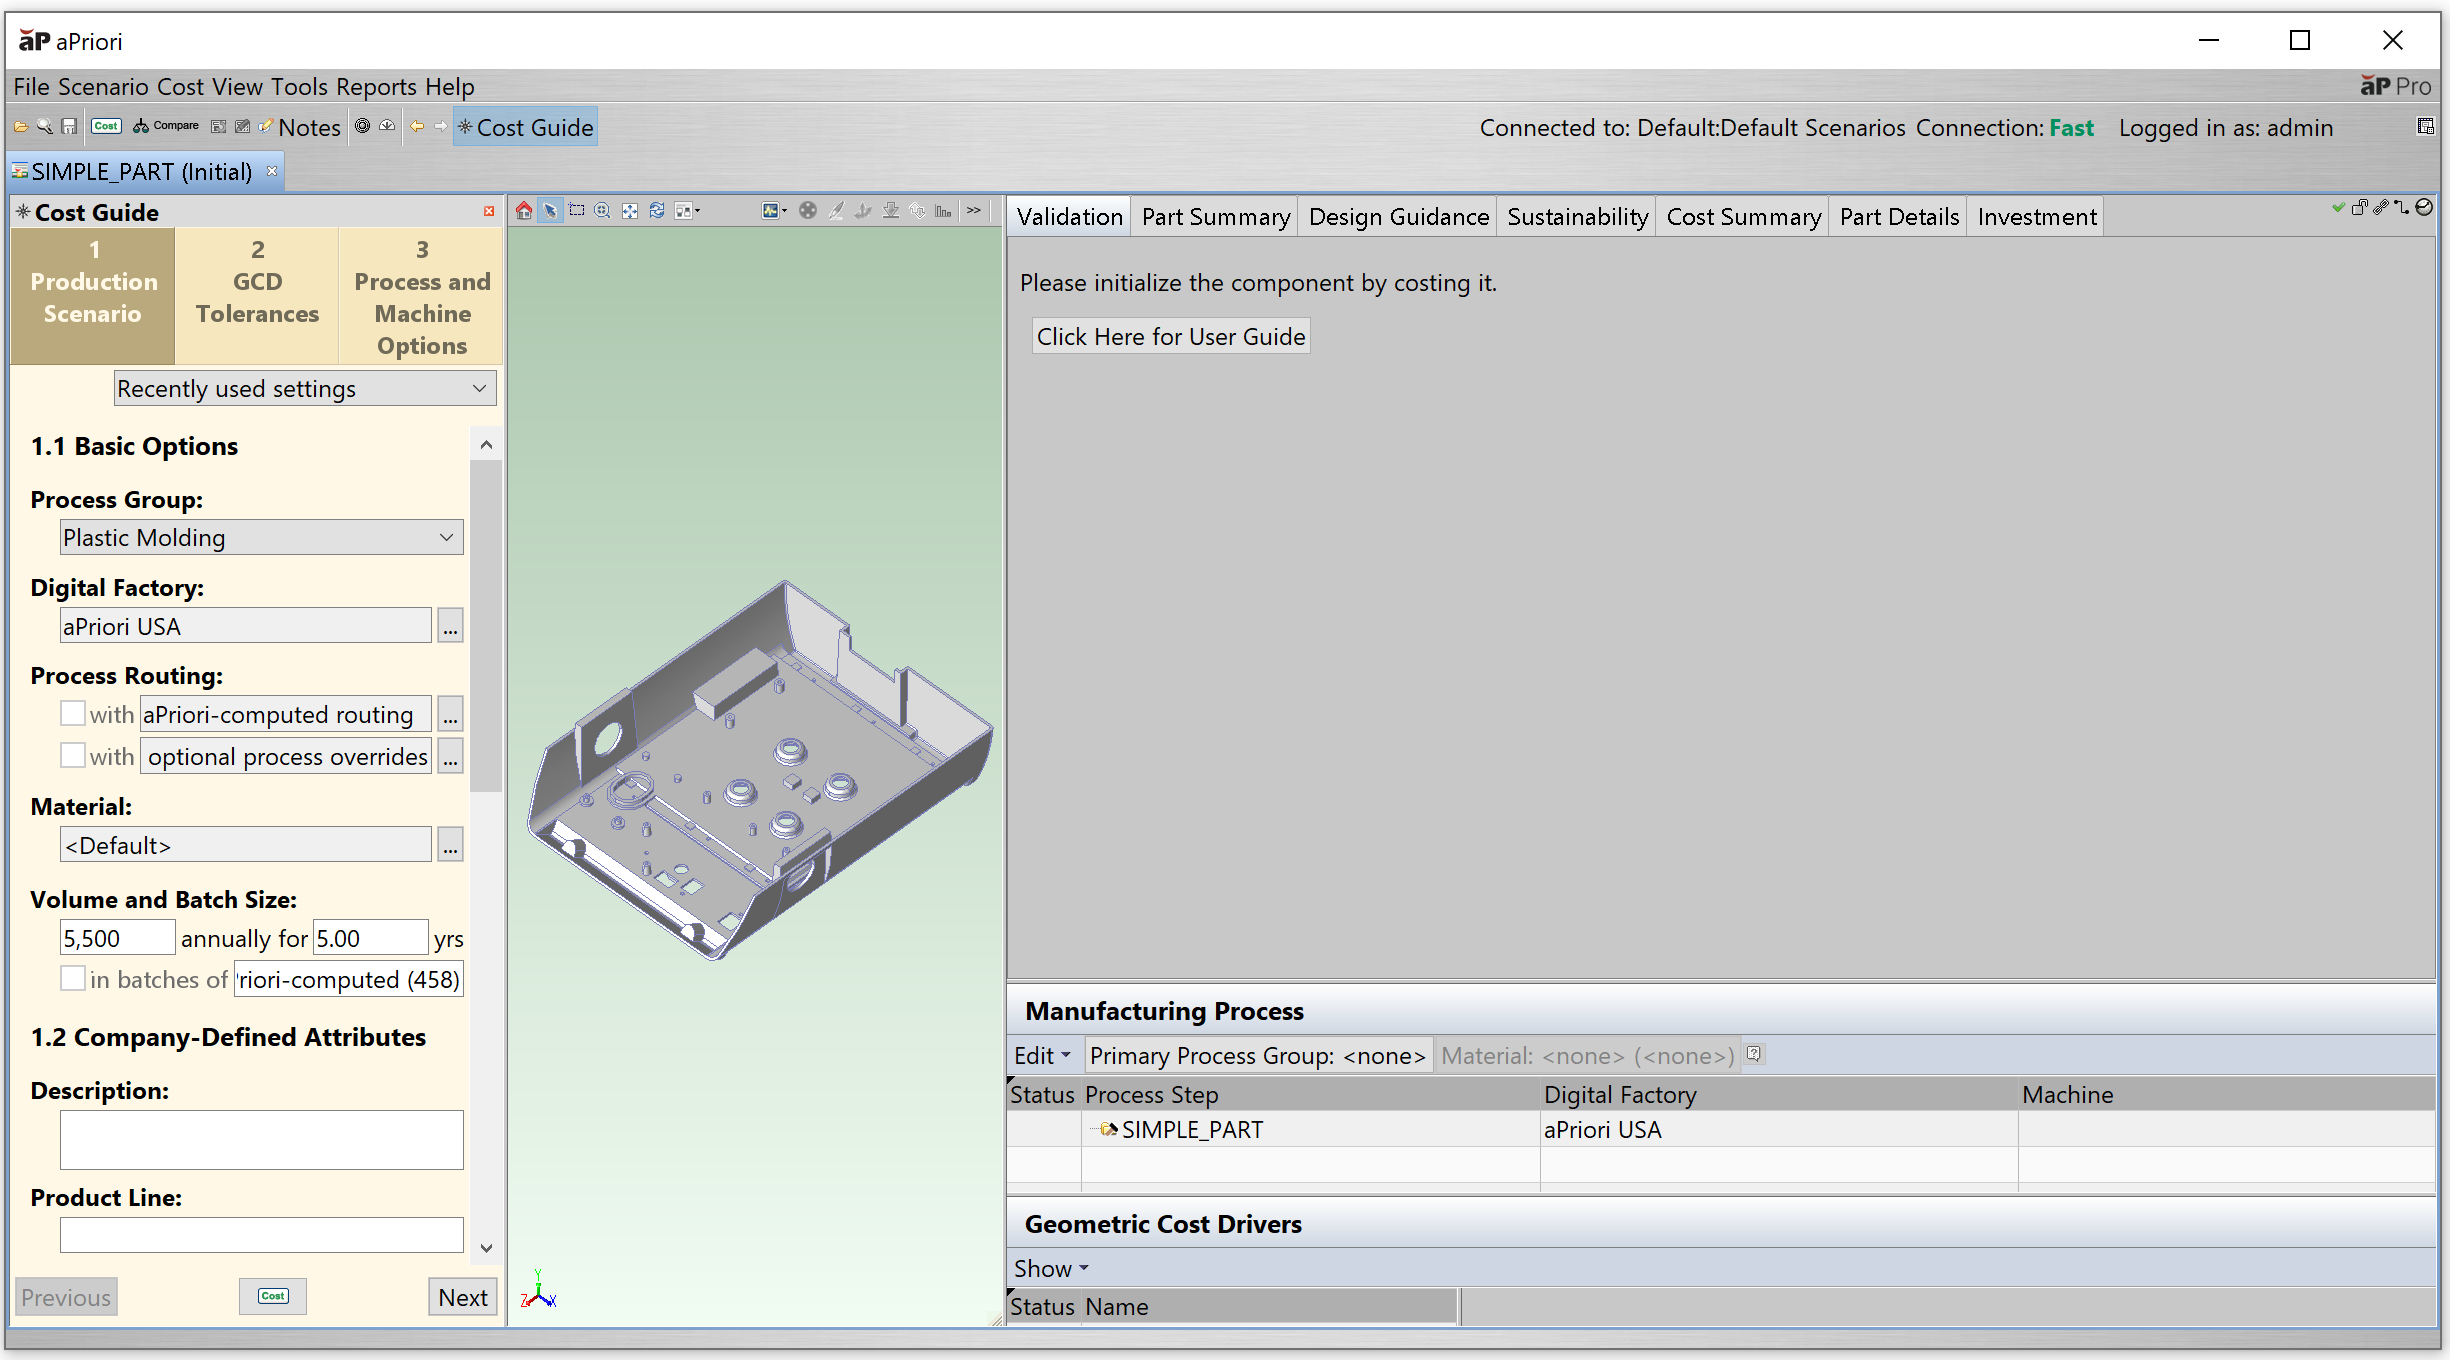
aP Pro creates the component and displays the component's default scenario (Initial):
See Open a Scenario for more details.
You can now set inputs for this component.
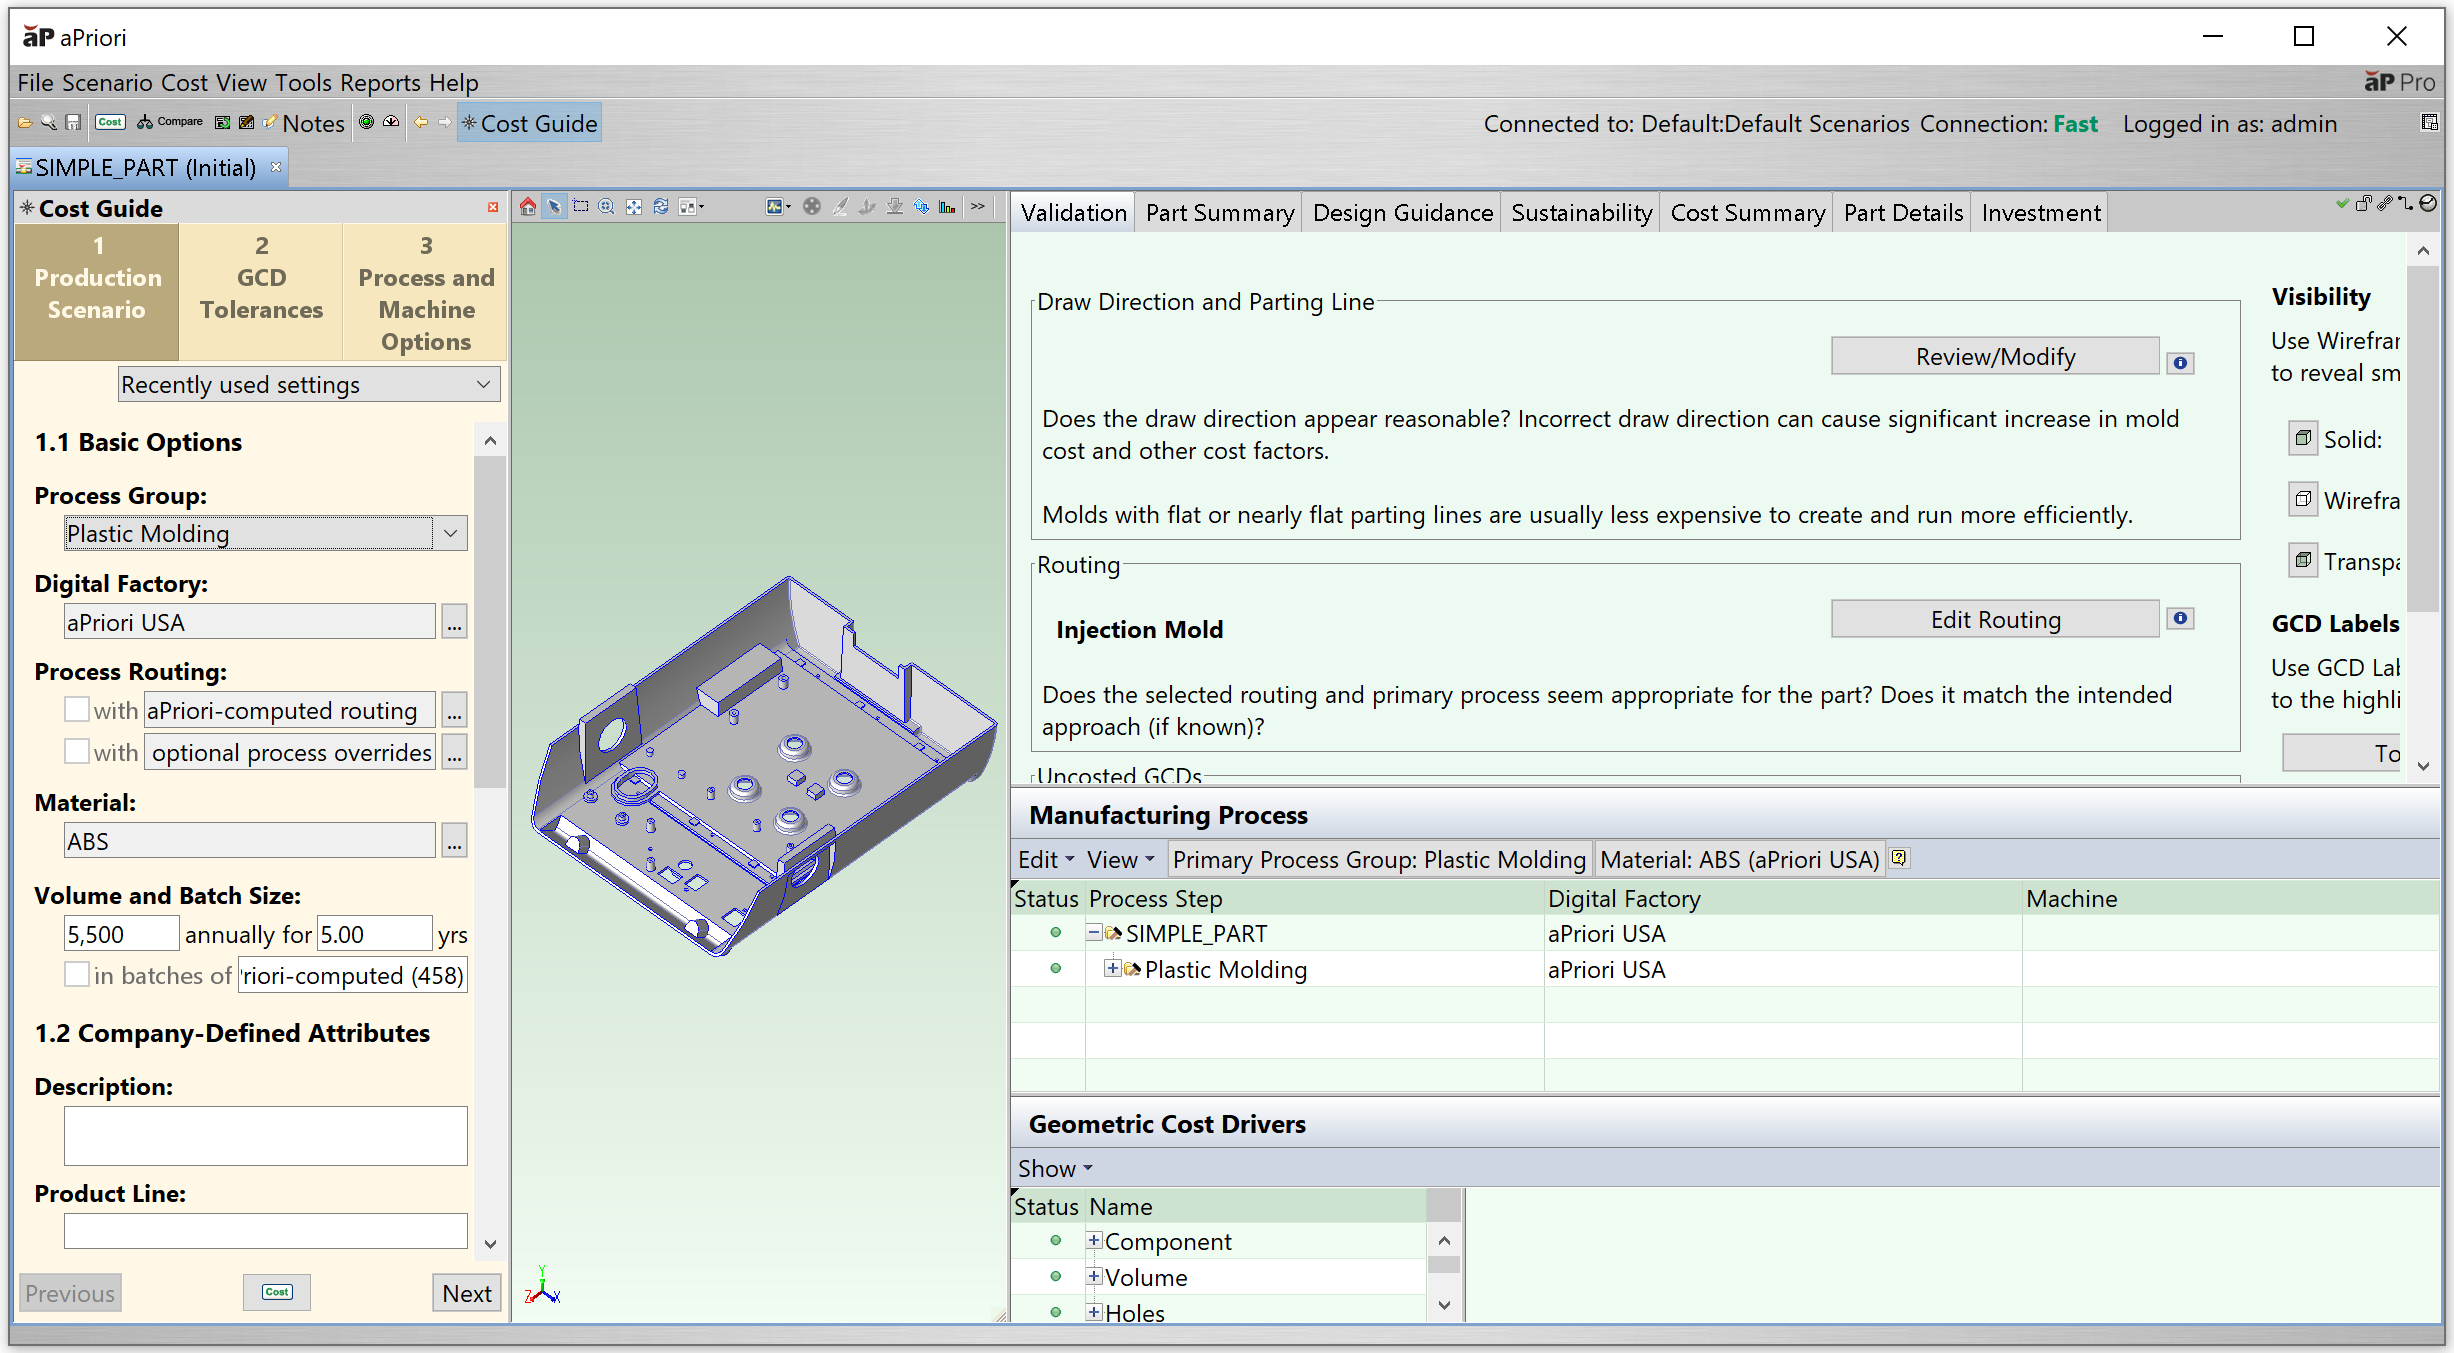
Step 2: Set Component Inputs
Use the Cost Guide on the left of your aP Pro window to quickly enter or modify inputs for your new component:
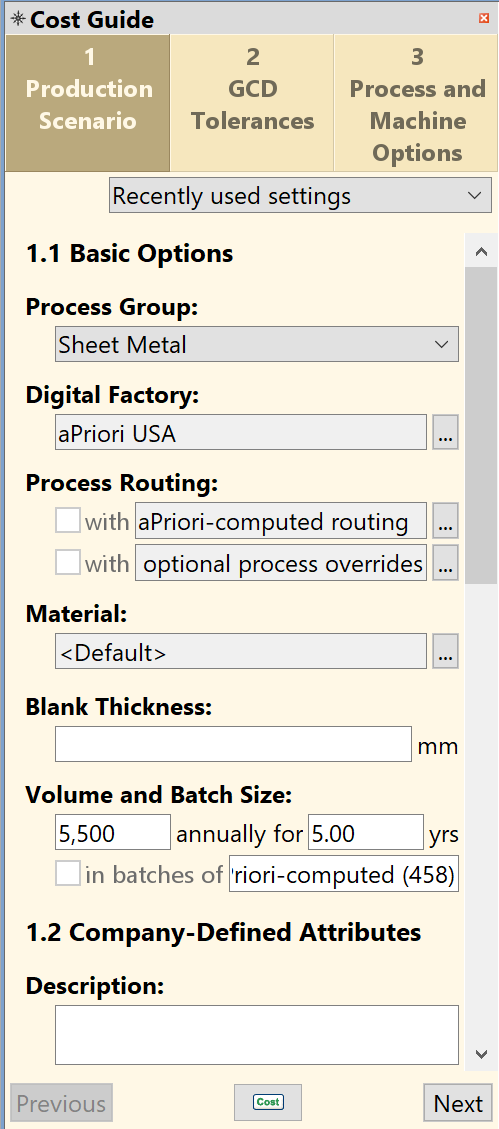
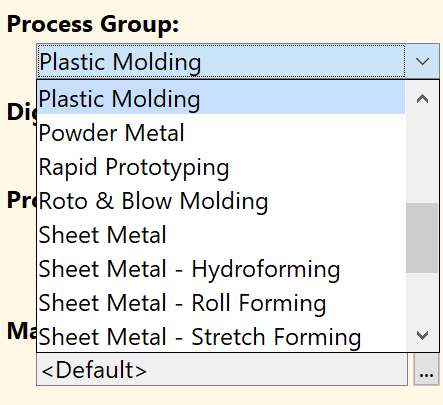
For example, you may want to ensure that the Process Group entry reflects your desired manufacturing approach for that component:
Note: Typically, you will also want to modify other inputs, such as Digital Factory, Material, and Volume, before you analyze the part, but you can always get a quick, initial result by going straight to analysis.
See Analyze Components with the Cost Guide for more details.
You can now analyze (cost) the component.
Step 3: Analyze the Component
Use the Cost button ( ) to analyze the component, based on your inputs.
aP Pro will process and analyze routing variants based on your selected inputs and the component CAD data, then assigns logic and creates analysis calculations.
After analysis, aP Pro displays recommended results for that component, populating the manufacturing output information (such as the Cost Summary tab)
See Costing Functions for more details.
Next, you can review these analysis results.
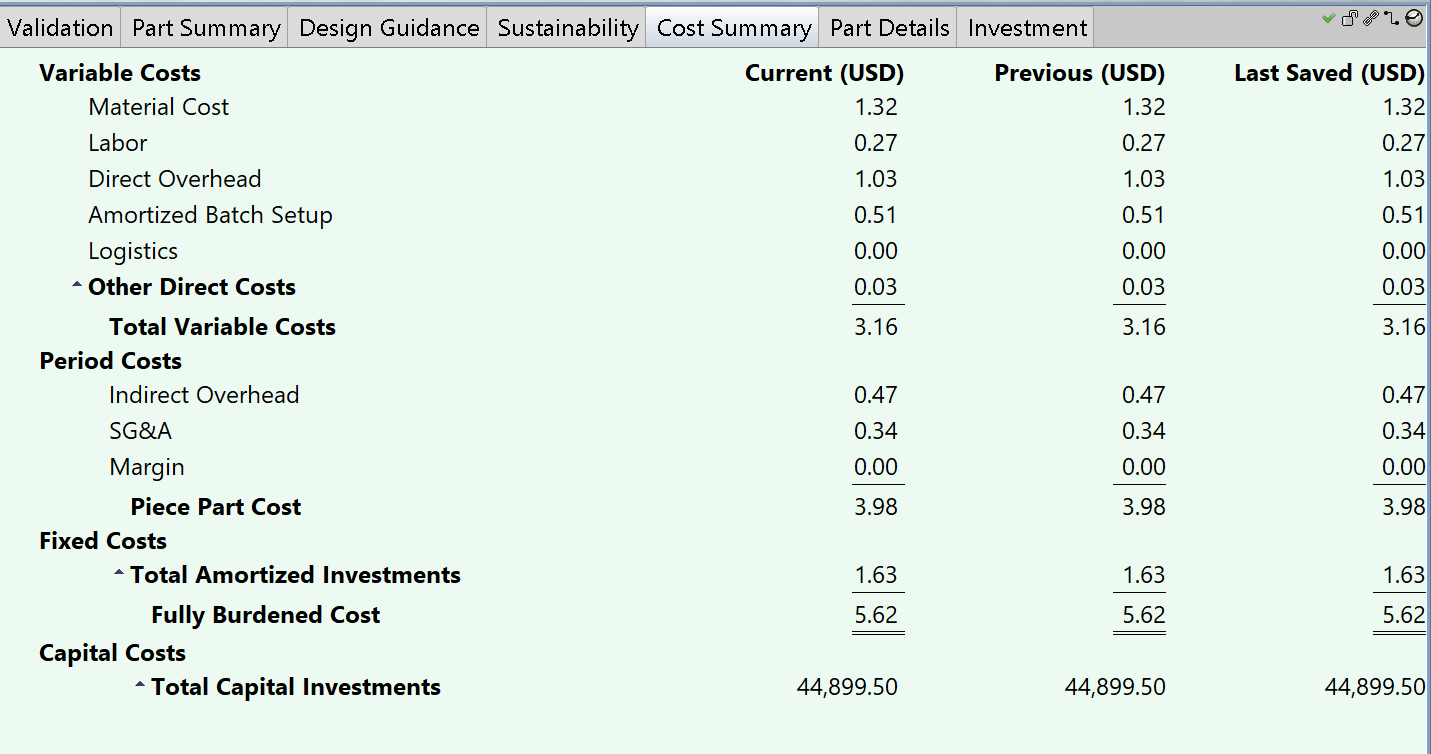
Step 4: Review Results
You can now review the output results from your analysis and make any necessary changes.
For example, select the Cost Summary tab to see cost results for your analysis:
See Review Analysis Results for more details.
You can then repeat this process, editing inputs and re-costing scenarios as part of your component analysis process .