Create Workflow Folders in the aP Connect Root Folder
File System integration allows aP Connect Workflows to read from and write to an aP Connect Root Folder that you create on your machine or server. The aP Connect Root Folder stores the inputs, CAD models and other production and manufacturing information (PMI), for the Workflow job. The aP Generate
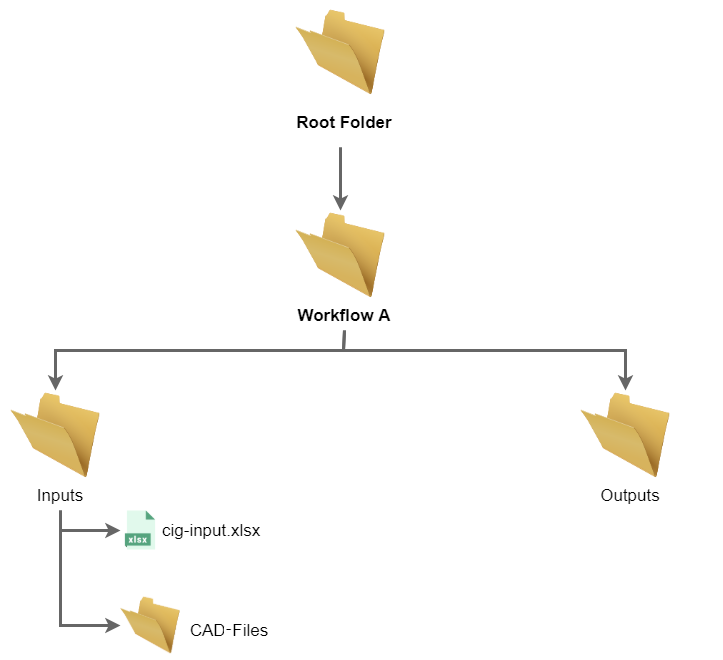
You create the aP Connect Root Folder as a prerequisite to the File System Agent installation. You also create a Connector in aP Connect Insight Connect as a prerequisite to the File System Agent installation. Then, when you install the Agent, you associate it with both the Connector in aP Connect and the aP Connect Root Folder on your machine or server. When you create a Workflow that uses the Connector that is associated with the Agent, aP Connect populates the aP Connect Root Folder with a subfolder named <WorkflowName> where WorkflowName is the name of the newly created Workflow. The <WorkflowName> subfolder contains these two subfolders:
-
Inputs – The inputs folder contains a:
- Subfolder that is named cad-files – Folder for storing CAD models for aP Design analyses.
- Spreadsheet that is named cig-input.xlsx – Spreadsheet for storing production and manufacturing inputs for aP Design analyses.
-
Outputs – Folder for storing production and manufacturing outputs for aP Design analyses.
For example, the figure shows a root folder that is named CIC Root Folder. It contains a folder for a Workflow that is named Workflow. The Workflow folder contains an inputs subfolder and an outputs subfolder. The inputs subfolder contains a subfolder for CAD-files and a spreadsheet for manufacturing and production inputs.
Prerequisites
Before you create the Workflow, make sure that the Connector that is associated with the aP Connect Root Folder is connected to the folder. For more information, see Confirm an aP Connection.
Create Workflow Folders in the Root Folder
-
In aP Connect, in the header bar, click Workflows.

-
In the Workflows page, click New.
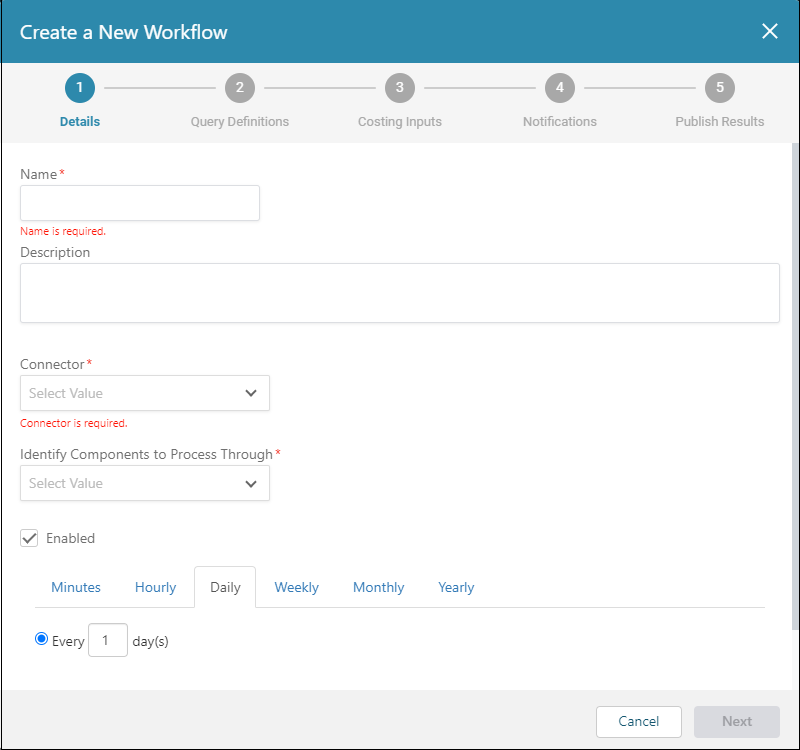
 The Create a New Workflow dialog opens.
-
In the Create a New Workflow dialog:
- Enter a Name.
- Optionally, enter a Description.
- For Connector, select the File System Connector that is associated with the aP Connect Root Folder that you want to populate.
Note:
When a File System Connector is specified for Connector, the Identify Components to Process Through field is automatically set to Spreadsheet.
- Click Next.
-
For the Costing Inputs settings, click Next.
- For the Notifications settings, click Next.
- For the Publish Results settings, click Save.
- On the applicable machine or server, navigate to and open the folder the aP Connect Root Folder.
The folder should now contain a folder that has the same name as the Workflow. The Workflow folder should contain an inputs subfolder and an outputs subfolder. The inputs subfolder should contain a subfolder for CAD-files and a spreadsheet for manufacturing and production inputs.
Before you can run the Workflow, you must manually add the relevant:
- CAD files to the CAD-files subfolder
- Input information to the cig-input.xlsx spreadsheet