Create a Connector
aP Connect Connectors enable communication and map fields between aP Connect and your PLM system. You cannot create a Workflow unless you first create a Connector.
Creating a Connector:
-
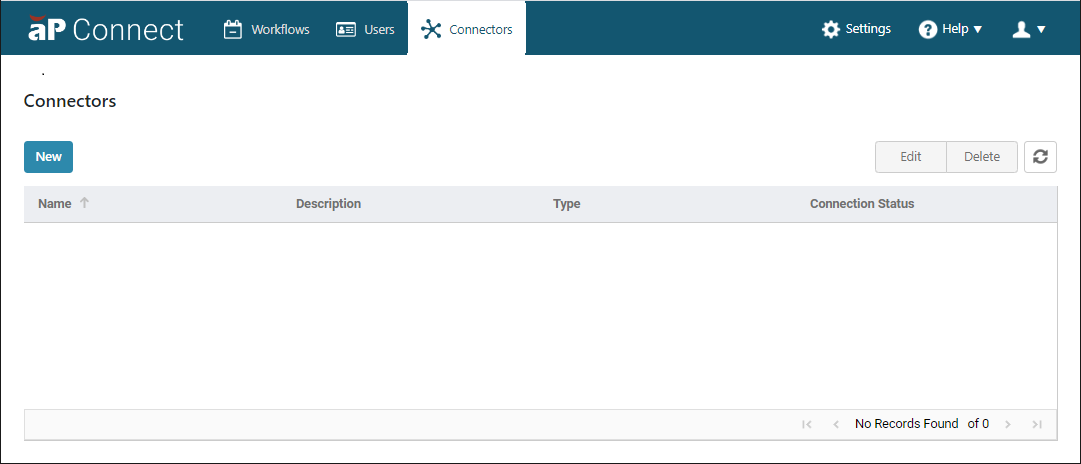
Open the Connectors page. In the aP Connect header bar, click Connectors.
-
On the Connectors page, click New.
Tip
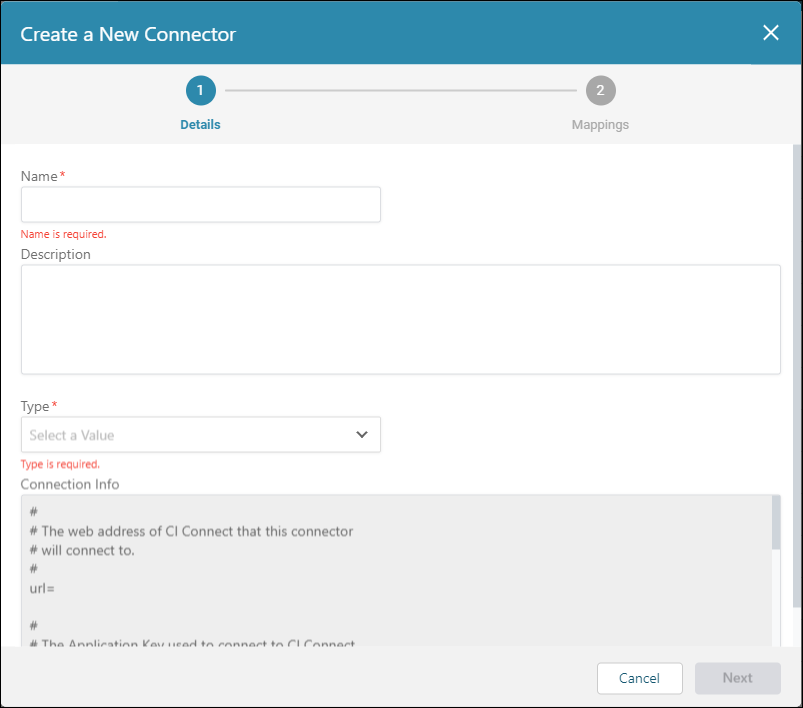
The Details settings contain a field called Connection Info, automatically populated by aP Connect after the Connector is first saved. You can reference this information during your Agent installation.
-
In the Details settings, populate the following:
-
Name – Enter a name for the connector.
-
Description – Optionally, enter a description for the connector.
-
Type – Select your connector type. For a PLM integration, the options are Windchill, and Teamcenter. There is also an option for a File System integration. After you create a Connector, you cannot change the Connector Type.
-
Use certificate-based authentication (mTLS) instead of IP allowlisting - Select if you want to use certificate-based authentication (mTLS).
Note
If using certificate-based authentication (mTLS): obtain a signed certificate from aPriori before Agent installation, then provide the certificate and private key during installation. When enabled, note the
urlchanges to use port 8443.
-
-
Click Next to open the Mapping settings.
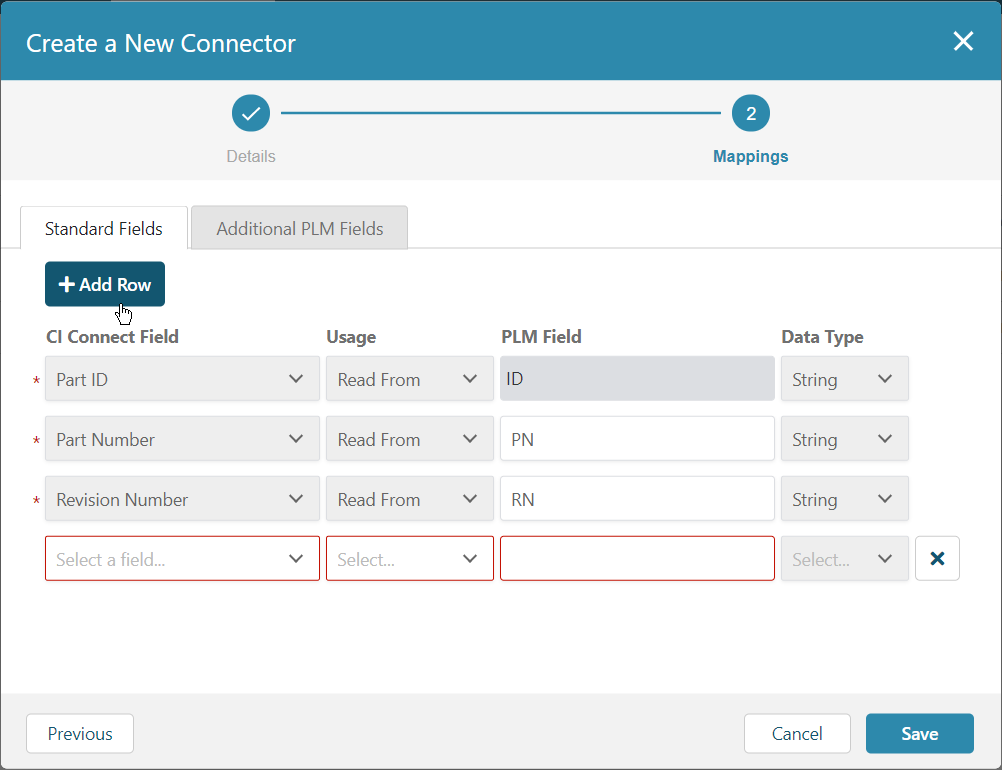
The Mapping settings open to the Standard Fields tab, which contains several prepopulated rows. A red asterisk indicates that you must configure a mapping for the adjacent row. Red outlines on empty data-entry boxes indicate that the value is required.
You cannot change a mapping setting that is greyed out because it is a preset mapping for the selected Connector type. You can change the value of a prepopulated field that is not greyed out because the provided value is a default value, not a preset value.
The required aP Connect Field mappings depend on the selected Connector type:
-
Teamcenter Connector mandatory mappings:
-
Part Number – There is no preset or default mapped PLM Field.
-
Sequence ID– The default mapped PLM Field is sequence_id.
-
Part ID – The preset mapped PLM Field is uid.
-
Revision Number – There is no preset or default mapped PLM Field.
-
-
Windchill Connector mandatory mappings:
-
Part Number – There is no preset or default mapped PLM Field.
-
Part ID – The preset mapped PLM Field is id.
-
Revision Number – There is no preset or default mapped PLM Field.
-
-
File System Connector mandatory mappings:
-
Part ID – There is no preset or default mapped PLM Field.
-
CAD File Name – There is no preset or default mapped PLM Field.
-
aPriori Part Number – There is no preset or default mapped PLM Field.
For each empty field, enter the PLM Field that corresponds to the standard required aP Connect Field.
-
-
-
After you map PLM fields to the required standard aP Connect Fields, you can:
-
Save the Connector and close the window – Click Save.
-
Add optional mappings for Standard Fields – Click + Add Row.
-
Add optional mappings for Additional PLM Fields – Click the Additional PLM Fields tab.
If you click + Add Row, a new mapping row appears.
For each row that you add, configure these settings:
-
aP Connect Field – Name for the mapped field in the aP Connect database. Select the value from the dropdown menu.
-
Usage – Whether aP Connect reads data from, writes the data to, or can both read data from and write data to the PLM database field. Select the value from the dropdown menu.
-
PLM Field – Name for the mapped field in the PLM database. Enter the value in the field.
The Data Type for standard Cost Insight fields is automatically set as a function of the value that you select for the aP Connect Field. Possible data types are String, Number, Date Time, Integer, and Email.
Note:
You can delete mappings only while you are creating a Connector. You cannot delete pre-existing mapping from a Connector when you edit it. To delete a mapping, click the X button that appears to the right of the mapping.
-
-
After you map PLM fields to the standard aP Connect Fields, you can either:
-
Save the Connector and close the window – Click Save.
-
Add optional mappings for Additional PLM Fields – Click the Additional PLM Fields tab.
-
-
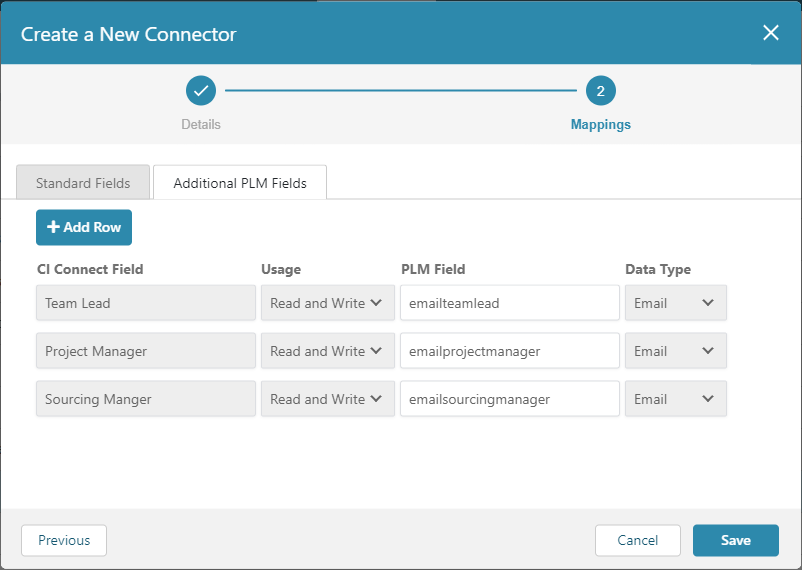
If you click the Additional PLM Fields tab, the Additional PLM Fields settings opens.
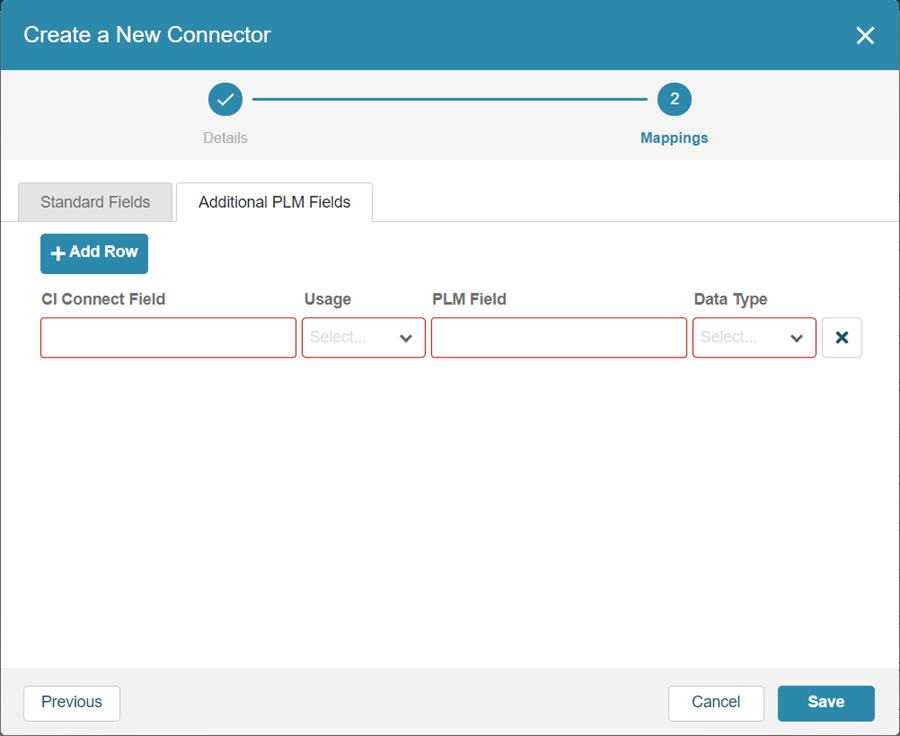 To add a new mapping – Click Add a Row and then enter or select values for each of these settings:
-
aP Connect Field
-
PLM Field
-
Usage
-
Data Type
For example, as this figure shows, you can create one or more aP Connect Fields that map to PLM Fields that store email.
Note:
You can delete mappings only while you are creating a Connector. You cannot delete pre-existing mapping from a Connector when you edit it. To delete a mapping, click the X button that appears to the right of the mapping.
- To save the Connector, click Save.
-