Review, Examine, and Export Workflow and Job Information
aP Connect generates job details for each Workflow job, that is, each time a Workflow is executed. You can review the Workflow history, examine the details for individual jobs, and export job details from the View History tab on the Workflows page.
Review the Workflow History:
- Open the Workflows page. In the aP Connect header bar, click Workflows.
-
Open the View History tab. Click View History.
This tab contains this table.
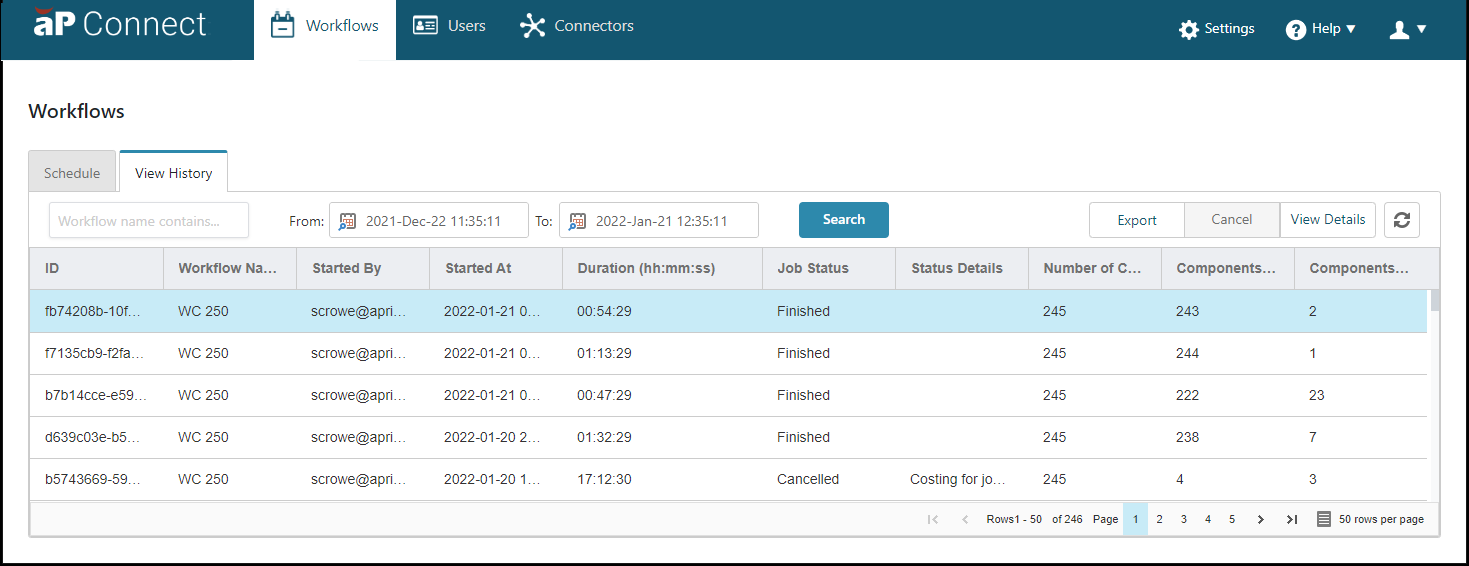
The table on the View History tab includes these column headings:
- ID – Job ID as assigned by aP Connect
- Workflow Name – Name of the Workflow as specified in the Workflow details settings
- Started By – Email address of the person that started the job, either via Workflow or by invoking it
- Started At – Time that the job started
- Duration (
hh:mm:ss) – Length of execution time for the job - Job Status – State of the job, for example, Finished or Processing
- Status Details – More detailed information about the state of the job, as applicable
- Number of Components – Number of components returned by the Workflow query
- Components Processed – Number of components that have finished execution
- Components Failed – Number of components that have failed
You can:
- Search for specific jobs – As applicable enter part or all of the Workflow name in the search window, configure the From and To date menus, and then select Search.
- Change the order of the column headings by dragging and dropping a column heading.
- Change the width of a column by pulling the edges of the column heading.
- Using the page menu in the lower right corner of the table to navigate to another page or to adjust the table to include 5, 10, 25, 50,or 100 rows per page.
Export the Workflow History:
- Open the Workflows page. In the aP Connect header bar, click Workflows.
- Open the View History tab. Click View History.
- Click Export.
The Workflow history is exported and downloaded to your machine in a csv file. You can open the file using a spreadsheet application such as MS Excel.
Examine the Details for an Individual Workflow Job:
- Open the Workflows page. In the aP Connect header bar, click Workflows.
- Open the View History tab. Click View History.
- To search for the job, enter part or all of the Workflow name in the search window, and, as applicable, configure the From and To date menus, and then select Search.
- Select the row that contains the job that you want to examine.
-
Click View Details.
The Job Details window opens.
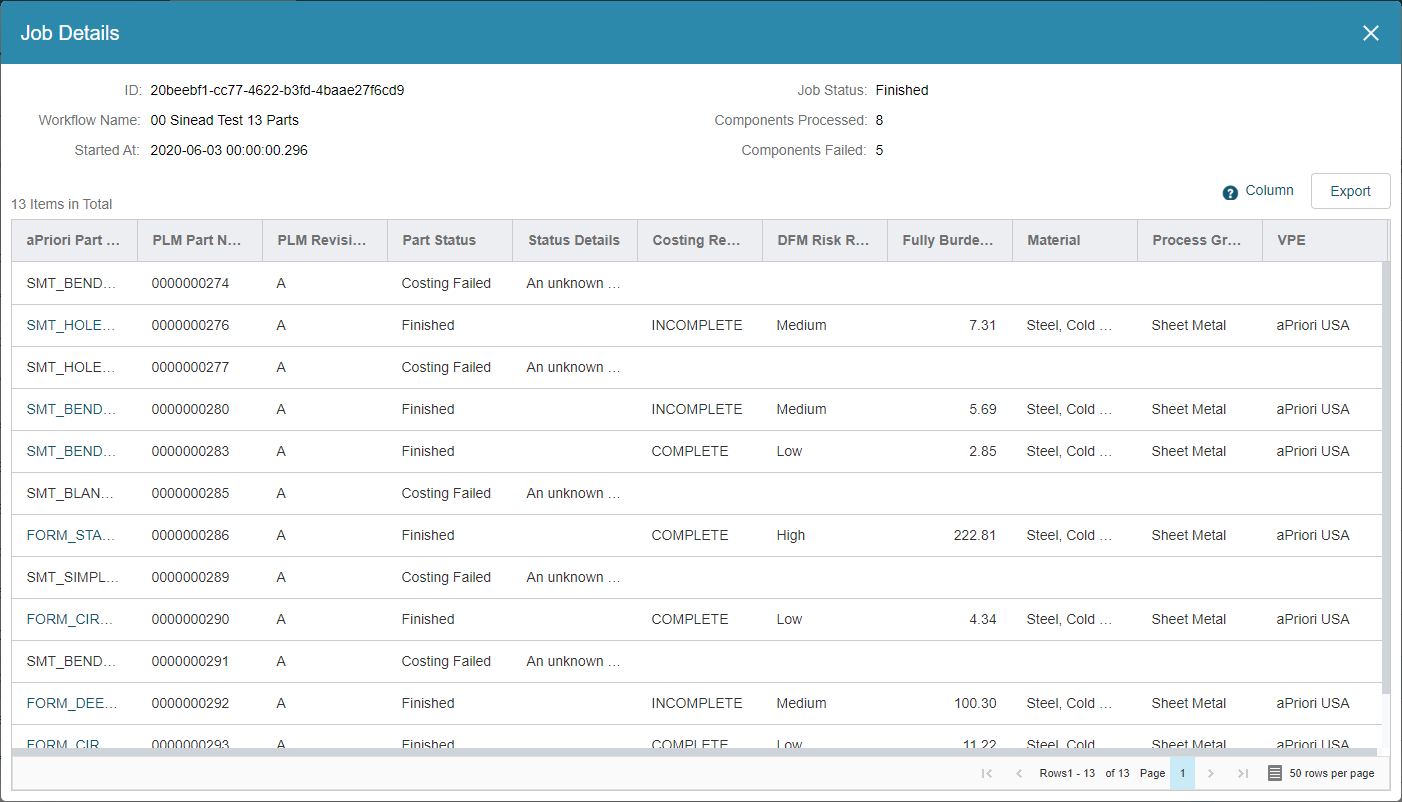
The Job Details window includes information such as:
- ID – Job identifier, as automatically generated by aP Connect
- Workflow Name – Name of the Workflow, as specified in the Workflow details settings
- Started At – Timestamp, to the nearest second, when Workflow started
- Duration – Total time elapsed, if finished. Total time elapsed so far, if processing
- Job Status – State of the job, for example, Finished or Processing
- Components Processed – Number of components that have finished execution
- Components Failed – Number of components that have failed
You can choose which columns appear in the table. To do so, right click the right side of the column heading that is on the far-right side of the table. In the menu that opens, select the columns that you want to show and clear the columns that you want to hide.
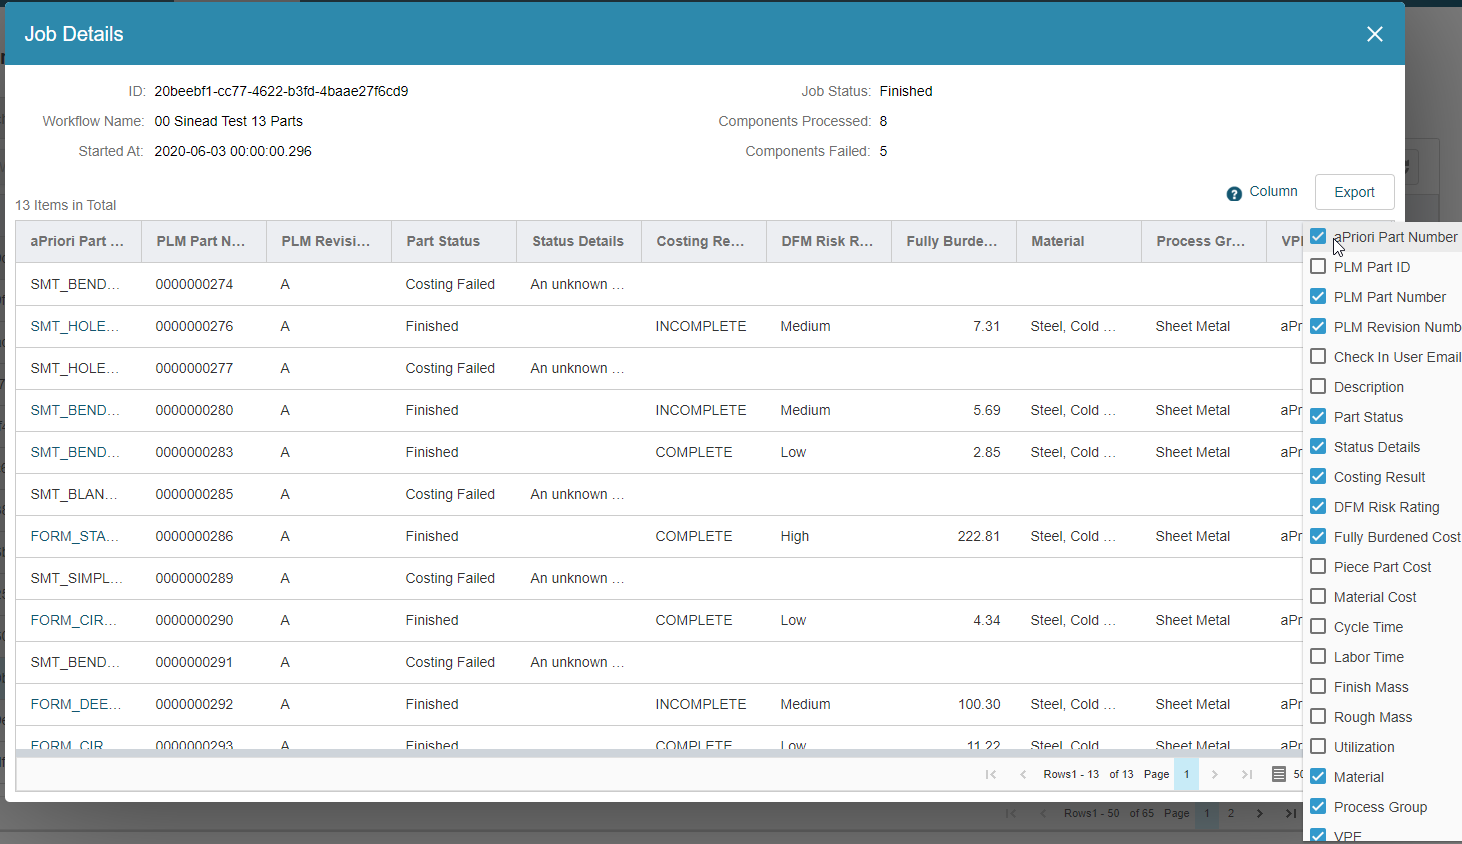
The column headings that you can select are:
- aPriori Part Number
- PLM Part ID
- PLM Revision Number
- Check In User Email
- Description
- Part Status
- Status Details
- DFM Risk Rating
- Fully Burdened Cost
- Piece Part Cost
- Material Cost
- Cycle Time
- Labor Time
- Finish Mass
- Rough Mass
- Utilization
- Material
- Process Group
- Digital Factory
- Process Routing
You can also:
- Change the order of the column headings by dragging and dropping a column heading.
- Change the width of a column by pulling the edges of the column heading.
- Using the page menu in the lower right corner of the table to navigate to another page or to adjust the table to include 5, 10, 25, 50,or 100 rows per page.
Export the Job Details:
- Open the Workflows page. In the aP Connect header bar, click Workflows.
- Open the View History tab. Click View History.
- To search for the job that you are interested in, enter part or all of the Workflow name in the search window, and, as applicable, configure the From and To date menus, and then select Search.
- Select the row that contains the job that you are interested in.
-
Click View Details
The Job Details window opens.
Note:
Regardless of which columns are displayed in the Job Details window, all columns are exported in the exported file.
-
Click Export.
The job details are exported and downloaded to your machine in a csv file. You can open the file using a spreadsheet application such as MS Excel.