Create a PLM Connector
This example shows how to create a connector for a Product Lifecycle Management (PLM) integration in aP Connect.
Prerequisites
Before you create a PLM Connector, obtain the required field names. For more information, see Attribute Field Mappings.
Create a PLM Connector
To create a Connector for a PLM integration:
-
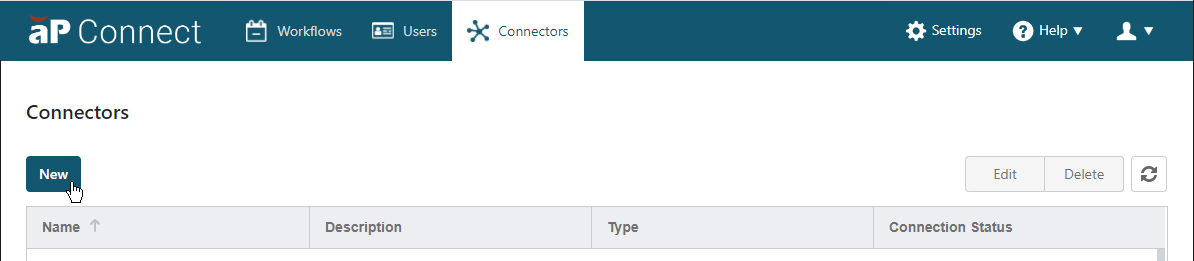
Log in to aP Connect and then, in the aP Connect header bar, click Connectors.

-
In the Connectors page, click New.
-
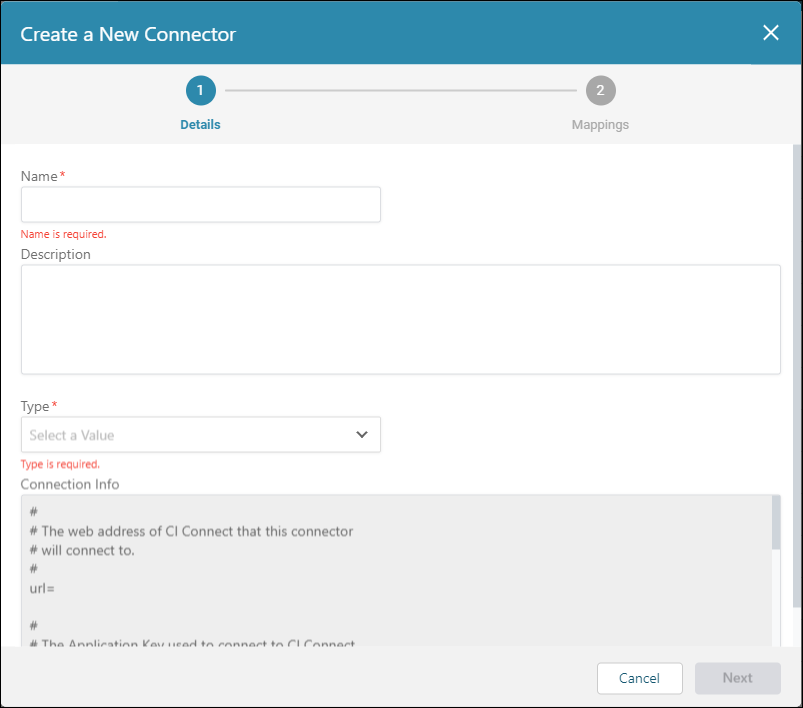
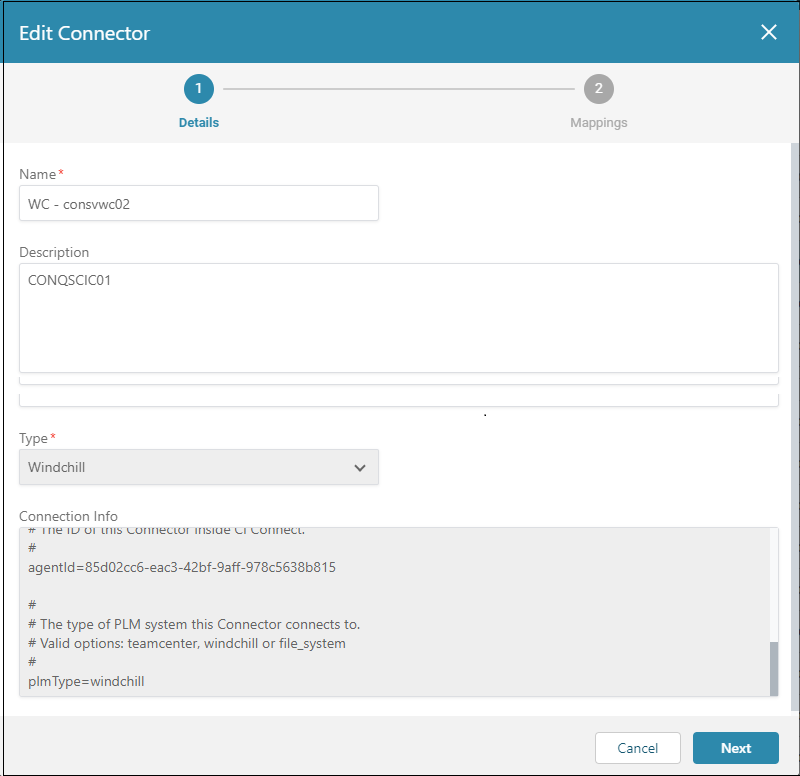
The Create a New Connector dialog opens to the Details settings.
-
In the Details settings, populate the following:
-
Name – Enter a name for the connector.
-
Description – Optionally, enter a description for the Connector.
-
Type – Select the type of PLM integration. Choose between:
- Teamcenter
- Windchill
-
Use certificate-based authentication (mTLS) instead of IP allowlisting - Select if you want to use certificate-based authentication (mTLS).
Note
If using certificate-based authentication (mTLS): obtain a signed certificate from aPriori before Agent installation, then provide the certificate and private key during installation. When enabled, note the
urlchanges to use port 8443. -
Click Next.
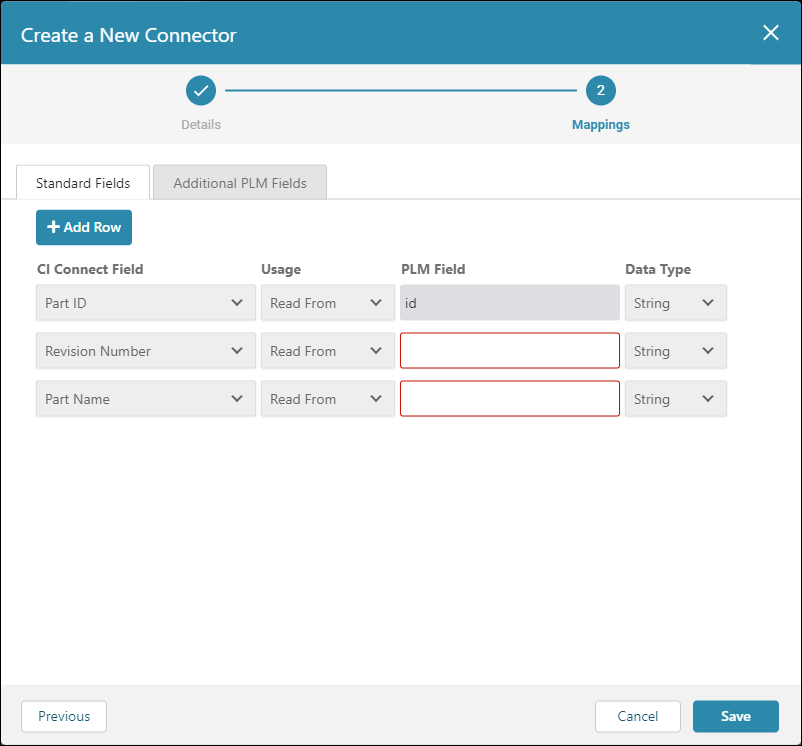
The Mappings settings open to the Standard Fields tab.
Note:
The fields that appear depend on the specified type of PLM integration.
-
-
On the Standard Fields tab:
-
Specify mapping values for the required fields as indicated by this table.
PLM System Required CIC Field Default PLM Field TeamCenter® Part ID uid TeamCenter® Part Number – TeamCenter® Revision Number – TeamCenter® Sequence ID sequence_id. Windchill® Part ID ID Windchill® Revision Number – Windchill® Part Number – -
Click Save.
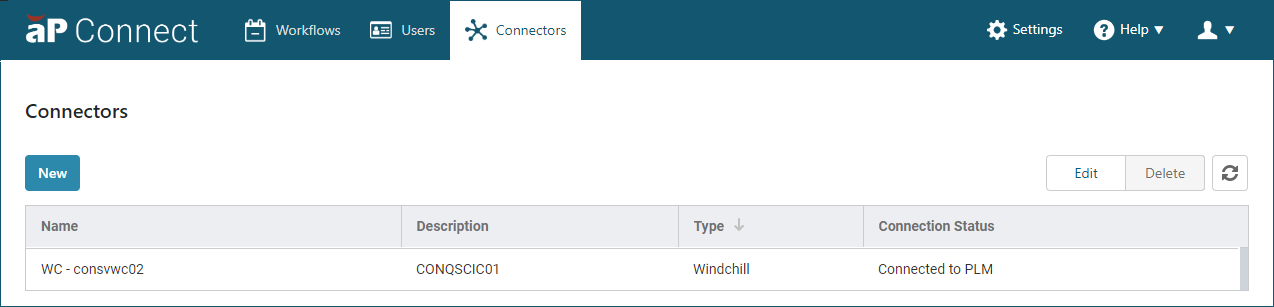
The newly created connector appears in the list on the Connectors page.
-
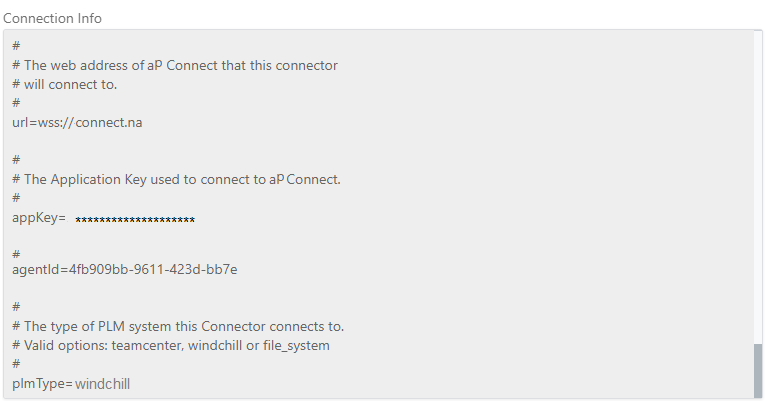
Reference the Connection Info
When you create a connector, properties that are required for an Agent installation are written to the *Connection Info* field. For more information, see Installation Configuration Properties.
To view the properties:
-
On the Connectors page, scroll or sort to and then select the row that contains the newly created connector and then click Edit.
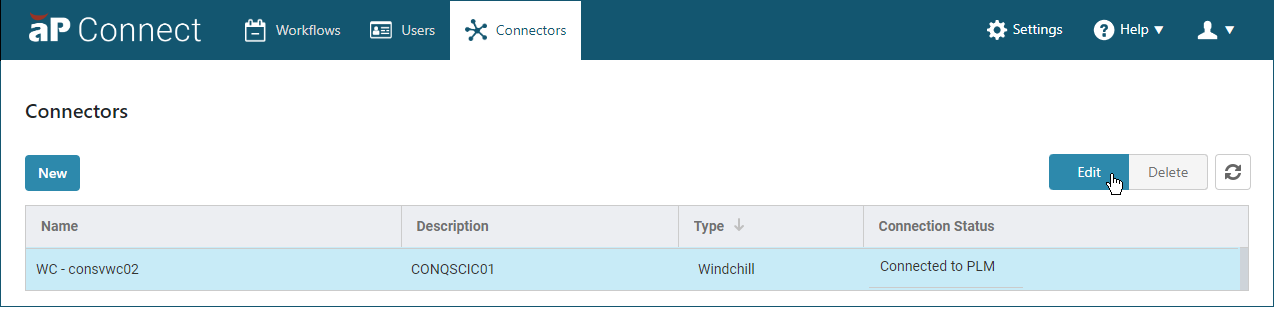
The Edit Connector dialog opens.
-
In the Connection Info field, scroll to examine all the properties.
-
To close the dialog, click Save.