Scenario Override Options
Cost Insight Design (CID) Release Notes 2021 R1 SP1
Override a pre-existing scenario for a given component that has the same name as a scenario that you want to create or publish for that component.
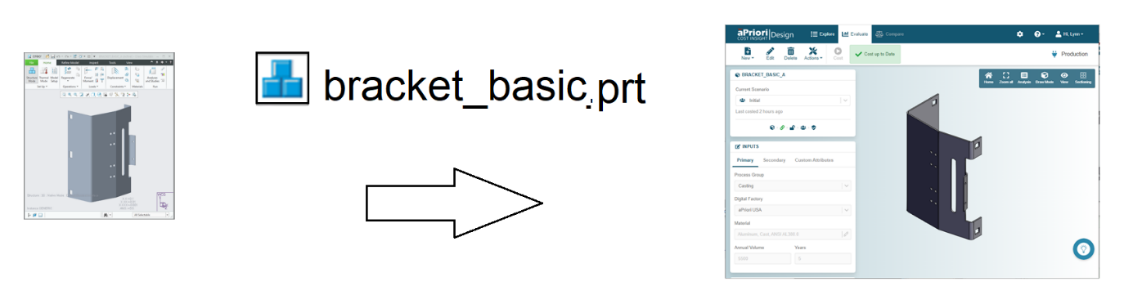
When a CAD file is uploaded to an aPriori application such as aPriori Professional or Cost Insight Design, the application creates a component that has the same geometric features as the model in the CAD file.
Note
aPriori Professional, the Component Name is referred to as the Name/Part#.
The application then creates a scenario for the component. Both the component and the scenario have names. The name of the component, which is automatically assigned by the aPriori application, is the uppercase version of the name of the CAD file. The default scenario name is initial, but the aPriori application allows users to provide a different scenario name prior to the upload of the CAD.
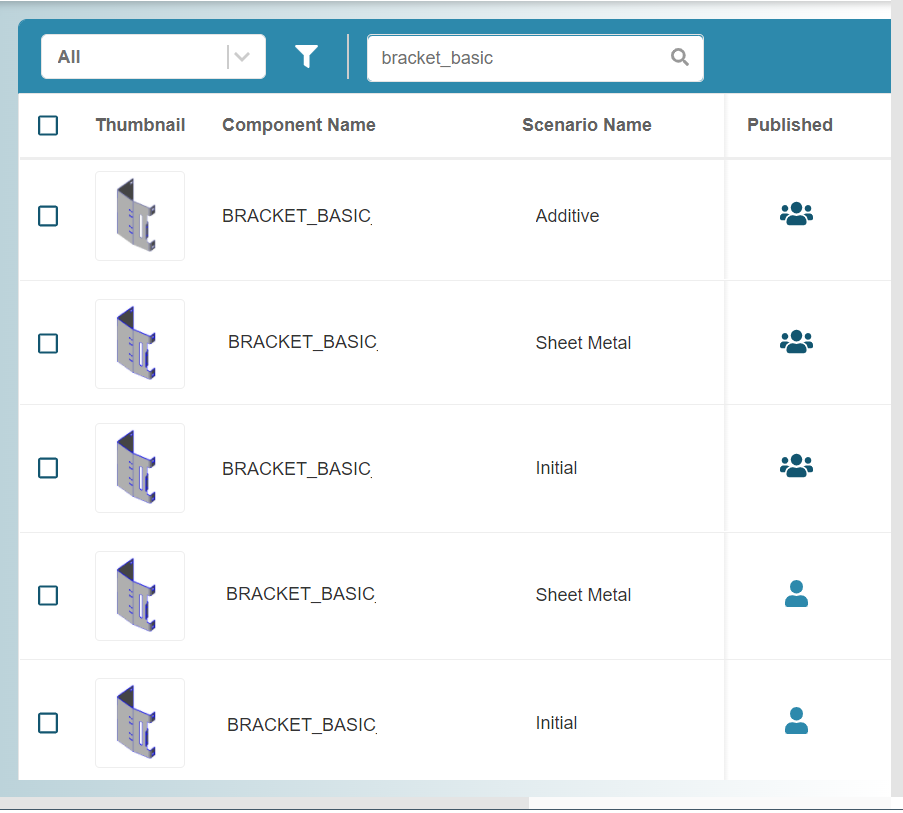
For example, if you upload a CAD file named bracket_basic to Cost Insight Design using the default setting for the scenario name, Cost Insight Design creates a component named BRACKET_BASIC and then creates a scenario for the BRACKET_BASIC component that is named Initial. As this figure shows, Cost Insight Design sometimes displays the component and scenario names as COMPONENT Name / Scenario Name.

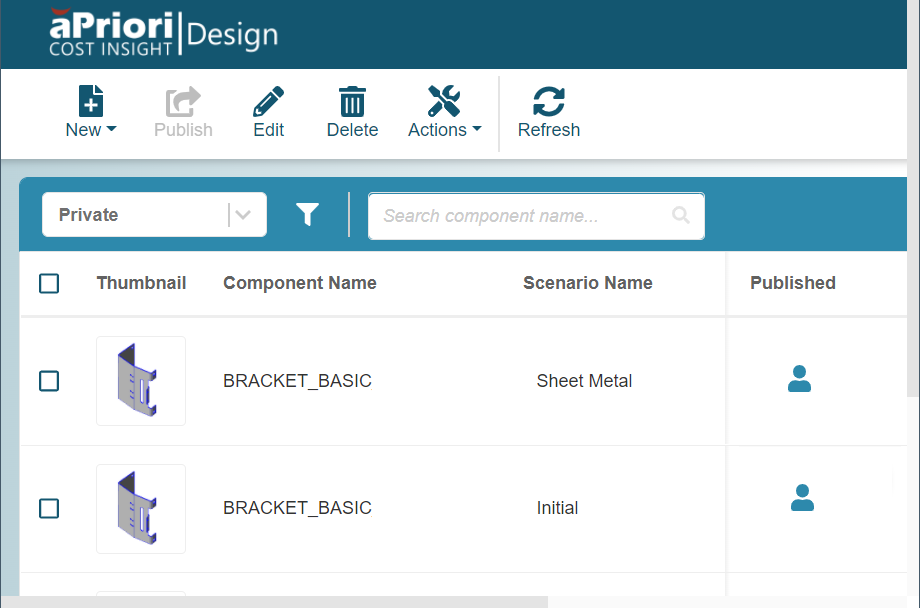
There can be multiple scenario for the same component. However, in any given workspace, every scenario for a given component must have a unique name. For example, you can have one scenario for the BRACKET_BASIC component in your private workspace that is named Initial, and a second that is named Sheet Metal.
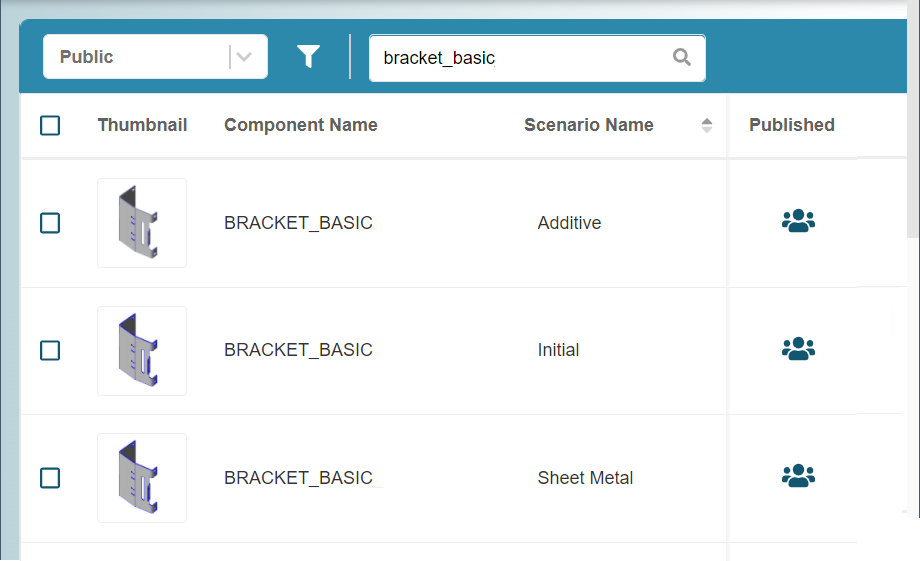
There could also be several scenario for the BRACKET_BASIC component in the public workspace, but they must each have a name that is unique from the other scenario for the for the BRACKET_BASIC component that are in the public workspace.
It is possible for a given scenario for a given component to have several instances, each having the same scenario and component name as long as each instance is in a different workspace. For example, it is possible for there to be one scenario that is named Initial for a component that is named BRACKET_BASIC in the public workspace and a second scenario that is named Initial for a component that is named BRACKET_BASIC in your private workspace.
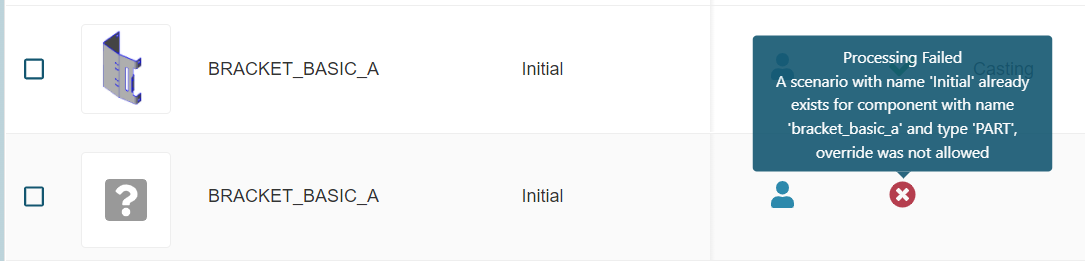
If there is a given scenario for a given component in your private workspace and you try to upload a CAD model that has the same name as the pre-existing component and supply or default to a scenario name that is the same as the name for pre-existing scenario for the component, the upload process fails because the Component Name / Scenario Name that you are trying to upload not unique from the pre-existing Component Name / Scenario Name.
For example, if your private workspace contains a scenario named Initial for a component named BRACKET_BASIC, and you upload a CAD file named Bracket_Basic and supply or default to Initial for the scenario name, the CAD model does not upload correctly.
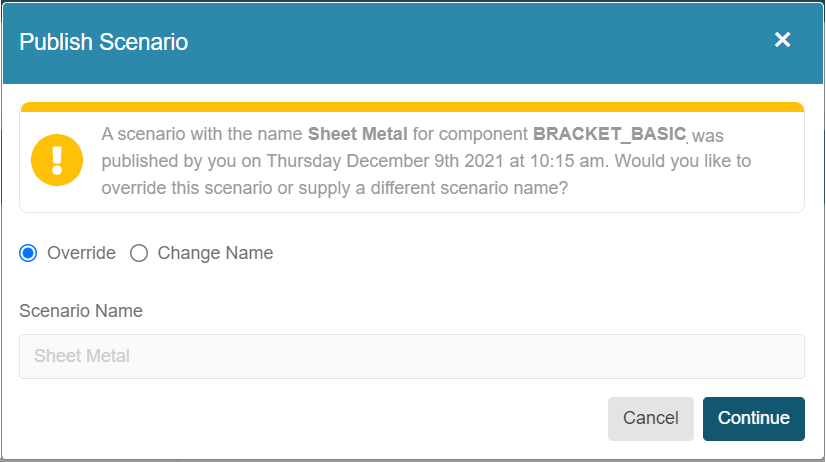
Furthermore, you cannot publish a given scenario for a given component from your private workspace to the public workspace if there is already a matching Component Name / Scenario Name in the public workspace. Likewise, you cannot copy a given scenario for a given component from the public workspace to your private workspace by using the Edit button if there is already a matching Component Name / Scenario Name in your private workspace.
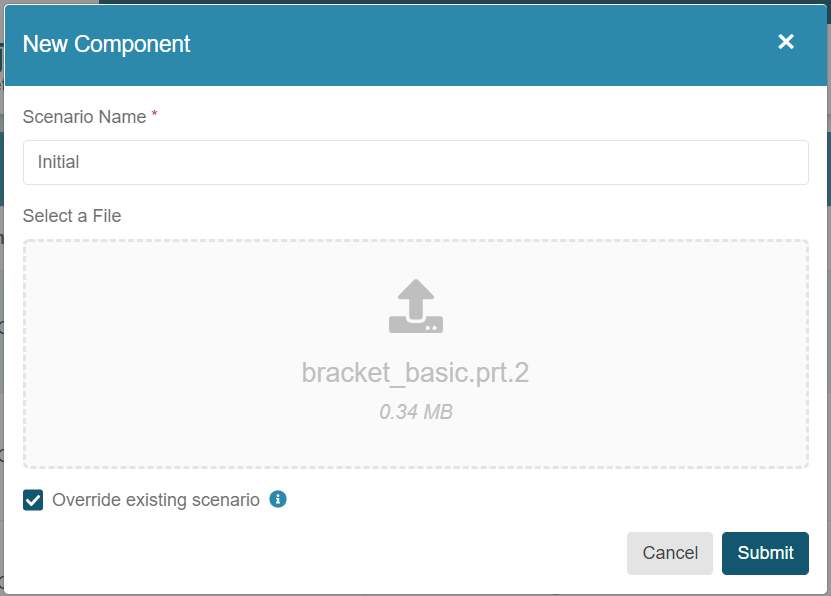
In this release, when you upload a CAD file, Cost Insight Design allows you to override scenario for a given component with a new scenario that has the same name as the pre-existing scenario. You can use the override option when you:
- Upload a CAD file that has the same name as a pre-existing component in your private workspace. To override the pre-existing scenario, enter or default to the name of the pre-existing scenario and select the Override existing scenario check box.
- Create a private version of a public scenario by editing the public scenario. To override the pre-existing scenario, enter or default to the name of the pre-existing scenario and select the Override option.
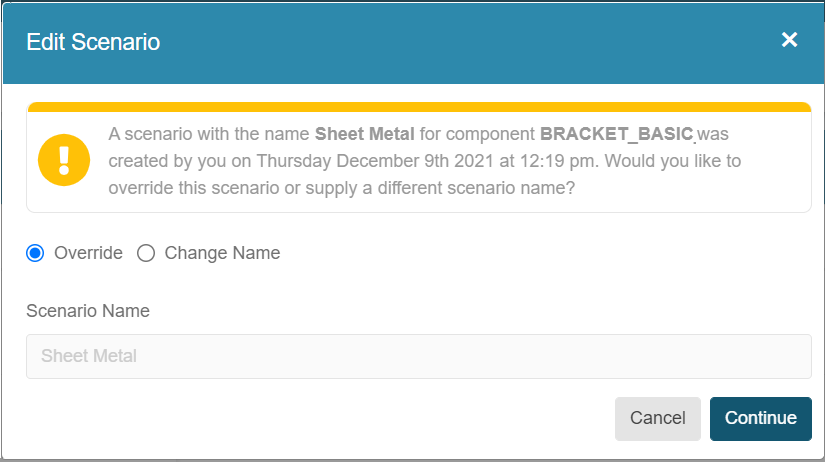
- Publish a scenario that has the same name as a public scenario for the same component. To override the pre-existing scenario, enter or default to the name of the pre-existing scenario and select the Override option.