Analyze a Simple Part
After you open a part (see Open a Simple Part), you can then analyze it, based on the part component geometry, and the part scenario PMI.
Info
Before you analyze a part, you should review and configure the PMI values for the part's scenario.
Note
This topic describes how to analyze a part using the aPriori engine. You can also provide details manually; see Provide Costs Manually.
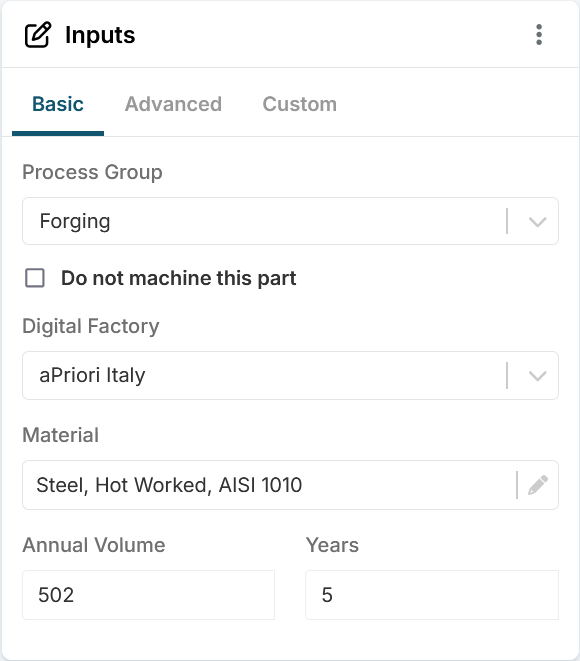
Set Inputs
Use the Inputs tile > Basic tab to select key inputs. See Set Scenario Inputs.
Tip
The part is loaded with the default production settings already set, so you can analyze the part without changing these settings if they match the parameters you want to simulate.
- Process Group: the type of manufacturing, which sets how aP Design analyzes the CAD model’s geometry and what models to use with your part. Select a relatively simple process group, such as sheet metal. You can examine the geometry of the part by using the tools in the viewer control panel, even if the current scenario has never been analyzed.
- Digital Factory: the virtual production environment for the scenario.Choosing the one that seems most applicable based on your knowledge about your organization's manufacturing shop or supplier.
-
Material: a material for the scenario.
In the Material Selector dialog, expand the Material Mode dropdown menu and select an option.
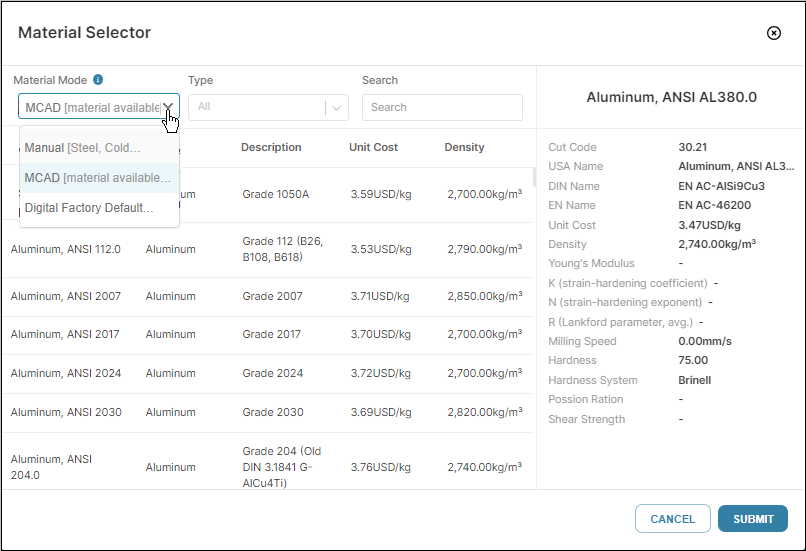
For this example, the options for Material Mode are:
-
Manual: Manually select a material. Use the Type filter and Search tool to find a specific material.
-
Digital Factory Default: aP Design automatically selects the default material for the specified Process Group and Digital Factory.
-
MCAD: aP Design uses the material defined in the imported CAD file; the Material name must exactly match material name in the selected Digital Factory. If you select this option, the material is not displayed until after the scenario is initialized (analyzed for the first time).
For this example the Digital Factory Default mode is selected. If Process Group is set to Sheet Metal and Digital Factory is set to aPriori USA, the default material is Steel, Cold Worked, AISI 1020.
When a material is selected, the properties for that material appear in the Material Selector dialog:
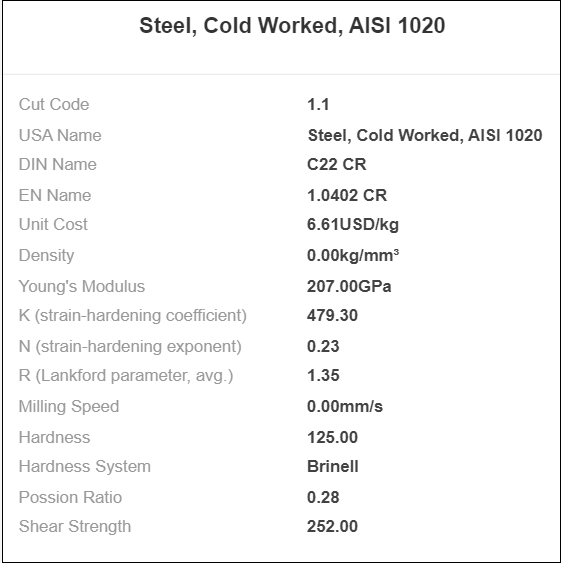
After you select a suitable material, click Submit.
-
-
Annual Volume: the number of parts to be produced per year. For this example, the default value for the selected digital factory, 5500, has been specified automatically.
- Years: the number of production years, used to amortize capital investments.For this example, the default value for the selected digital factory, 5, has been specified automatically.
Info
When you make any changes, they are highlighted in the Inputspanel.
You can also make changes to the Advanced inputs, selecting the Advanced tab. See Scenario Advanced Inputs.
Analyze the Part
On the Evaluate tab toolbar, click Analyze. aP Design then analyzes the part based on the inputs provided.
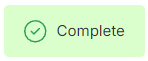
When the analysis is complete:
-
The state updates to Complete:
-
The Evaluate tab contains additional information and tools:
-
An Analysis tool appears in the viewer control panel:

-
The Design Guidance, Material & Process, and Cost Results tiles have expanded and are populated with information that summarizes the results of the analysis. An OPEN button appears in the upper right corner of each tile. Click this button to view the Explorer view for that tile, showing more detailed data.
Note
If a analysis is incomplete, review the Design Guidance results. For more information see Review Design Guidance.
Next Steps
To learn about the data that is provided once a part is analyzed, see Review Results for a Simple Part.