What's New
The 2023 R1 version of Cost Insight Design (also known as aP Design) provides these enhancements in functionality, performance, usability, or robustness.
Spreadsheet Reports for Costed Parts
Easily generate and download a CSV file of the information contained within a costed part scenario
Cost Insight Design 2023 R1 addresses a regression from an earlier release because you can once again generate and download Spreadsheet Reports for costed parts. An aPriori Spreadsheet Report is a detailed report in a print-formatted, CSV (comma-separated value) file. Spreadsheet Reports are useful because they enable you to download and share information in editable spreadsheets and printable PDF files with stakeholders that might not have the required license or access control permission for viewing your analysis in an aPriori application.
This figure shows an example of a Part Cost Report, which is a detailed cost report about a single costed part scenario that is in the first worksheet of type of Spreadsheet Report that you can now generate in Cost Insight Report.
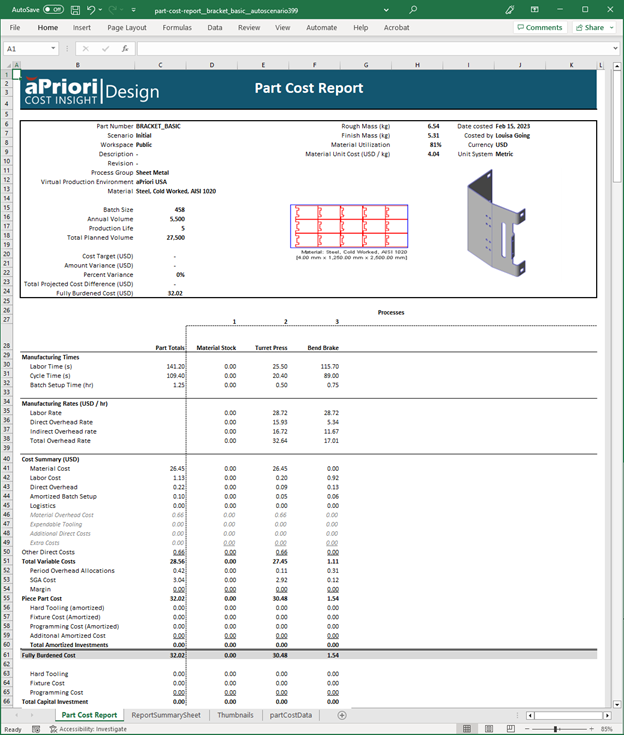
Part Cost Reports also include these worksheets:
- ReportSummarySheet – Provides the scenario name, description, and published status (Public or Private), the component name and type (part or assembly), the date the that the report was generated, and a list of thumbnails that are included in the report.
- Thumbnails – Provides a copy of each thumbnail that is included in the report.
- partCostData – Provides detailed data for each process that is used to manufacture the part given the inputs for the current scenario.
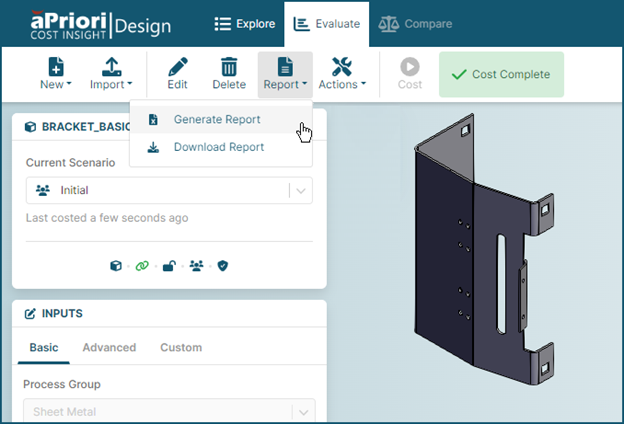
To generate and download report in spreadsheet format for your costed part:
-
In the Evaluate tab toolbar, click Report and then select Generate Report.
-
When the report has been generated, click Report and then select Download Report.
Tip
If the data is not visible when you open the downloaded report, enable editing for the report in your spreadsheet application.
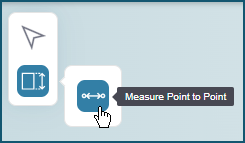
Measurement Tool for the Component Viewer
Measure physical distances in a 3D model of your part or assembly within Cost Insight Design.
While reviewing the data and, as applicable, guidance that Cost Insight Design provides for your parts and assemblies, it can be helpful to measure distances between features in your model. Previously, you could view a 3D model of your part or assembly component in the viewer on the Cost Insight Design Evaluate tab, but you had to open the CAD file in your CAD application to take any physical measurements. If you did not have access to the CAD file and to an application that supports the CAD file format, you could not readily take physical measurements of your parts and assemblies.
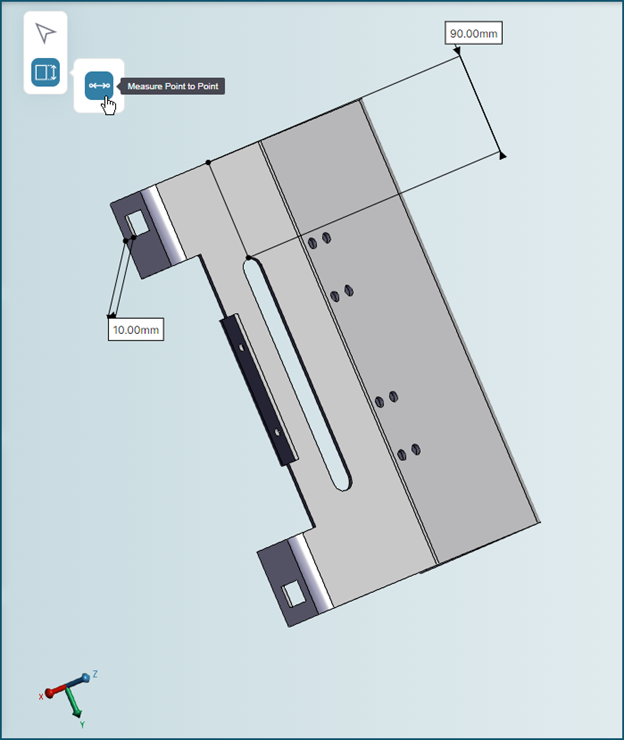
Now, as this figure shows, Cost Insight Design allows you to measure point-to-point physical distances in your part components quickly and easily by using a new measurement tool in the in the component viewer.
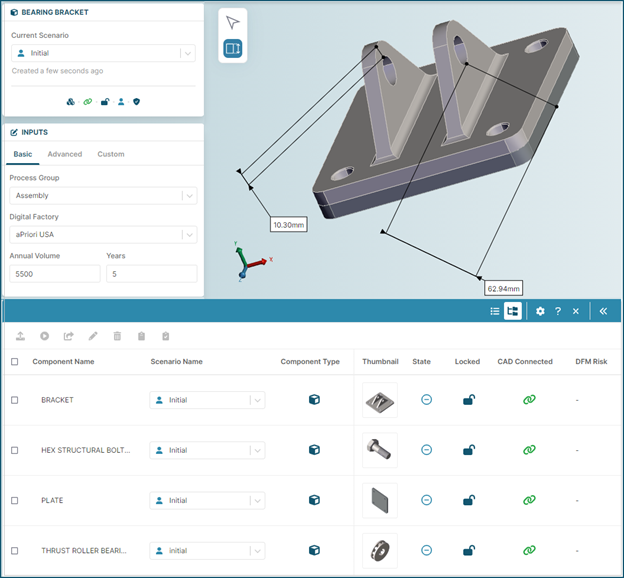
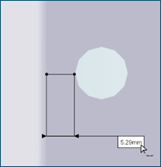
As this figure shows, you can also measure point to point distances in assembly models, both within a single part and between points on different parts.
To measure distances, in the Component Viewer on the Evaluate tab:
-
Click the measurement button and then click the point to point button.
-
Click the location for the first end point, then click the location for the second end point, drag and drop first the measurement lines and then the measurement to your desired location in the viewer.
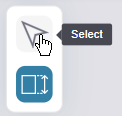
To clear displayed measurements, click the Select button.
Tip
You can easily measure the distance between two points in the same plane by using the intersection tool in conjunction with the measurement tool.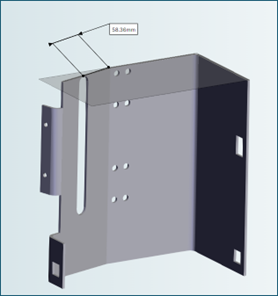
Limitations
- Although you can measure distances while an assembly model is exploded, measurements display only when an assembly is not exploded.
- Measurements are temporary, however you can capture measurements using the new Screen Capture for the Component Viewer.
Screen Capture for the Component Viewer
Capture and automatically download images of model in Cost Insight Design.
Cost Insight Design 2023 R1 allows you to capture screen shots of your model in the component viewer by using a new integrated Screen Capture tool. Once you capture a screenshot, Cost Insight Design automatically downloads it as a *.png file to your local machine so that you can save and share it. The image in the downloaded file will contain the global reference axis if it is enabled as well as any measurements and sectioning planes that are active when the image is captured.
These figures show a part in the Component Viewer and a screen capture thereof.
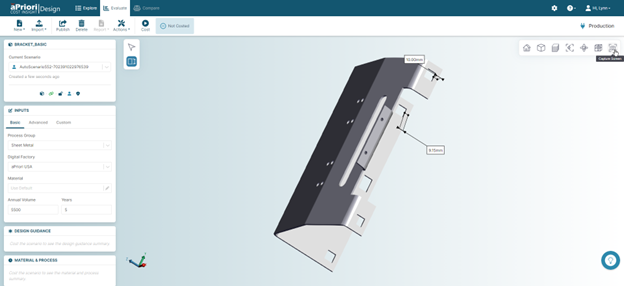

To capture an image of your model in the Component Viewer, click the Screen Capture tool in the toolbar in the viewer.
