Log in and Manage Subscriptions
Once VPE Synchronization has been installed as described in the aPriori Enterprise Platform Installation Guide, you can log in and get to work.
Important:
The account that you use to log in with may have ramifications for what you do throughout your working session. See the Scenario Sync Usage Notes chapter.
Log in to VPE Synchronization
You access VPE (Digital Factory) Synchronization through aP Admin.
- Click VPE Sync from the Manage pull-down menu.
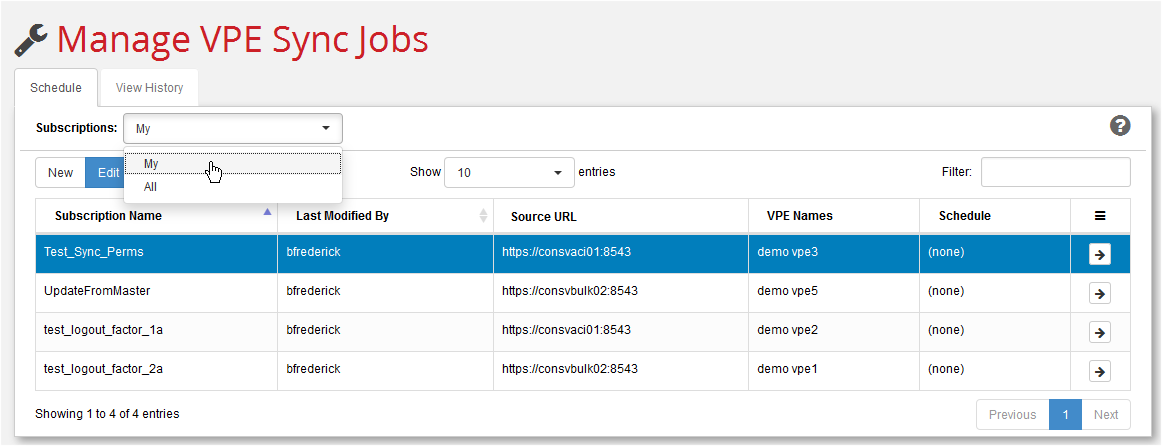
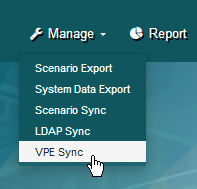 This brings you to the Manage VPE Sync Jobs page.
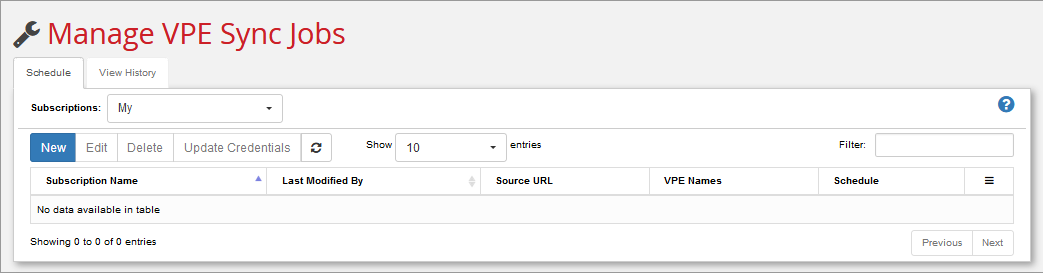
To create a subscription Job
-
Log in as described in Log in to VPE Synchronization and click the Schedule tab.
-
You can ignore the Subscriptions: pull-down menu, since you are creating a new job. (But if you are a member of the VPE Sync administrator's group and you want to view any subscriptions that already exist, you can select "All".)
-
Click New to display the New Subscription dialog.
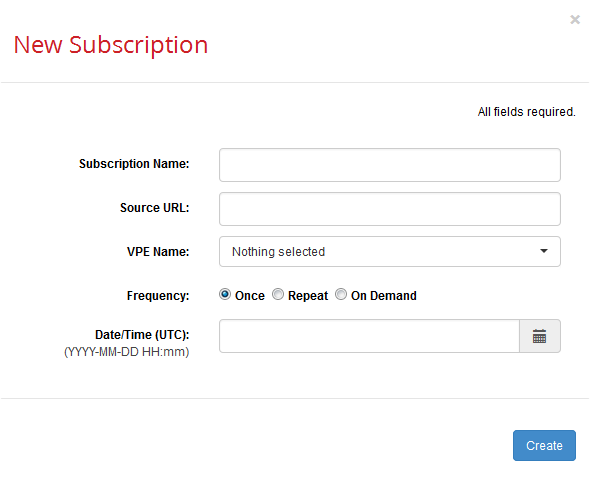
-
Fill in the fields on the Subscription dialog:
Field: Description: Comment: Subscription Name: A unique string identifying this job. For example: "UpdateUSAFromMaster" Source URL: Enter the link to the site that provides the VPEs to import. This is just the host name and port, such as:
https://mysourcehost.com:443
Note: VPE Sync starts to query the source system as soon as you exit this field so that it can populate the VPE Name pull-down menu. It does not wait for you to click Create. If VPE Sync encounters any problems at this stage, it immediately displays an error message.Sync Scope: The field is new as ofEnterprise PlatformRelease 2016 R2 SP1 F3.
Select between VPE and All.The selection here determines which VPEs get synced and affects the behavior of the VPE Name: field:
All– Sync ALL VPEs -- The sync job dynamically updates itself to include all available VPEs each time the job runs. Since all VPEs are included, the VPE Name(see below) is not displayed.
VPE– You must use the VPE Name field (see below) to manually select the VPEs that will be included in the job.VPE Name: From the pull-down menu select the VPE(s) to be downloaded by this subscription. This field only appears if the Sync Scope field above is set to VPE.
The items on this menu are populated by the source site and include all the published VPEs on the site (assuming that you have CREATE, READ, UPDATE, DELETE permissions to them).
Clicking an item adds it to the list, indicated by both a check mark in the menu and its presence in the field. Multiple items are separated by a comma and a space. Clicking a checked item removes it from the list.
Use the Select All and Deselect All options to quickly control the entire list.
Note: When dealing with very large VPE lists, the system may take a while to refresh the UI.Frequency: Select from Once,Repeat, or On Demand. Once: The job will perform a single import operation at the time specified by the settings described below, and never run again.
Repeat: The job will continue to run on the schedule specified by the settings described below.
On Demand: The job executes only when you click the Execute Now button () on the Schedule tab. You might want to use this when first setting up and testing a job. You can then change to a Repeat schedule once things are working the way you want.Date/Time (UTC): A date and time from the widget, indicating when the job should begin. Only visible when "Frequency": is set to "Once".
NOTE: Times are UTC, not local time.Time (UTC): A time from the clock widget, indicating when the first in a series of repeating jobs should start, based on the selected interval (see below). Only visible when "Frequency": is set to "Repeat".
NOTE: Times are UTC, not local time.Interval: A selection from the pull-down menu:
Hourly
Daily
Weekly
MonthlyThe selection here determines what refinement (if any) appears on the next line.
Hourly –Run at the frequency specified in the Every: field. For example, to run the job every six hours, specify 6 Hours. To run every hour, specify 1 Hour.
Daily --Run once a day. No further settings are required.
Weekly --Run once a week, on the days specified in the Days in Week: field. Note: Specifying Weekly and then selecting every day of the week is equivalent to specifying Daily.
Monthly --Run once a month, on the months specified, either on the Last Day of the month or on the Days: specified.Starts on
(YYYY-MM-DD):A date from the calendar widget, indicating when the first in a series of repeating jobs should start. Only visible when "Frequency": is set to "Repeat". Ends: Never or On Never: Job continues to run on schedule for eternity.
On: Set a date in the calendar widget after which the job will no longer run. -
Click Create when done.
-
The job appears in the schedule tab and will execute at the specified date and time.
Note:
Remember, the user you are logged in as when you create or modify a sync subscription determines the user account and privileges that the job will run under when it executes. See "Important Access Considerations“ in the Scenario Sync Usage Notes chapter for more information.
To edit an existing subscription
Editing a subscription is not that different from creating a new description:
-
Log in as described in Log in to VPE Synchronization and click the Schedule tab.
-
Filter the display of existing subscriptions by selecting either "My" or "All" from the Subscriptions: pull-down menu. ("My" will show you only the subscriptions that you were the last user to create/update. "All" (which is only visible to system administrators) displays all subscriptions from all users.
-
Select the existing subscription that you want to edit.
Note:
Rows that display “All VPEs” in the VPE Names column are jobs that were defined with a Sync Scope of All.
-
Click Edit to display the Edit Subscription dialog. This is the same as the New Subscription dialog described in the previous section (To create a subscription Job). Edit the fields as described in the table for the Fill in the fields on the Subscription dialog:. Click Update when done.
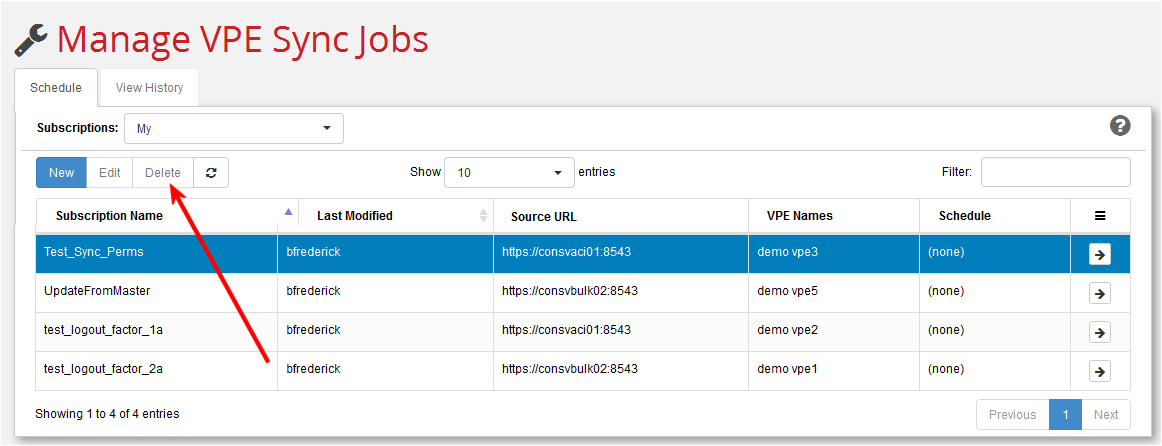
To delete an existing subscription
-
Log in as described in Log in to VPE Synchronization and click the Schedule tab.
-
Filter the display of existing subscriptions by selecting either "My" or "All" from the Subscriptions: pull-down menu. (You only see "All" on this menu if you are a system administrator.) Every user can delete their own subscriptions. Only system administrators can delete other users' subscriptions.
- Select the existing subscription that you want to delete.
- Click Delete. When prompted to confirm, click Yes, delete.