Adding Custom Fields to aP Analytics
aP Analytics allows you to add custom fields, including User Defined Attributes (UDAs), in Ad Hoc views. You can add custom fields by using either the derived tables approach or the views approach. The two approaches offer comparable performance, but the derived tables approach is preferred because it is more efficient. Both approaches rely on Jaspersoft joins. Joins create associations between tables so that their rows can be presented together in the same report.
As of 2018 R3, the derived tables approach is the new and preferred method for adding custom fields. In this method, you define a separate join each custom field by editing the aPriori Domain using the Domain Designer
Prior to 2018 R3, the views approach was the preferred method for adding custom fields. In the views approach, OOB reports use the Jaspersoft Studio reporting tool to explicitly execute the required joins.
Domain Changes
The derived tables approach requires that you use the Domain Designer to edit the aPriori Domain. The Domain Designer is available in the Jaspersoft toolset. For more information, see Defining or Editing a Domain (Admins Only).
A Domain specifies the data source for the Domain Topics and reports that are based on the Domain.
Use extreme caution when editing Domains. Domain Topics and reports can fail if you edit the underlying Domain. If you delete the underlying Domain, dependent reports fail.
Prerequisites
To add custom fields, you must first make any tables that you are going to use active in the domain.
As a best practice, you should also make a backup copy of the Domain.
- Log in as an Administrator and then:
- From the header bar, select View > Repository.
- In the Folders panel, select root > Organizations > Organization > aPriori > Domains.
- As a best practice make a backup copy the Domain that you are going to edit.
- Select the Domain and, from the Repository toolbar, select Copy.
- In the Folders panel, right-click a folder that does not contain the original Domain, and from the context menu, select Paste.
- Select the tables that you are going to use.
- Open the domain.
- Click the Data Management tab.
-
Move the tables that you are going to use from the Available Tables column to the Selected Tables column.
Note:
The tables that you might use are:
-
process_setup_option -
operation_custom_ouput -
operation_setup_option -
process_custom_output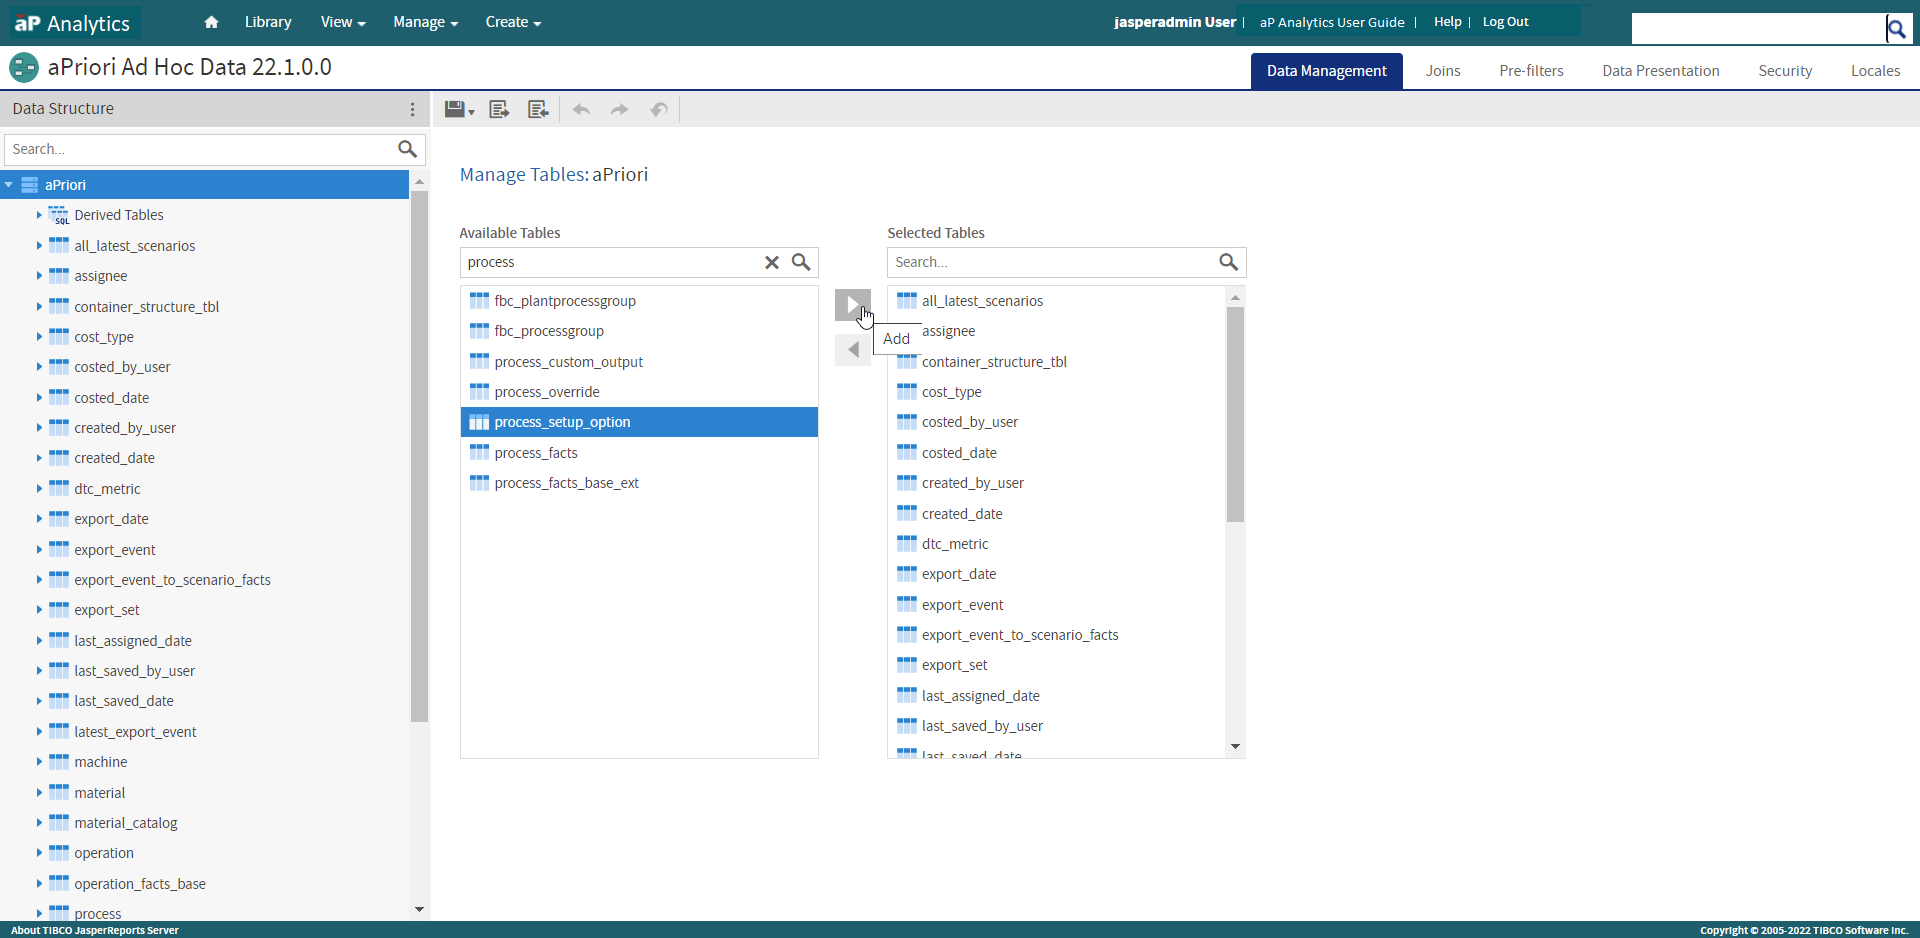
-