Log in and Schedule a Job
Once one or more LDAP connections have been defined as described in the previous chapter and in the aP Pro System Administration Guide, you can log in and get to work.
Important:
The account that you use to log in may have ramifications for what you are able to do throughout your working session. See Important Access Considerations in the chapter Scenario Sync Usage Notes.
Log in to LDAP Synchronization
You access LDAP Synchronization through aP Admin.
- Log in to aP Admin.
- Click LDAP Sync from the Manage pull-down menu.
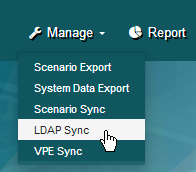 This brings you to the Manage LDAP Sync Jobs page.

Create an LDAP Sync Job
-
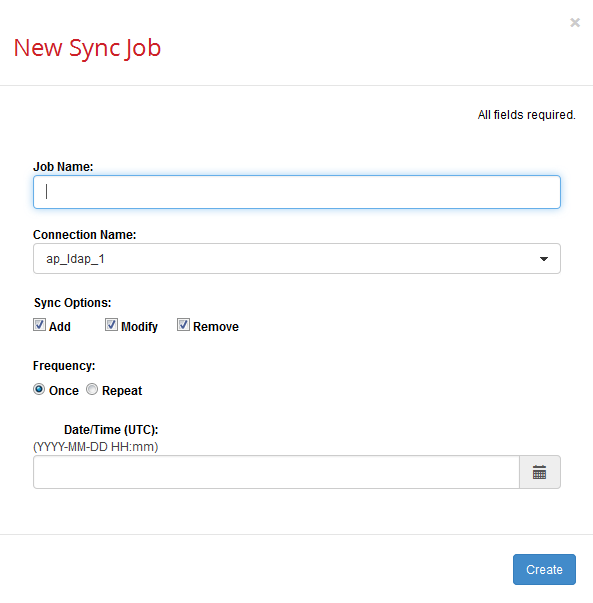
Click New to display the New Sync Job dialog.
-
Fill in the fields on this dialog. Note that ALL fields are required.
Field: Description: Comment: Job Name: Enter a unique identifying string. For example: "nightly_update" Connection Name: Select an LDAP connection from the pull-down menu. This menu is populated LDAP connections that have been defined in the aPriori client System Administrator window. Note that you can select multiple connections from the menu. Use the page Refresh button to re-populate this pull-down menu with any LDAP Connection changes made in aPriori.
Note: If any specified connection is lacking a required setting (User License, Schema Privileges, or Default Schema), creation of the sync job will fail.Sync Options: Choose one or more of the choices:
Add,Modify,RemoveThis allows you to control which LDAP changes you want to automatically accept. (When doing a one-time, manual synchronization from the aPriori System Administrator window, you would normally review and accept or reject such changes interactively before "publishing".) Frequency: Choose
Once or RepeatOnce: The job will perform a single LDAP sync operation and never run again. You might want to use this when first setting up and testing a job. You can use the Execute Now button to manually start jobs, and then change to a Repeat schedule once things are working the way you want.
Repeat: The job will continue to run on the schedule specified by the following settings.Date/Time (UTC): A date and time from the widget, indicating when the job should begin. Only visible when Frequency is set to Once.
NOTE: Times are UTC, not local time.Time (UTC): A time from the widget, indicating when the first in a series of repeating jobs should start, based on the selected interval (see below). Only visible when Frequency is set to Repeat.
NOTE: Times are UTC, not local time.Interval: A selection from the pull-down menu:
Hourly
Daily
Weekly
MonthlyThe selection here determines what refinement (if any) appears on the next line.
Hourly –Run at the frequency specified in the Every: field. For example, to run the job every six hours, specify 6 Hours. To run every hour, specify 1 Hour.
Daily --Run once a day. No further settings are required.
Weekly --Run once a week, on the days specified in the Days in Week: field. Note: Specifying Weekly and then selecting every day of the week is equivalent to specifying Daily.
Monthly --Run once a month, on the months specified, either on the Last Day of the month or on the Days: specified.Ends: Never or On Never: Job continues to run on schedule for eternity.
On: Set a date in the calendar widget after which the job will no longer run. -
Click Create when done.
-
The job appears in the schedule tab and will execute at the specified date and time.
Note:
If job creation fails because a specified LDAP connection does not define a required field, a system administrator must correct this from the aPriori System Administrator window before the job can be created. See the aPriori System Administration Guide for more information about LDAP connections, and see Scenario Sync Usage Notes for information about other considerations when creating LDAP Sync jobs.