Cost a Wire Harness
This example shows a high-level summary of typical steps to import and cost a Wire Harness.
Tip:
Your administrators and aPriori Services will define customized procedures for your company; use the documentation for these procedures as your primary source of information.
Process Steps
-
In aP Pro, click the Wire Harness button.

-
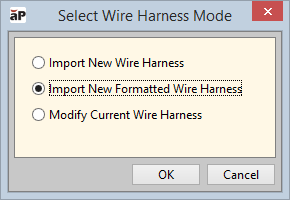
aPriori prompts you to select the wire harness mode:
-
Select Import a New Wire Harness to import an unformatted Wire Harness.
-
(Default) Select Import New Formatted Wire Harness to import a wire harness defined by a single CSV file in aPriori’s format.
-
Select Modify Current Wire Harness if you have an open Wire Harness
-
-
(Assuming you selected Import New Formatted Wire Harness in the previous step)
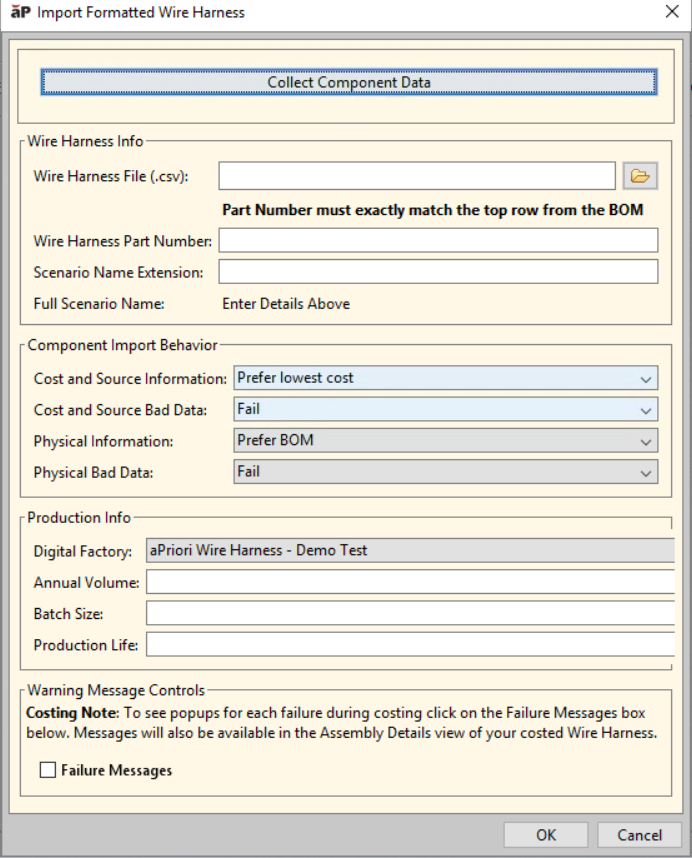
Enter information and inputs required for the manufacture of a specific Wire Harness assembly (similar to the Cost Guide for other process groups - see Analyze Components with the Cost Guide).
-
Click Collect Component Data to use the Electronics Data Collection service to match the parts in your BOM to parts in Silicon Export and automatically add costing data from Silicon Expert to your Wire Harness BOM. See Electronics Data Collection.
-
Wire Harness Info area:
-
Wire Harness File: point to the CSV file for the formatted BOM file previously created for your Wire Harness. See Wire Harness BOM Formatting.
-
Wire Harness Part Number: this must exactly match the part number for the Wire Harness in the CSV BOM file. If they do not match, costing fails (see Wire Harness Common Issues).
-
Scenario Name Extension: a suffix to add to your scenario name.
-
Component Import Behavior area:
-
Cost and Source information: decide your preferences in terms of how data sources are used. For example, you may select Prefer Lowest cost for your components if you are seeking to reduce costs overall.
-
Cost and Source Bad Data: decide how bad data is handled with the sources selected. Choose to have costing Fail or select to Continue to the second source if required.
-
Physical information: select Prefer BOM, Prefer Component Library, BOM only or Component Library only. For example, you may select Prefer Component Library for trusted components that have been used in previous projects.
-
Production information area: set up where the wire harnesses are to be manufactured, and to what scale, choosing the Digital Factory, volume, batch size and production life.
-
Select the Failure Messages checkbox to prevent failure message windows from displaying during the costing process.
-
-
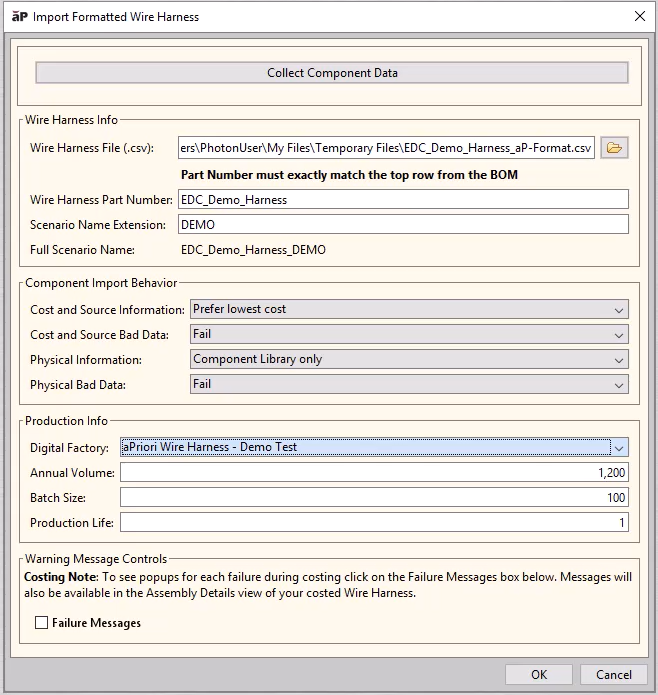
Review your entries - for example:
-
Click OK to import your Wire Harness and run the analysis.
After you import, validate and cost your Wire Harness, you can work with it as for a CAD-based assembly. See Analyze Assemblies for more details.
View Routing Information
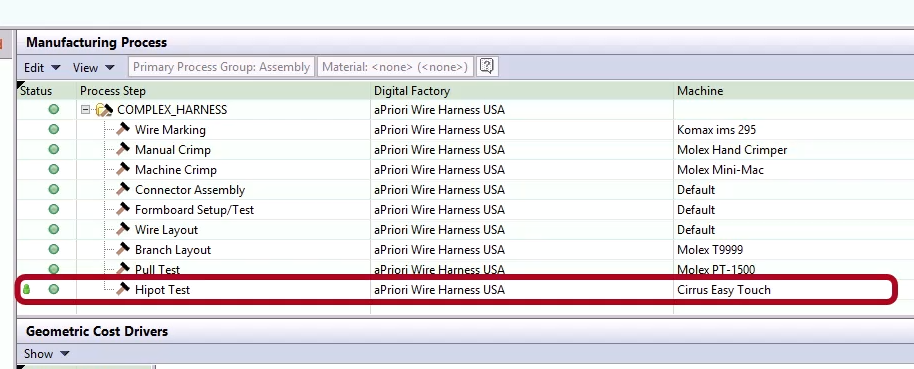
Within the Manufacturing Process area. you can see all the process steps required to assemble this harness and view the machines selected to carry out these tasks. For example:
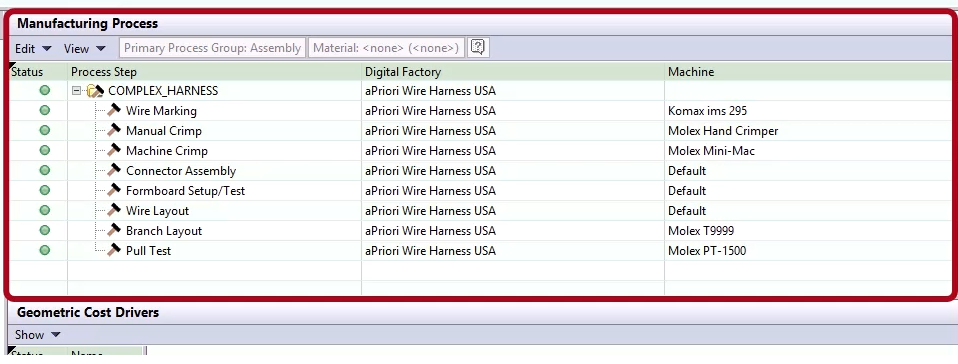
You can select to view routing information more visually, allowing you to make adjustments more easily.
-
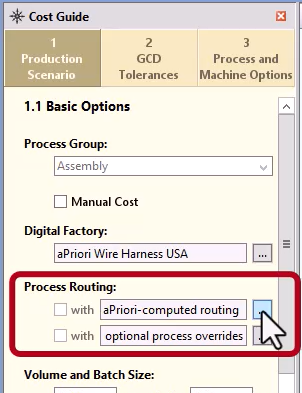
In the Process Routing area of the Cost Guide (see Production Scenario: Tab Basic options), select the Process Routing - aPriori computed option and select the ellipsis button:
-
In the Routing Selection window that appears, expand the Assembly machining node:
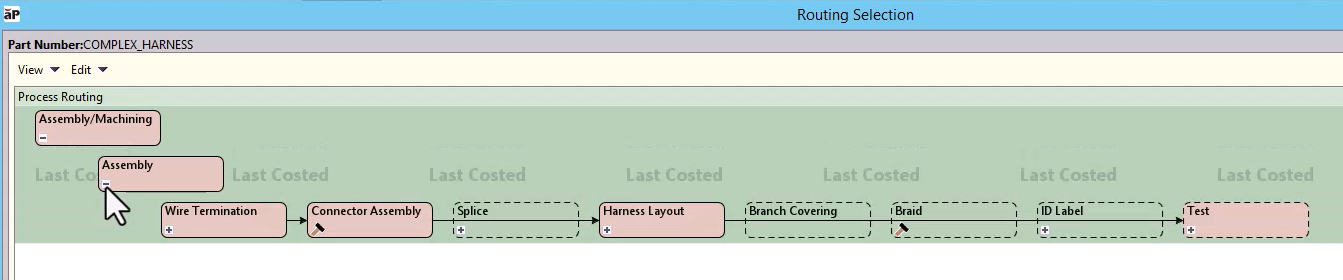
Scrolling across, you can see all the activated nodes as well as those considered optional.
-
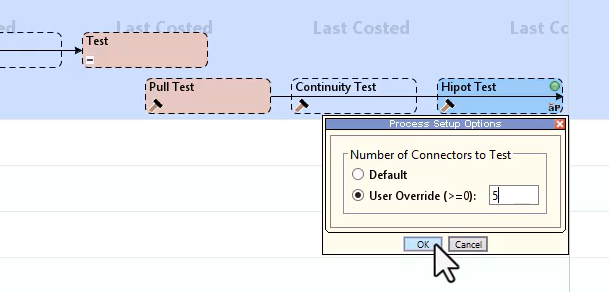
You can then make sets of adjustments as needed. For example, if 5 those components require additional HiPot testing:
- Expand the Test area, right-click on HiPot Test, select Process Setup Options, then set the User Override value to 5 and click OK:
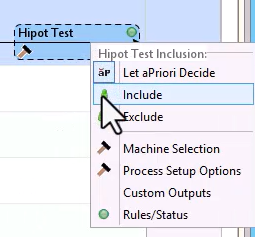
- Right click on the HiPot test node to select include, then click OK on the whole window:
-
Click Cost to apply the cost.
-
You can see this manual addition in the Manufacturing Process area:
Validate Costing
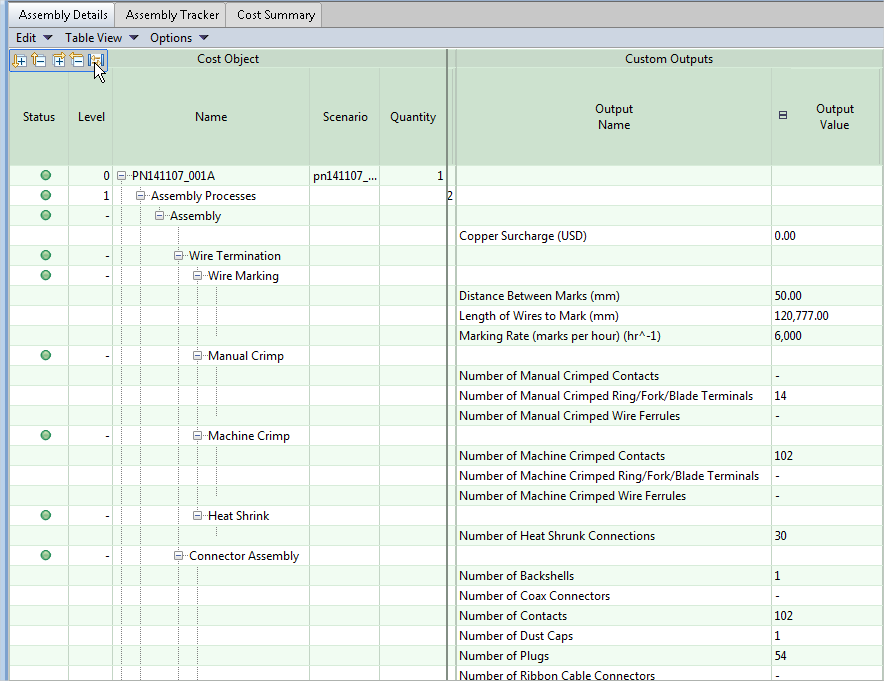
As a best practice, validate your results, by manually checking the number of components in the assembly against the number of components listed in the aP Pro Assembly Details table. For example, if your Wire Harness design tables call for 114 machine crimped contacts and aP Pro shows only 102, you need to investigate 12 missing components.
-
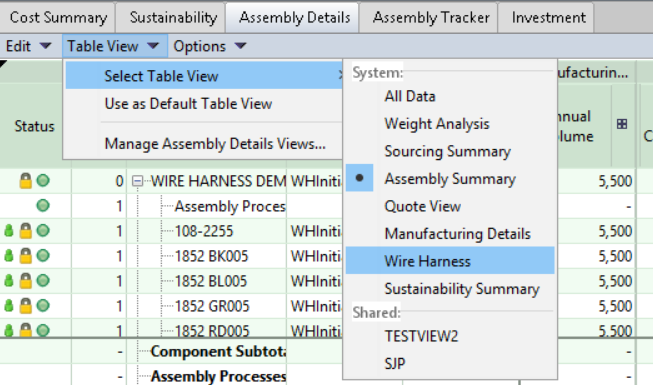
In your Wire Harness assembly, go to the Assembly Details tab, select Table View > Select Table View > Wire Harness:
-
Scroll horizontally to the Custom Outputs columns:
Tip:
Close the Cost Guide and the Messages panel to provide the maximum space to the Assembly Details tab. Then use the table icons to expand the entries and size all the columns to their contents.
-
Under the Assembly process, examine the Output Value column and compare the quantities there to the quantities in your Wire Harness output tables and/or schematics, to check that all your components are correctly imported.
Common errors causing issues include:
-
Something is not typed correctly.
-
The component is missing from the Component Library, or it exists in the library but does not have a price, or is missing a type designation.
See also Wire Harness Common Issues.
-
-
Identify the errors, run the Transformation Utility again, re-load the BOM, and re-cost.
Tip:
For a quick fix, temporarily override the Output Values to correct quantities to match your design.
-
Another adjustment is to add additional operations that might not be called out explicitly on the original BOM. For example, labeling operations might not be in the BOM and so do not appear in the Assembly Details tab. To add such an operation:
-
Click Edit > Routing Selection in the Manufacturing Process panel to open the Routing Selection editor.
-
Add the missing process and adjust the quantity in the Process Setting Options.
Tip:
See Edit a Process Routing for more details.
-