Adding users
Important:
If you are a cloud customer, you should NOT add users through the System Admin module. Instead, you should use the aPriori Cloud User Management service.
You can add users individually, or you can import multiple users simultaneously from a comma-separated values (CSV) file or LDAP server connection.
Users who are associated with an LDAP server connection are authenticated against LDAP each time they start aPriori .
Adding a new user
-
Click Add User on the Users tab to display the Add User window.
Column Description Login ID Identifier required to log in toaPriori. Full name Enter the full name of the user for the associated Login ID. Last name Last name of the user for the associated Login ID. First name First name of the user for the associated Login ID. Middle name Middle name of the user for the associated Login ID. E-mail The user’s email address. System Admin Check this box to provide access to the System Admin Toolset. Uncheck the box to restrict access. Digital FactoryAdmin Check this box to provide access to theDigital FactoryToolset. Uncheck the box to restrict access. Provenance LDAP connection name. If your site uses one or more LDAP servers and you have defined LDAP connections for doing so, use this field to select the LDAP server connection against which the user will be authenticated. If you select an LDAP server connection, you will not assign the user a password. Select the blank option if you do not want to use LDAP authentication. Password Create a user password. For password requirements, see Managing users.
If LDAP authentication is selected, this field is disabled.Confirm Password Re-enter the user’s password. Once confirmed, the password is stored in encrypted format. Location The user’s physical location. Department The user’s department. Manager The name of the user’s manager. Function Some companies specify a role or other job description for employees. Use this field to contain this kind information. User License Select the license ID (as provided byaPriori) that this user should be using. See Change a User License. Preferred Currency Select the default currency in which component costs are displayed by default for the user. Schema Privileges Select the component database to which the user is connected by default whenaPrioristarts. (For information about deployments and schemas, see Editing user settings in the Managing deployments). Default Schema If your company has multiple schemas to restrict access to specific cost objects, select the schema the user will be connected to by default. Roles Reserved foraP Design. Default Role Reserved foraP Design. Reset Password When set, the new user can log in one time with the password you have specified but must immediately change to a new password of their choice.
For password requirements, see Managing users.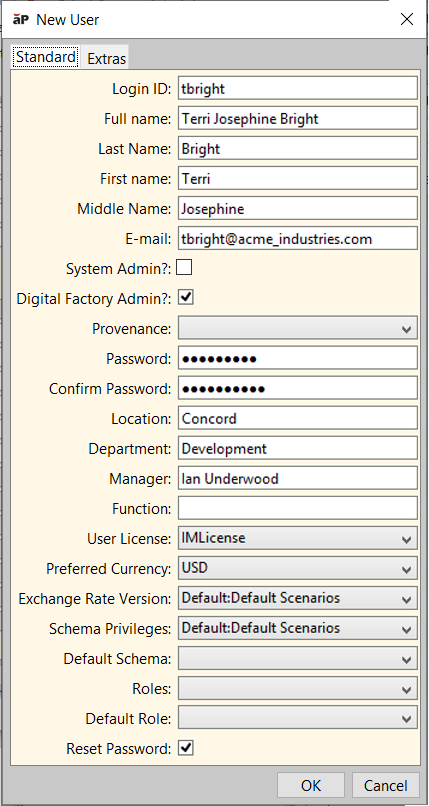 By default, the Standard tab is displayed.
 -
Enter user information into the fields on the Standard tab.
-
(Optional) Click the Extras tab if you want to define up to ten Extra user fields.
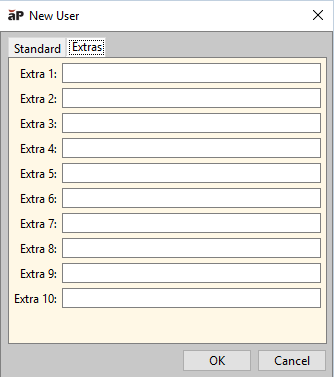
These extra fields enable you to use additional information about each user to affect aPriori behavior. You can use these fields in whatever way makes sense for your company. For example, you could use these in conjunction with Access Control rules (as properties to the "currentUser" subject), or to implement new custom workflow capabilities delivered by aPriori Professional Services team.
-
Click OK.
The new user’s Login ID is displayed in green at the bottom of the user list.
-
Click File > Publish Changes from the System Administrator menu bar or click
 in the toolbar to display the Publish Changes window, then click Yes to publish your changes.