Importing or adding UDAs
The Wire Harness and PCBA Process Groups both require specific sets of User Defined Attributes (UDAs). You must add or import these UDAs before you or your users open the BOM Loader to cost the first Wire Harness or PCBA so that the field mappings can be set.
Note:
UDAs can be exported and imported across aPriori installations but importing a set of UDAs will wipe out any UDAs that currently exist in your system. If you have existing UDAs that you wish to keep, you must add the following UDAs manually rather than by importing them.
Again, this procedure is typically done by aPriori Customer Service before delivering the process groups to you.
Add or import UDAs
- In the aPriori client click Tools> System Admin Toolset.
- Click the System Administrator icon on the System Admin Toolset window.
- Select User Defined Attributes from the navigation pane on the left.
If UDAs do appear in the main panel, you must manually enter each UDA as described in the following step so that you do not delete your existing UDAs.
If no UDAs appear in the main panel, you can safely import the required UDA set as described in the following steps.
-
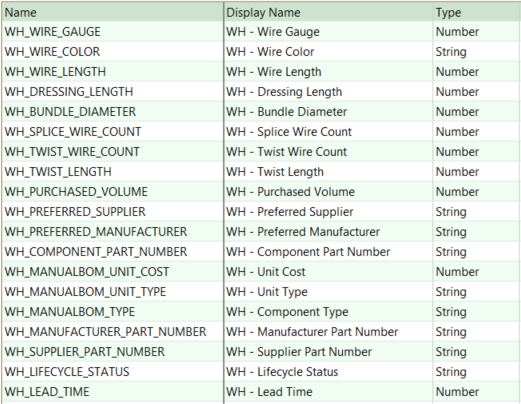
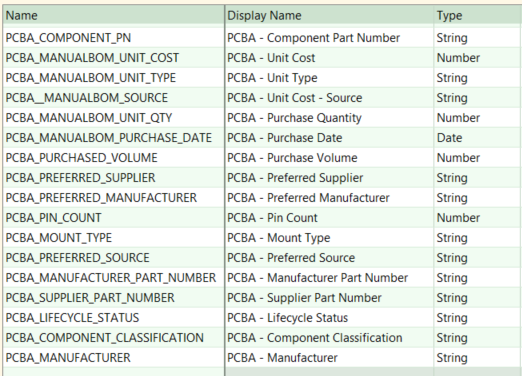
To add UDAS manually, enter each UDA as shown in the following images (one for Wire Harness, one for PCBA, as necessary). For each UDA, click the first empty row in the Name column and type the name exactly as shown. Then select the Type column to specify String or Number from the drop-down menu. When you finish, click the Publish Changes icon (
 ) in the toolbar When you finish.
Wire Harness UDAs:
PCBA UDAs:
-
To import UDAs when aPriori has provided you with a UDA import file, and you do not have any existing UDAs, click File > Import > User Defined Attribute Data and navigate to the UDA import file. Note that importing UDAs will remove any existing UDAs you might have. After importing, your main panel should look like the illustration above. When you finish, click the Publish Changes icon (
) on the toolbar. -
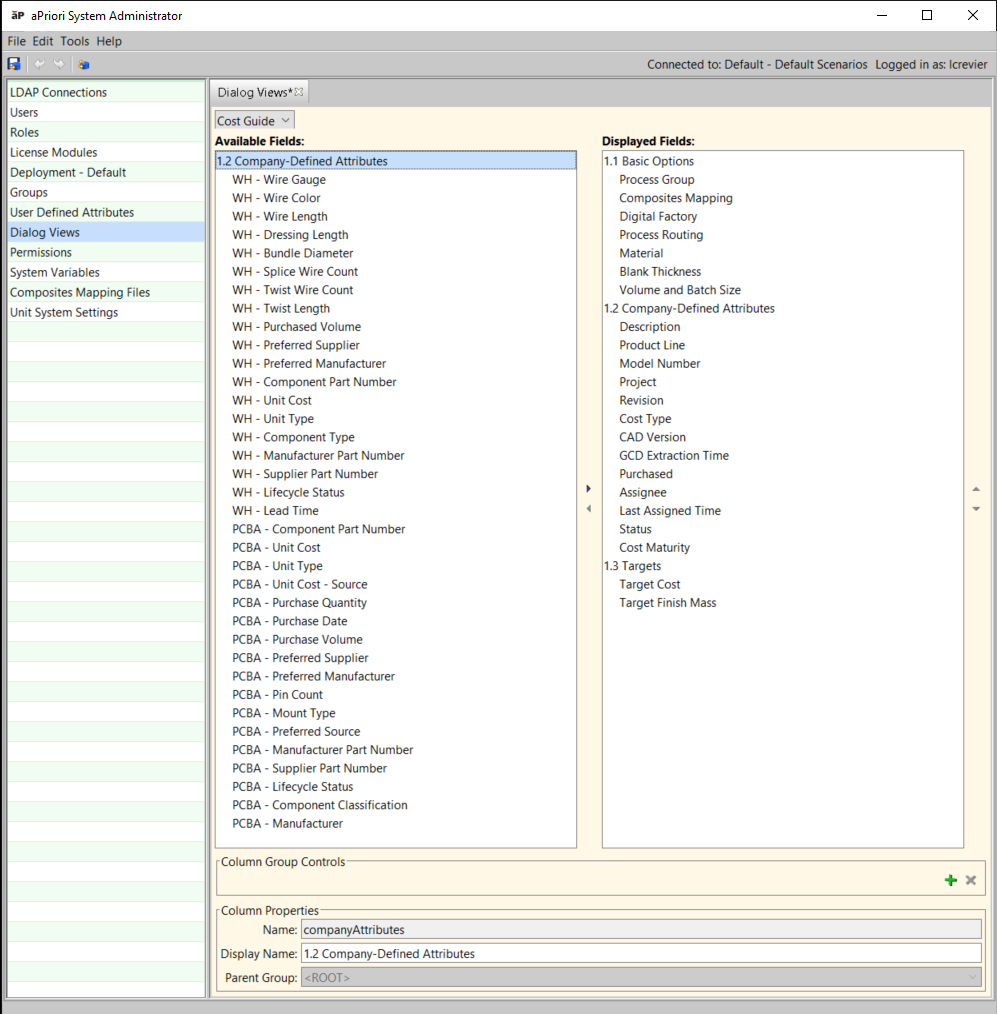
Before you exit, ensure that these new UDAs are not set to display in the Cost Guide. Click Dialog Views in the navigation pane and select Cost Guide from the pull-down menu. It is okay if the UDAs appear in the Available Fields column as shown in the illustration below. But if they appear in the Displayed Fields column, use the arrow to move them, then click the Publish Changes button.