Adding UDAs to aPriori
When you know which CAD properties you want to map; you need to ensure that there are corresponding attributes in aPriori .
To demonstrate various aspects of property mapping, we assign one UDA the same name as its corresponding CAD property, and different names for the others. We will use mixed-case and spaces for displaying them in the UI.
For more general information about UDAs, see: Managing user defined attributes. See also UDA Mappings.
This table shows the properties and attributes used in this example:
| CAD Property |
aPriori Attribute |
aPriori Display Name |
aPriori Type |
Comment |
|---|---|---|---|---|
| ITEM_DESCRIPTION | Description | Description | System | Does not need to be created, but does need to be mapped |
| MATERIAL | Material | Material | System | Does not need to be created but does need to be mapped. Also requires additional configuration. |
| PROJECT | PROJECT | Project_2 | UDA | There is a non-mappableaPriorisystem-defined attribute named PROJECT, so need to create a new UDA. |
| CURRENT_REL_NUMBER | Current_Rel | Current Release | UDA | Create a UDA with a different name and map it in the XML file. |
| REV_LEVEL | REV_LEVEL | Rev Level | UDA | Create a UDA with the exact same name as the property and map it in the XML file.. |
Adding UDAs
Follow the same procedure as you would to create any UDA (see Managing user defined attributes).
- In the aPriori client, click Tools > System Admin Toolset.
- Click the System Administrator button (
 ) on the resulting window.
 -
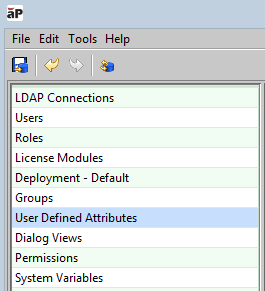
Click User Defined Attributes in the System Administrator window.
-
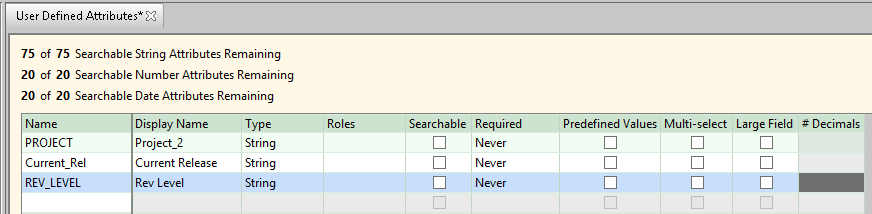
In the User Defined Attribute pane, double-click the fields to enter information from the table above. (Remember, ITEM_DESCRIPTION and MATERIAL are aPriorisystem-defined production inputs that do not need to be created as UDAs.) When you finish, the results should look like the screenshot below.
-
When you finish, click the Publish Changes button (
 ) in the toolbar.
 -
Now that the UDAs exist, you can adjust their appearance (if necessary) on the Cost Guide. By default, the new UDAs will appear in section 1.2 Company-Defined Attributes. The following steps are optional. If you are exploring CAD property mapping for the first time, you can skip this step to keep things simple. But for a production environment, you might want to perform steps like these to configure the Cost Guide for your users. See Managing dialog views for general information.
-
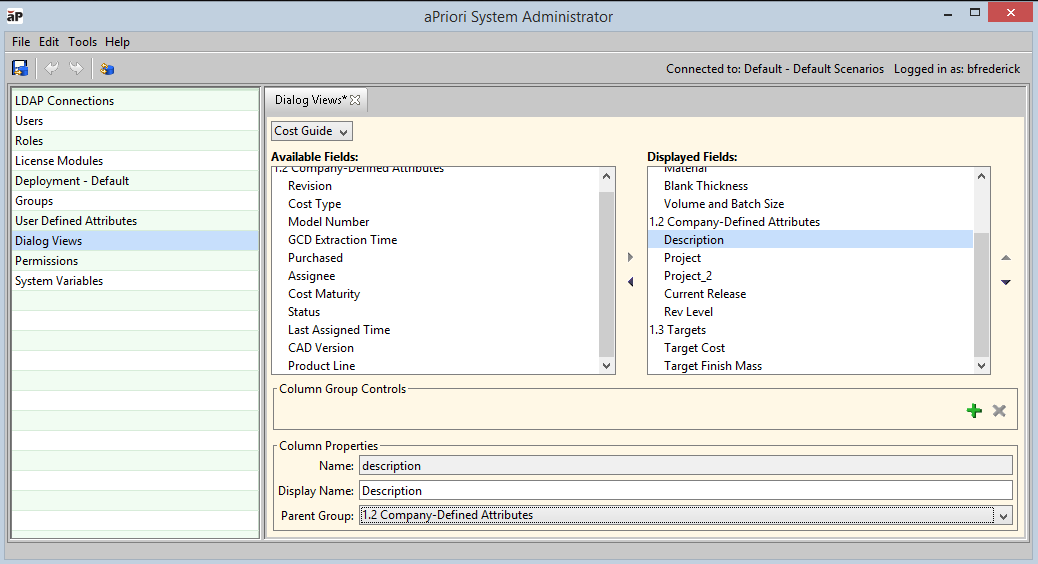
Click Dialog Views in the left pane.
- Click the Search pull-down menu and click Cost Guide.
- Use the left and right arrows to move entries between the Available Fields and Displayed Fields. Use the up and down arrows to change the relative position of items in the Cost Guide. Note that you have two similarly named entries: "Project" is the aPriori system-defined attribute which cannot be mapped, and "Project 2" is the display name of the Project UDA you created in the previous step. Both are displayed to show that a UDA can have the same name as a system-defined attribute but will not conflict with it.
-
When you finish, click the Publish Changes button (
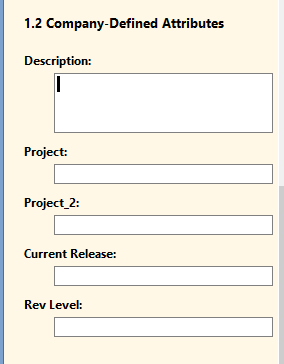
) in the toolbar. When you complete these steps, the Company Attributes section of the Cost Guide should now look like the following screenshot (you must have a part open to display the Cost Guide):