Use Matrix Costing
This example shows how to use Matrix Costing for a part or assembly:
- Step 1: Open and Cost Scenarios
- Step 2: Enter Matrix Costing Values
- Step 3: Analyze Scenarios
- Step 4: Compare Scenarios
Step 1: Open and Cost Scenarios
-
Open a scenario for the part or assembly.
For assemblies, also open a scenario for each sub-component.
-
Configure the scenario settings. Use any Digital Factory, production volume, and batch size, but specify the value that you want to use for the comparison for other settings, such as setup options, tolerances, routing, and operation assignments.
- For assemblies, add welds as required and perform optional assembly operations for the top level assembly and any components in the assemblies that are also assemblies.
-
Cost the scenario.
For assemblies, you can deep cost the assembly for quicker results - see Deep Costing.
Step 2: Enter Matrix Costing Values
-
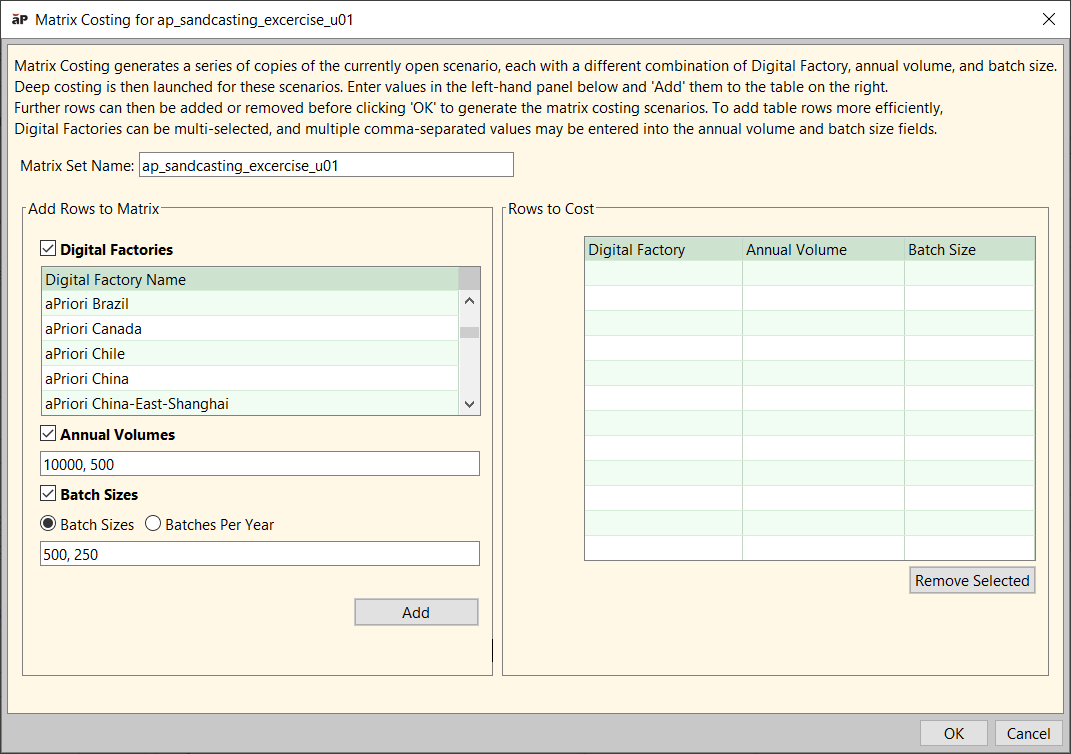
Select Cost > Matrix Costing to load the Matrix Costing dialog:
-
In Matrix Set Name, enter a name for the set of scenarios to be created and compared.
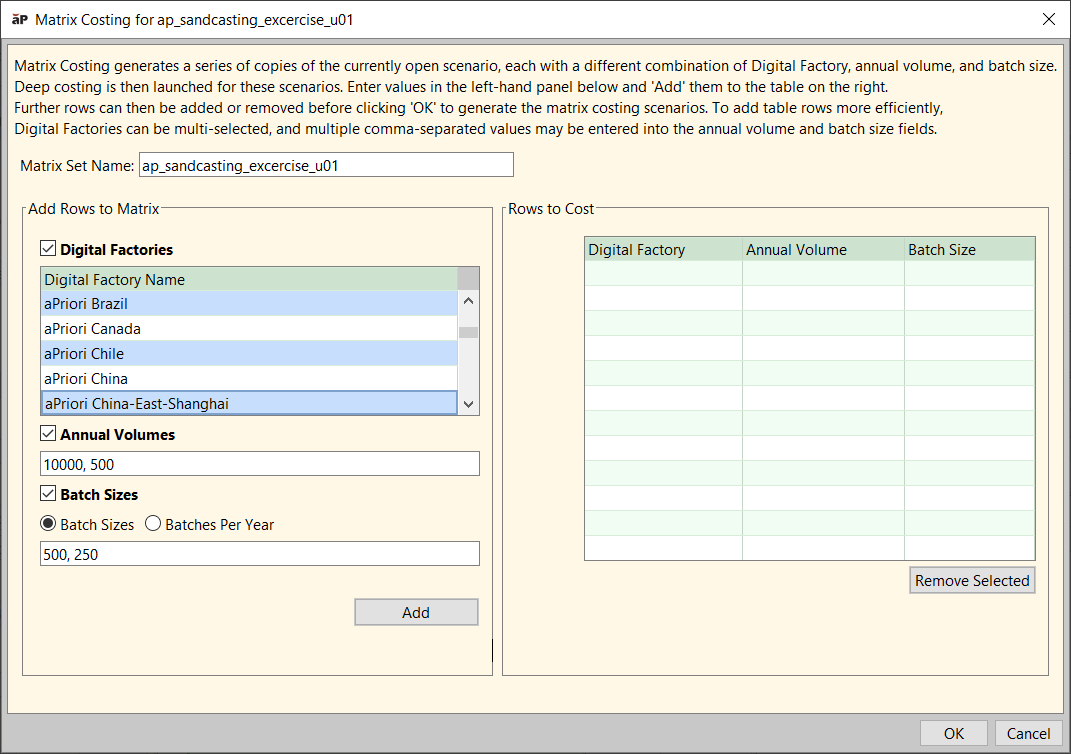
- In the Digital Factories list box, select the Digital Factories to compare.
- in the Annual Volumes field, enter one or more annual volumes (separated by commas).
-
To vary batch sizes, you can select either:
-
Batch Sizes, entering one or more batch sizes (separated by commas).
-
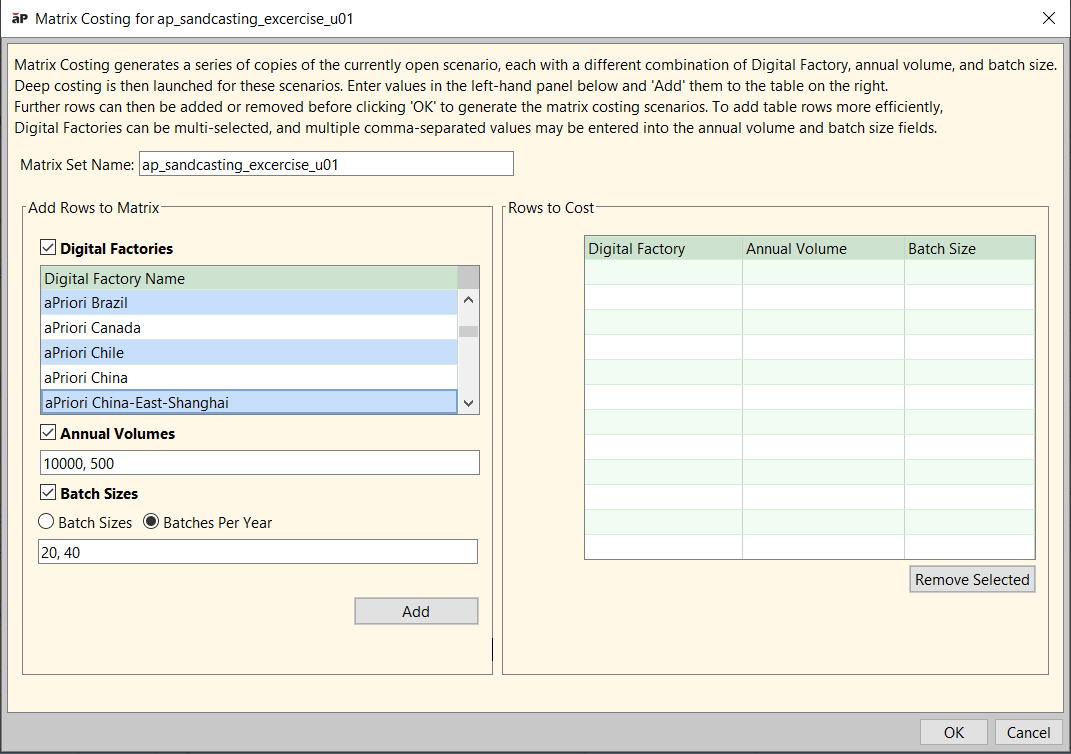
Batches Per Year, entering one or more values representing the number of batches to run in a year (separated by commas).
Info:
aP Pro computes the batch sizes in the background based on the specified values.
-
-
Click Add to populate the Rows to Cost table with your selected values:
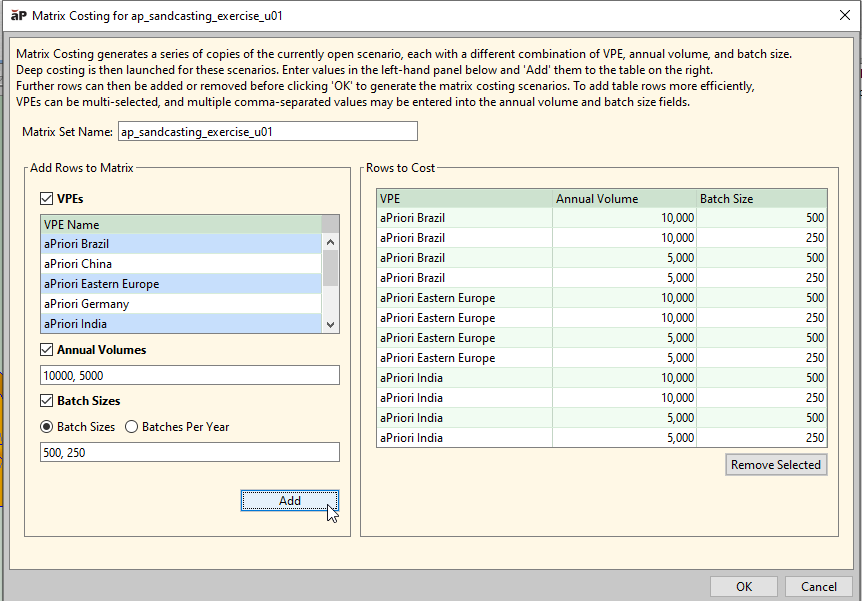
Each row represents a scenario. There is one scenario for each possible combination of Digital Factory, production volume, and batch size from the values that you specified in the previous steps
-
Click OK to view details of generated scenarios.
Step 3: Analyze Scenarios
You can now view details for each generated scenario,
-
The aPriori Bulk Costing and Analysis window appears. It contains a line for each generated scenario. For more information, see Bulk Costing and Analysis.
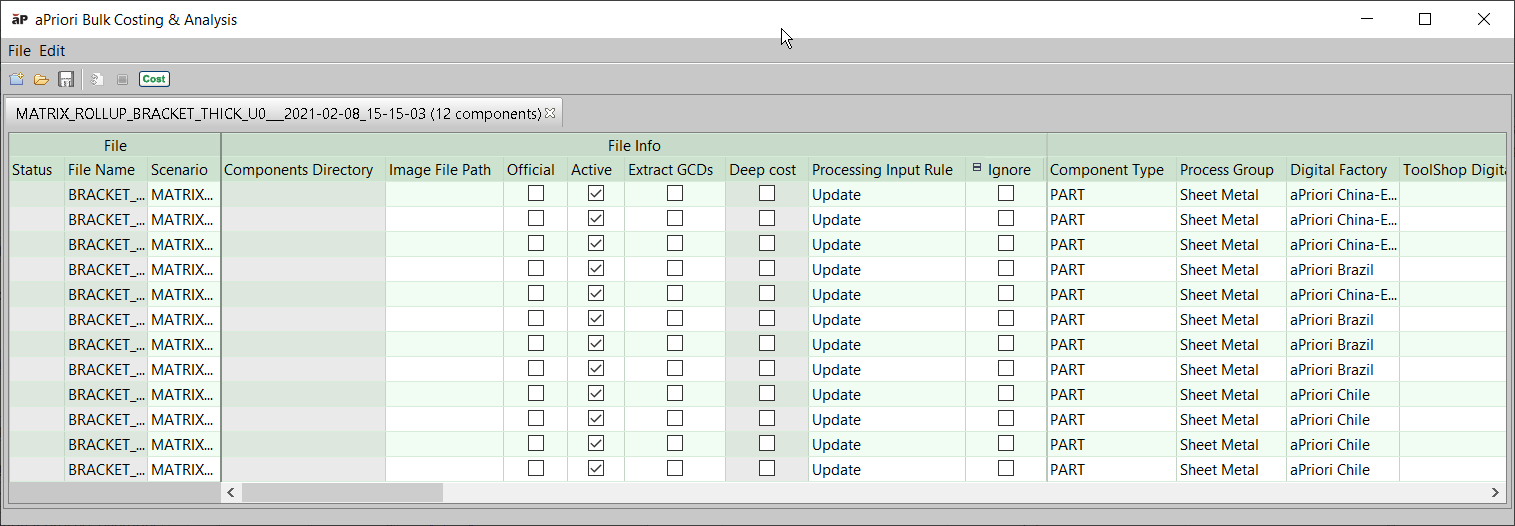
The Annual Volume value(s) for sub-component scenarios are automatically set based on the specified values for the assembly/roll-up and considering the number of instances (quantity) of sub-components in the assembly
-
Click Cost to initiate costing of all scenarios.
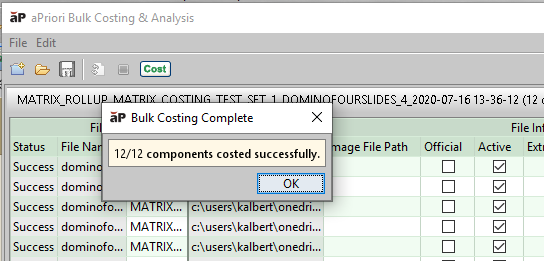
All the scenarios are cost in a background process; a message dialog is displayed upon completion.
-
Click OK.
-
Exit from the Bulk Costing & Analysis window.
aPriori creates a new roll-up that contains all the generated scenarios, with the name:
MATRIX_COST_<Matrix Set Name>_<Component Name>_<Digital Factory Name>_<Annual Volume>_<Batch Size>_<Time Stamp>For example:
MATRIX_COST_Test01_bracket_aPriori Mexico_10000_834_2020-06-01 12-38-53This roll-up gives you a convenient way to consolidate and review the different cost estimates for all the generated scenarios. See Roll-ups.
Step 4: Compare Scenarios
-
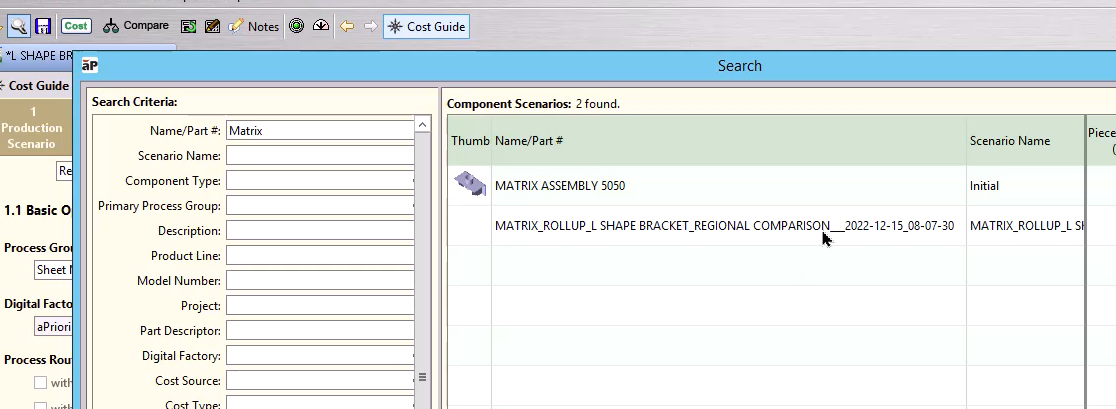
To view this roll-up, click the search icon and enter Matrix in the Name/Part # field, then select the appropriate entry from the list:
-
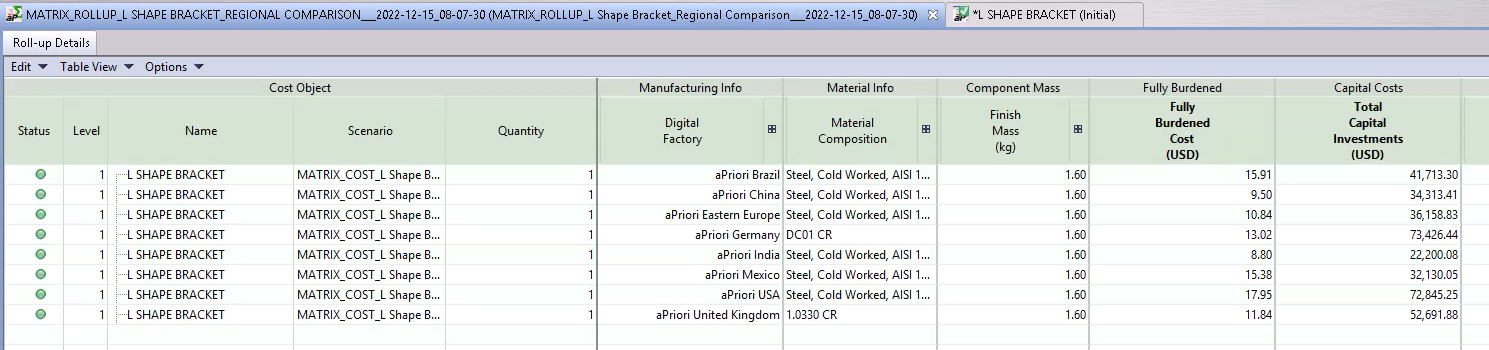
Review the generated results for that roll-up:
-
Review the information for each scenario, including the cost variations.
-
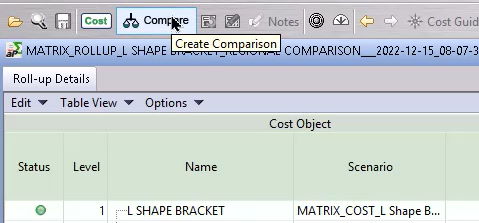
To compare the generated scenarios, click Compare:
-
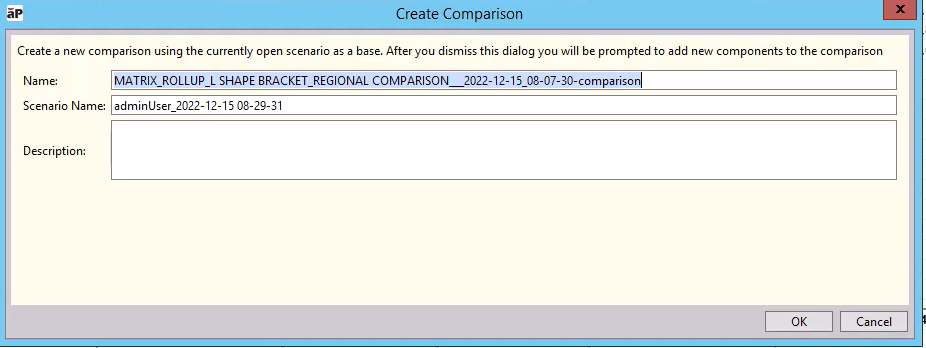
Click OK to allow the default comparison:
-
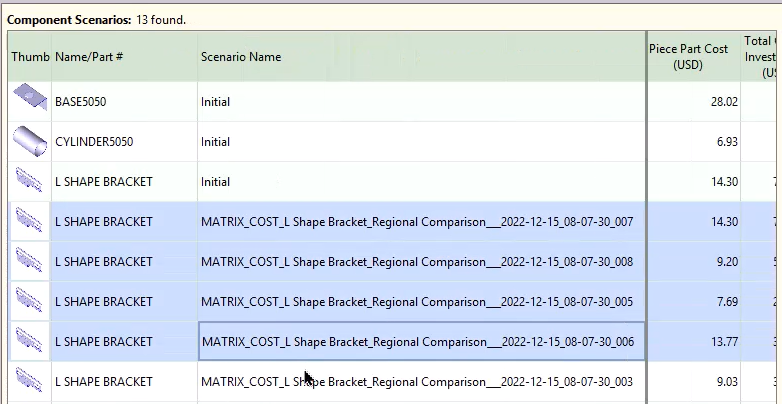
Select the component scenarios to compare when prompted, then click OK:
-
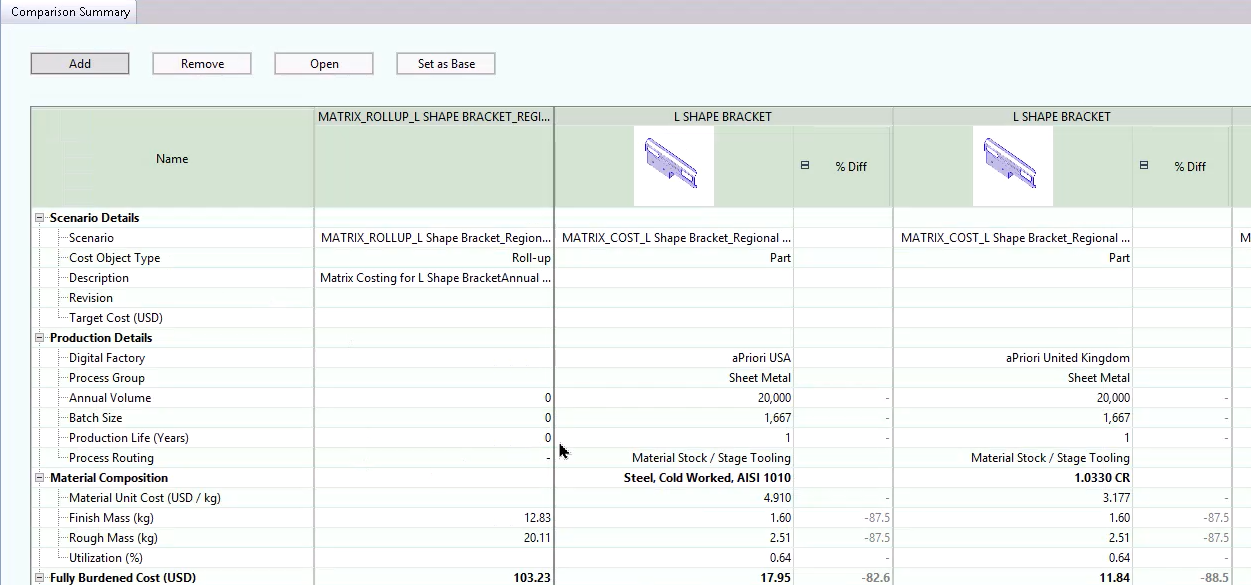
You can now review and compare the details for your selected scenarios, in the generated Comparison Summary report:
-
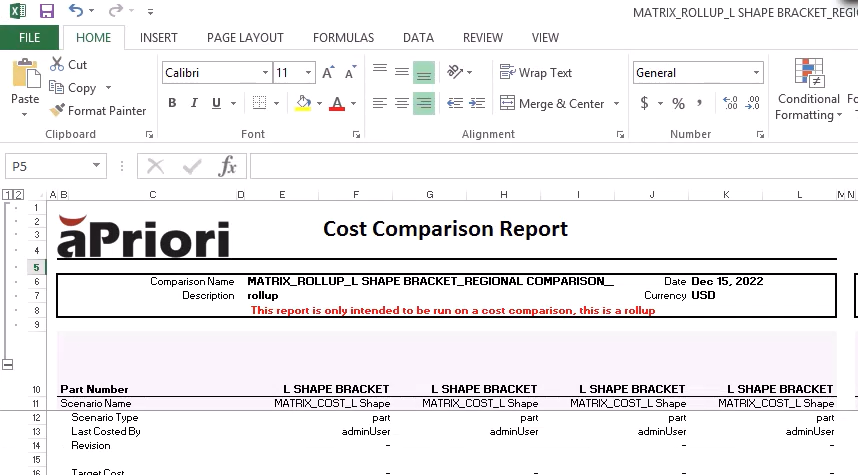
To save these details as a spreadsheet, select Reports > Spreadsheet Reports..., then select Cost Comparison Report from the dropdown list, when prompted, then save the report.
-
Select Yes when prompted, to view the spreadsheet, opening the report in Excel: