NX™
-
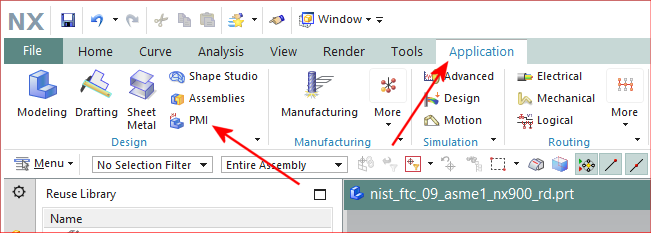
To turn on PMI in NX™, go to the Application tab and click PMI
-
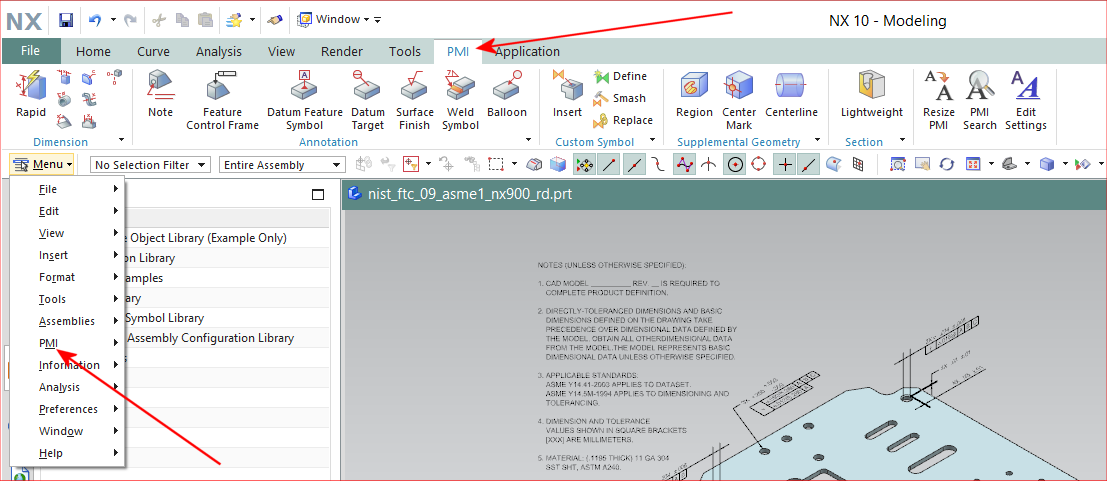
When PMI is enabled, you can access PMI capabilities from the PMI tab and from the PMI menu item on the main dropdown menu.
-
To specify and apply geometric tolerances to model features, click either the Feature Control Frame icon in the tool bar, or Menu > PMI > Feature Control Frame and make entries in the fields of the Feature Control Frame dialog.
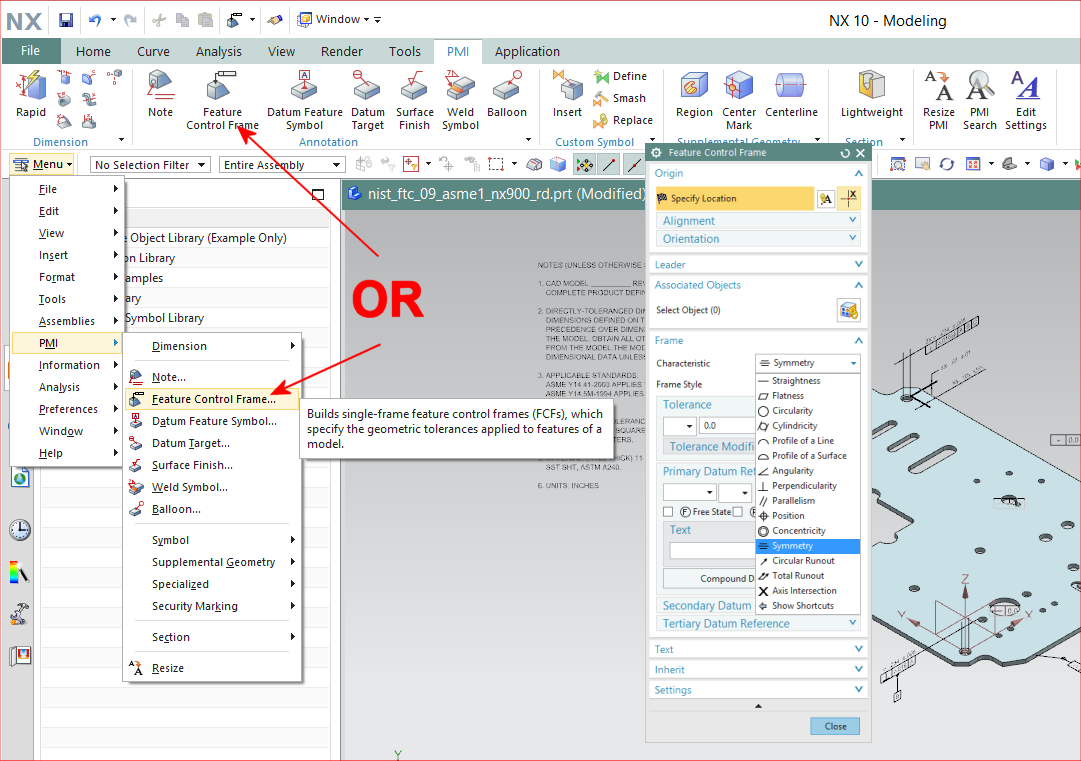
- It is important to use the Associated Objects control to select the correct geometry reference (typically a surface or a hole) and associate it with the annotation you are creating. Note that aPriori does not read PMI associated on edges.
-
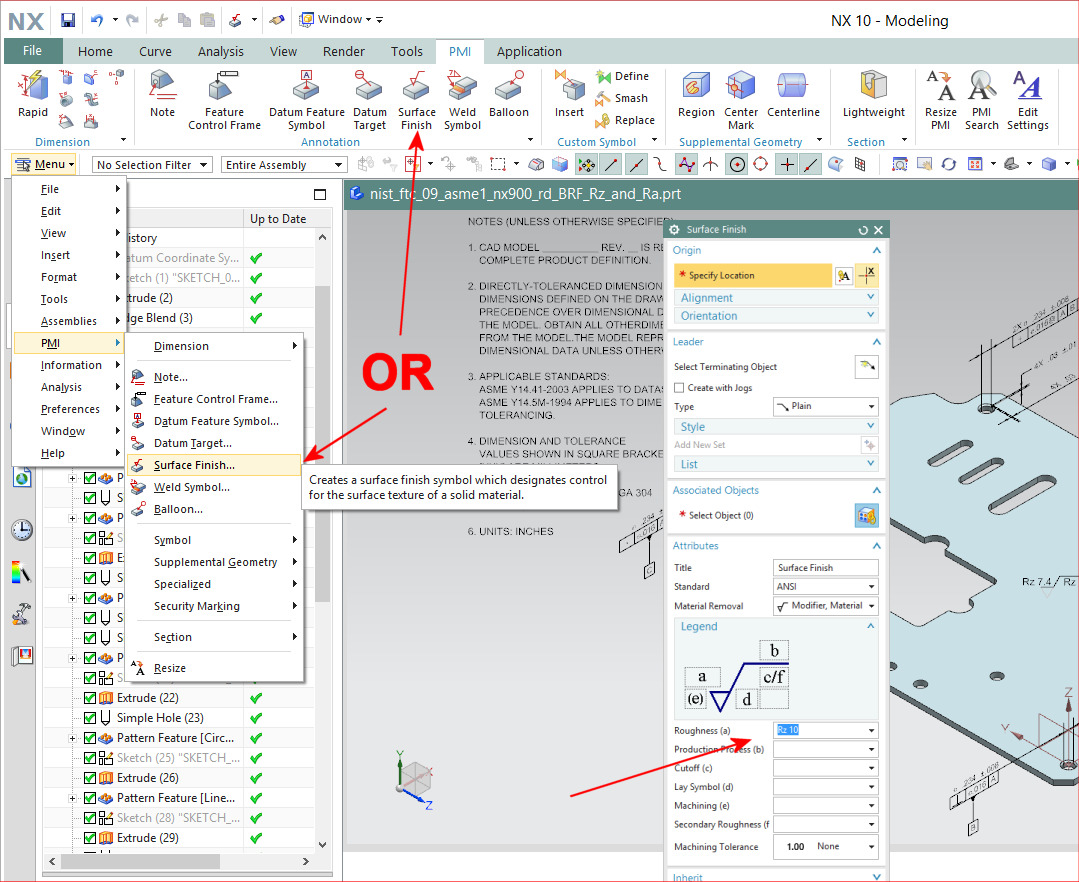
To specify and apply roughness requirements to model surfaces, click either the Surface Finish icon in the tool bar or Menu > PMI > Surface Finish
-
Fill in the fields on the Surface Finish dialog. Enter use the Roughness (a) field.
-
If the value that you want is not provided by the dropdown menu, type in the value such as “Ra 1.5” or “Rz 10”.
-